Limewash walls have a soft, chalky texture that flat paint cannot fully imitate. The finish looks layered, slightly imperfect, and more natural than standard paint, which is why it has become popular for bedrooms, living rooms, bathrooms, and feature walls.
The right method depends on the surface and the look you want. Authentic limewash works best on porous surfaces, while pre-mixed limewash-style products can make the effect easier to apply on primed drywall. Faux acrylic versions are usually more beginner-friendly and easier to maintain.
A single accent wall can take several hours. A full room may take one to two days, depending on prep, drying time, and the number of coats. The difficulty ranges from beginner for faux limewash effects to more advanced for traditional lime-based products.
What Is Limewash and What Does It Look Like?
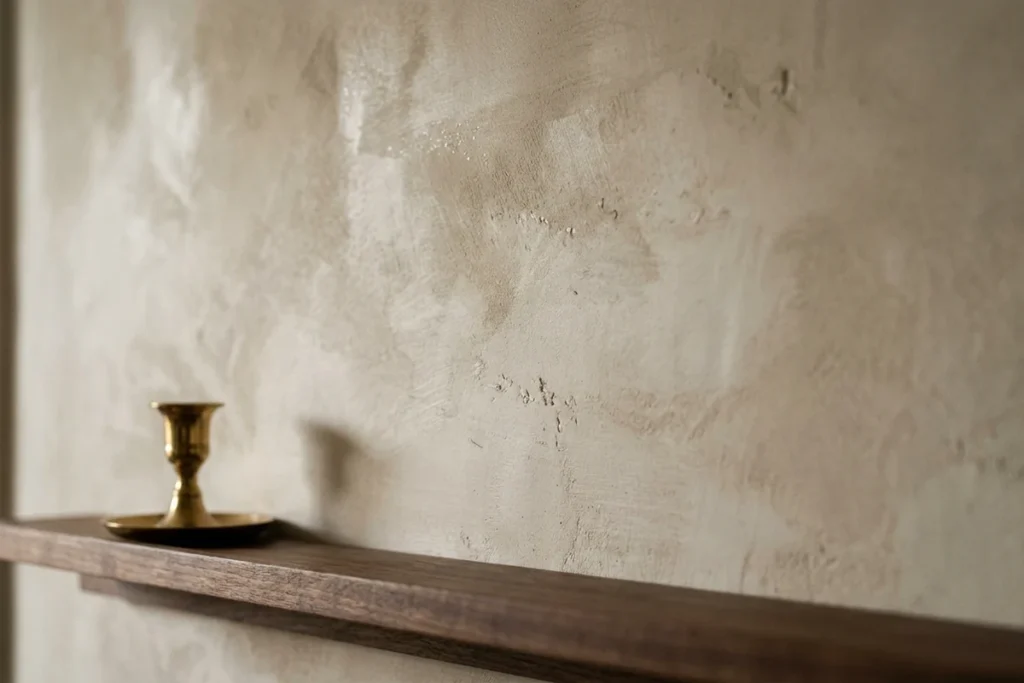
Limewash is a mineral-based wall finish traditionally made from limestone and water. Unlike standard paint, it does not create a flat, uniform surface. It leaves a soft, chalky finish with subtle movement, variation, and depth.
The look is slightly imperfect in a good way. Light catches the surface differently throughout the day, creating gentle shifts in tone. That is why limewash walls often feel warmer, softer, and more natural than a standard painted wall.
Bedrooms, living rooms, fireplaces, and older homes suit the finish especially well. Limewash also works in spaces with natural materials, warm neutrals, stone, wood, linen, and earthy color palettes.
Some designers also extend limewash-style finishes onto ceilings for a more enveloping effect. Used carefully, this can make a room feel more custom and atmospheric. For resale or staging, though, it is usually safer to start with one accent wall or a smaller room before committing to a full wrapped finish.
Authentic Limewash vs. Faux Limewash vs. Pre-Mixed
Before choosing a product, start with the surface. Brick, stone, plaster, and drywall do not all respond to limewash the same way. The right option depends on the look you want, the room’s use, your budget, and how much DIY experience you have.
Traditional Limewash
Traditional limewash is made from lime putty and water. It works best on porous surfaces such as brick, stone, lime plaster, and mineral-based walls. The finish is soft, chalky, breathable, and naturally varied.
This is the most authentic option, but it has the steepest learning curve. On modern drywall, it usually needs the right mineral primer or surface preparation to bond properly.
Pre-Mixed Limewash Paint
Pre-mixed limewash paint is the more practical middle ground. It gives homeowners a limewash-style look without mixing raw materials or managing the full traditional process.
This option is usually easier for first-time users and can work on primed drywall when the manufacturer’s instructions are followed. It is a good choice for accent walls, bedrooms, living rooms, and homeowners who want the textured look with fewer variables.
Faux Limewash
Faux limewash uses matte acrylic paint, mineral-style paint, Roman clay, or similar products to imitate the soft movement of limewash. These finishes are often easier to apply and can be more forgiving in busy homes.
The tradeoff is authenticity. Faux finishes can look beautiful, but they do not behave exactly like traditional limewash. They may feel smoother, more uniform, or less mineral-based depending on the product and technique.
Repairability Matters
One practical downside applies to most limewash-style finishes: repairs are not always seamless. Because the finish depends on layered movement and tonal variation, spot touch-ups can stand out.
For scuffs, stains, or damage, repainting or reworking the full wall often creates a cleaner result than patching one small area.
| Type | DIY Ease | Authenticity | Best Surface | Repairability |
|---|---|---|---|---|
| Traditional limewash | Low | Highest | Brick, stone, plaster | Usually full wall |
| Pre-mixed limewash | Medium | High | Primed drywall, plaster, masonry | Usually full wall |
| Faux matte acrylic | High | Moderate | Drywall | Easier, but may still show patches |
| Roman clay / mineral finish | Low–Medium | High | Prepared drywall or plaster | Usually full wall |
Where to Use Limewash, and Where to Avoid It
Limewash works best in rooms where texture, softness, and natural light can stand out. Bedrooms, living rooms, dining rooms, entryways, and reading corners are usually strong candidates. These spaces often benefit from the warm, layered look without needing heavy scrubbing or constant moisture resistance.
Brick fireplaces are also a good fit because porous masonry works well with limewash and helps create a natural, aged finish.
High-Moisture Rooms
Bathrooms and kitchens need more caution. Steam, splashes, grease, and frequent cleaning can wear down limewash-style finishes faster than in quieter rooms.
That does not mean limewash is impossible in these spaces, but the product choice and finish protection matter. Some applications may need a compatible breathable sealer, and the surface should be cleaned gently rather than scrubbed with harsh products.
For sellers thinking about design updates before listing, practical maintenance matters as much as style. This connects with broader home staging tips for sellers, where durable, clean, low-friction finishes often matter more than trendy choices.
Surface Compatibility
Limewash performs best on porous materials such as brick, stone, plaster, and lime render. These surfaces allow the finish to absorb and develop its natural variation.
Drywall, previously painted walls, or sealed surfaces usually need a compatible primer first. Without proper preparation, the finish may not bond well or may dry unevenly. Always follow the product instructions for the exact surface before applying the first coat.
Materials and Tools Needed Before Starting
A good limewash finish starts with the right materials. The product, primer, brush, and surface preparation all affect how the final wall looks. Skipping the right primer or using the wrong tool can lead to uneven coverage, poor adhesion, or a finish that does not develop the soft movement limewash is known for.
Choosing the Right Paint Formula
Traditional limewash, usually made from lime putty and water, gives the most authentic mineral finish. It works best on porous surfaces and creates the soft, chalky variation people associate with old-world walls.
Pre-mixed limewash paint is often the most practical choice for first-time users. It removes the mixing step and can be easier to apply consistently when the wall is properly prepared.
Faux limewash uses matte acrylic or a similar paint applied with a cross-hatch motion. It is usually the easiest to control, especially for beginners working on drywall.
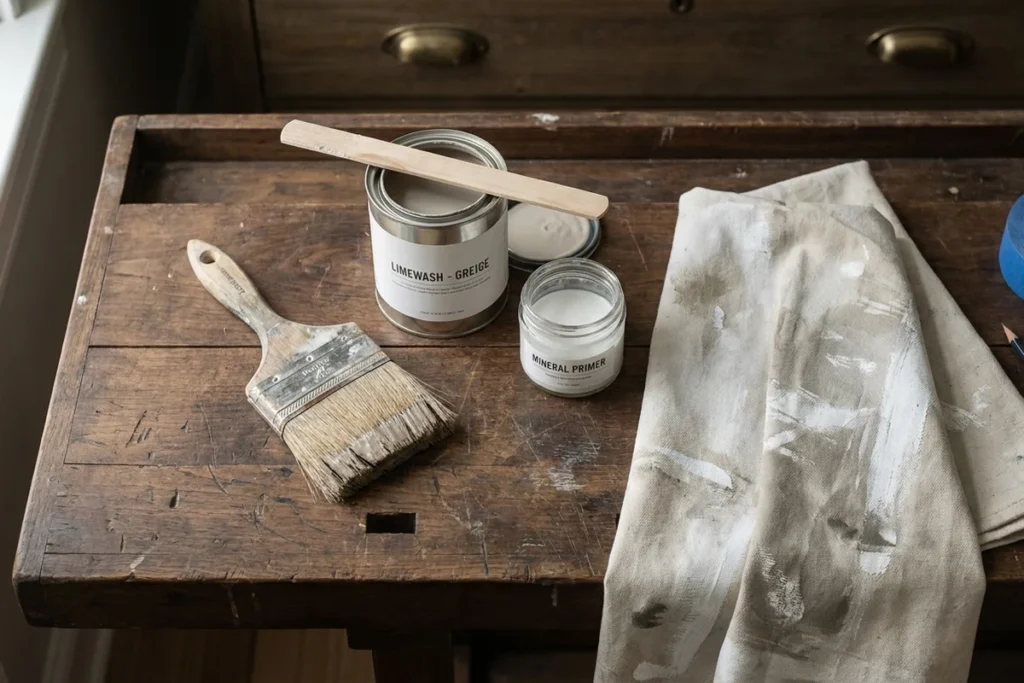
Essential Tools
- Natural bristle block brush: Best for the loose, cross-hatch movement that gives limewash its texture.
- Compatible primer: Important for drywall, sealed walls, and previously painted surfaces.
- Breathable matte sealant: Useful in moisture-prone spaces when the product manufacturer recommends it.
- Drop cloths, painter’s tape, and plastic sheeting: Needed to protect floors, trim, outlets, and nearby surfaces.
- Mixing bucket and stir stick: Helpful because pigments can settle and may need stirring before and during application.
- Gloves and eye protection: Especially important when working with traditional lime-based products.
Safety, Skill Level, and Time
Traditional limewash can be highly alkaline, so gloves and eye protection are important when mixing or applying it. Pre-mixed and faux products are often easier to handle, but users should still follow the safety instructions on the label.
For skill level, faux limewash is usually the most beginner-friendly. Pre-mixed limewash sits in the middle. Traditional lime putty work is better for confident DIYers or professionals.
A single accent wall can take several hours, depending on prep, drying time, and the number of coats. A full room may take one to two days. The best results usually come from giving each coat enough time to dry instead of rushing the finish.
Step 1: Prepare and Prime the Surface
Limewash needs a surface it can grip. Porous materials such as brick, stone, plaster, and lime render usually accept limewash well. Drywall and previously painted walls often need more preparation because they are smoother and less absorbent.
Start by cleaning the wall thoroughly. Remove dust, grease, loose paint, and any residue that could affect adhesion. Fill cracks or holes with lightweight spackle, then sand the patches smooth once dry. If the existing paint has a sheen, lightly sand it until the surface feels more matte.
For drywall or previously painted walls, use a compatible primer recommended for the limewash product. A mineral-based or limewash-compatible primer can create a more absorbent, matte base so the finish applies more evenly.
Let the primer cure fully before applying the first coat. Rushing this step can lead to uneven absorption, patchiness, or poor adhesion.
Expected result:
The wall should look clean, flat, and matte. It should not feel slick or glossy. That surface gives the limewash a better chance to absorb evenly and develop the soft, layered finish people want from limewash walls.
Step 2: Mix and Dilute the Limewash
Uneven color can happen when limewash is not mixed well. Pigments may settle at the bottom of the container, especially if the product has been sitting for a while. A thorough stir helps keep the color consistent from the first brushstroke to the last.
For pre-mixed limewash, stir slowly from the bottom up before loading the brush. Avoid shaking the container too aggressively, since that can introduce bubbles or make the mixture harder to control.
For traditional limewash, combine lime putty with water according to the product or supplier instructions. Many applications use a thin, milk-like consistency, but the right dilution depends on the surface, desired opacity, and number of coats. A thinner mix usually builds depth gradually through layering.
What a Properly Mixed Batch Looks Like
The mixture should look smooth, even, and free of obvious lumps or streaks. If concentrated pigment or color variation is still visible in the bucket, keep stirring before applying it to the wall.
Pigment can settle again during the project, so stir the limewash whenever work pauses. A quick stir helps prevent the second half of the wall from looking different from the first.
Step 3: Apply the First Coat with Cross-Hatch Brush Strokes
Avoid brushing the whole wall in one flat direction. That can make the finish look more like regular paint than limewash.
Load a natural bristle brush and work in small sections, roughly two feet by two feet at a time. Use loose, overlapping X-shaped strokes and vary the pressure slightly as you move. This helps create the soft, layered movement that makes limewash walls feel more natural.
The first coat may look darker, patchier, or more uneven while it is wet. That is normal. Limewash often dries lighter than it looks during application, so avoid trying to “fix” every uneven area while the coat is still wet.
Let the first coat dry before deciding whether the wall needs more depth.
Step 4: Let It Dry and Evaluate Before Adding Layers
Limewash needs drying time before you can judge the color and texture. Adding more product too quickly can make the finish look heavier or flatter than intended.
Allow the first coat to dry fully before applying the next layer. Overnight drying is often the safer choice, especially for beginners. The wall may look different after it dries because the color softens and the chalky texture becomes more visible.
Evaluate in the Right Light
Check the wall in the lighting the room normally receives. A finish that looks too light in direct afternoon sun may feel right in the room’s usual morning or evening light.
This matters even more on textured surfaces such as a limewash brick fireplace, where shadow and surface variation can change how the finish reads.
Expected result:
After the first coat dries, the wall should have a soft, chalky base with some variation showing through. That unevenness is part of the look. Additional coats can build more depth, opacity, and movement.
Step 5: Build Depth with a Second Coat
One thin coat may look too light or unfinished. One heavy coat may look too flat. Limewash usually gets its depth from multiple thin layers that let some variation show through.
Apply the second coat with the same loose cross-hatch strokes. Vary the direction slightly so the pattern does not look too uniform. Let the coat dry fully before deciding whether the wall needs a third pass.
After two coats, the finish should show soft movement and gentle tonal shifts. Darker colors may benefit from a third coat, but stop once the wall looks dimensional. Too many layers can make the finish feel heavy.
Faux Limewash Layering Technique
For a faux limewash effect with matte acrylic paint, start with a solid base coat. Once it dries, apply a diluted top coat using loose cross-hatch strokes.
While the top coat is still wet, wipe back small areas with a damp cloth. This helps create the soft, uneven movement of limewash without using a traditional mineral finish.
Step 6: Seal the Finish When Needed
Limewash is not as scrub-resistant as standard wall paint. In quiet rooms, that softness is part of the appeal. In kitchens, bathrooms, mudrooms, or other high-contact areas, the finish may need extra protection.
Use a breathable matte sealant if the product manufacturer recommends it. A compatible sealer can help protect the surface from moisture, splashes, and everyday contact while keeping the finish soft and matte.
Sealant choice matters. A glossy or non-compatible product can change the look of the wall or affect how the finish wears over time. Always test the sealer in a small area first, especially if the wall has strong color variation.
Rooms That May Need Sealing
Bathrooms, kitchens, mudrooms, and busy hallways are the most likely spaces to need a protective finish. These rooms face more moisture, cleaning, and surface contact.
Bedrooms, living rooms, dining rooms, and low-traffic accent walls may not need sealing at all. Leaving them unsealed can help preserve the natural chalky look and soft aging effect that makes limewash walls appealing.
Limewash for Home Staging: Buyer Appeal and Current Trends
Limewash can work well in home staging because it adds texture without making a room feel busy. The soft, matte finish gives walls more depth than flat paint, which can help living rooms, bedrooms, and fireplace surrounds feel warmer and more finished.
The best staging uses are usually selective. A limewash accent wall in a living room, a primary bedroom feature wall, or a brick fireplace surround can add character without overwhelming the buyer. A full limewash room can work too, but it needs the right architecture, lighting, and color palette.
How Limewash Photographs in Listings
Limewash walls often photograph well because light interacts with the surface in subtle ways. The finish can show gentle movement and tonal variation, which helps a room feel more layered in listing photos.
That said, the application needs to be clean. Uneven brushwork, patchy drying, or poorly chosen colors can look distracting on camera. For listings, the finish should support the room rather than become the only thing buyers notice.
When to Use a Professional
For large rooms, ceilings, Roman clay finishes, darker colors, or high-end listings, professional application may be worth the cost. Multi-coat finishes are harder to correct once they dry, and patchy results may require reworking the full wall.
Limewash can also complement virtual staging when the room is empty or lightly furnished. A textured wall gives the digital room more character, while staging helps buyers understand scale, layout, and possible furniture placement.
DIY vs. Hiring a Professional
Limewash is more forgiving visually than flat paint, but it is not always easy to correct. Because the finish depends on layered movement and tonal variation, patch repairs can stand out. In some cases, fixing one bad area means reworking the full wall.
When DIY Works
DIY can work well for small, low-pressure projects. A faux matte acrylic finish is usually the most beginner-friendly option because it is easier to control and maintain.
A single accent wall in a guest bedroom, hallway, mudroom, or small living area can also be a reasonable first project. Pre-mixed limewash products are a good middle ground for careful beginners who want more texture than faux paint without mixing traditional lime putty.
When to Hire a Professional
Professional application makes more sense for large rooms, ceilings, darker colors, Roman clay finishes, and high-end staging projects. These spaces are more visible, harder to correct, and less forgiving if the finish dries unevenly.
For resale or listing photography, the wall needs to look intentional in person and on camera. Strong real estate photo editing can help with lighting and color balance, but it cannot fully hide a patchy wall finish.
Maintenance, Durability, and Long-Term Care
Limewash walls need gentler care than standard painted walls. Because the finish depends on layered color movement, small touch-ups may not blend seamlessly. For visible stains or damage, reworking the full wall often gives a cleaner result than patching one corner.
Cleaning should stay light. Use a soft cloth, water, and mild soap if the product allows it. Avoid harsh scrubbers or strong chemical cleaners, especially on unsealed limewash, because they can wear down the chalky finish.
Limewash also changes over time. The surface can develop a natural patina, which is part of its appeal. In low-traffic rooms, that aging can look warm and characterful. In high-traffic areas, homeowners may need occasional recoats or a compatible matte sealer.
Faux matte acrylic finishes are usually easier to maintain. They can be more practical for rentals, busy hallways, kids’ rooms, or staging projects where durability matters more than full authenticity. For homeowners who want the limewash look with less upkeep, faux or pre-mixed options may be the better fit.
Final Thought
For most homeowners, pre-mixed limewash paint is the most practical starting point. It gives the soft, chalky, layered look without the extra work of mixing traditional lime putty from scratch.
Faux limewash with matte acrylic is the easiest and most budget-friendly option. It works well on drywall, handles everyday wear better, and suits sellers or stagers working on a tight timeline.
Authentic limewash is still the strongest choice for porous surfaces such as brick, stone, plaster, and lime render. It creates the most natural patina, but it also requires more preparation, patience, and comfort with variation.
For large feature walls, ceilings, Roman clay finishes, or high-end staging projects, hiring a professional may be worth it. Multi-coat finishes can be difficult to correct once they dry.
Limewash walls work best when they support the whole room, not when they are expected to carry it alone. Pair the finish with good lighting, simple styling, natural materials, and thoughtful furniture placement.
For sellers looking at broader home staging tips for sellers, limewash should be treated as one part of the room’s visual story, not the entire strategy.
FAQs
Can limewash go over existing paint?
Usually not without preparation. Limewash needs a surface it can grip, and sealed or previously painted walls often need a compatible primer first. Always follow the product instructions before applying limewash over drywall or old paint.
Does limewash work on exterior walls?
Authentic limewash can work well on exterior brick, stone, and masonry. It has a long history as a breathable mineral finish. Pre-mixed or faux limewash products may be interior-only, so check the label before using them outside.
How do you fix limewash that dries too dark or patchy?
First, wait until it dries fully. Limewash often looks darker when wet and lightens as it cures. If the wall still looks uneven, apply a diluted coat across the full surface instead of spot-patching one area.
Is limewash safe in a home with children or pets?
During application, traditional limewash can irritate skin and eyes because it is highly alkaline. Use gloves, eye protection, and ventilation. Once fully cured, many limewash products are considered low-VOC or VOC-free, but safety details depend on the exact product.
Can limewash be tinted beyond white and greige?
Yes. Limewash can be tinted with compatible pigments into soft blues, terracotta, sage green, ochre, and other muted tones. Test a sample first because the color can shift as it dries and cures.