HomeSmart agents can now access their personalized AI HomeDesign dashboard directly through the RealSmart Agent platform; no uploads or sign-ins required.
This guide walks you through how the system works and what to expect once you’re in.
How to Edit Photos Directly in RealSmart Agent
With AI HomeDesign, enhancing your listing photos is faster and easier than ever. Follow these simple steps to access AI-powered photo editing without leaving the RealSmart platform.
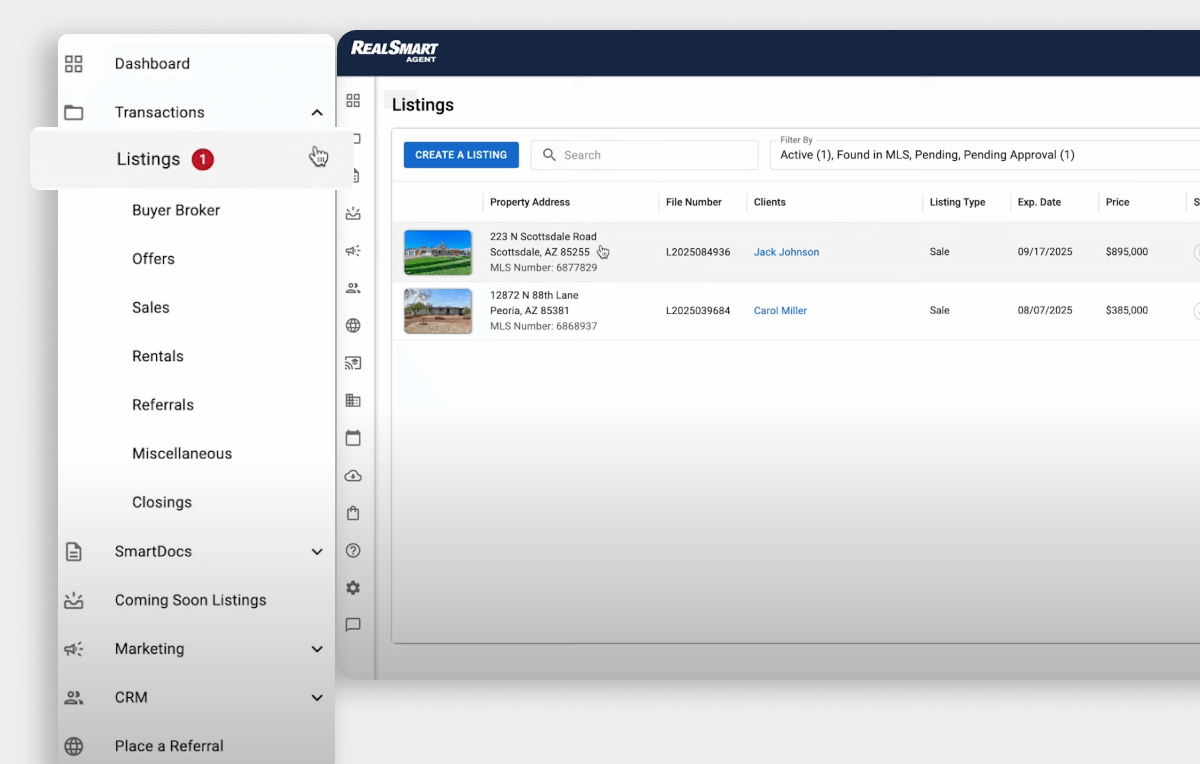
Step 1: Navigate to the transactions listings
From the left menu in RealSmart Agent, click on Transactions, then select Listings.
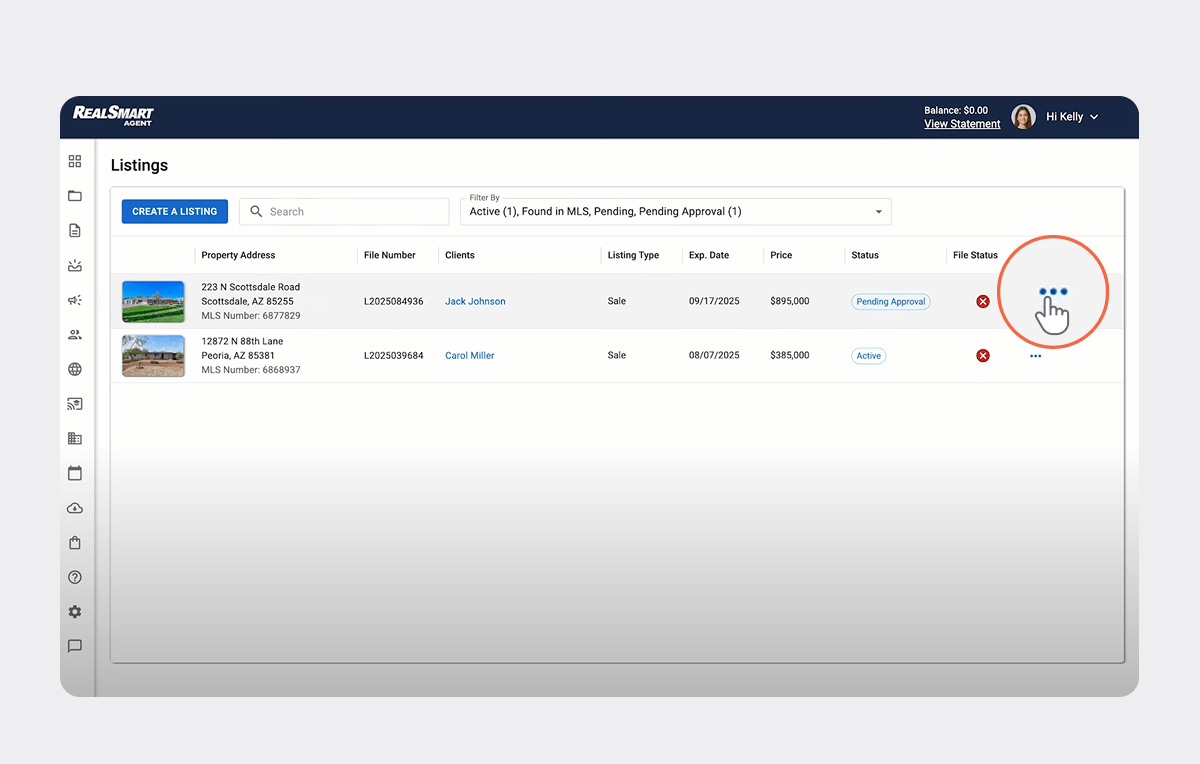
Step 2: Open your desired listing
Find the listing you want to edit and either:
- Click the listing name directly, or
- Click the three dots (…) beside the listing and select Edit Listing Information from the dropdown.
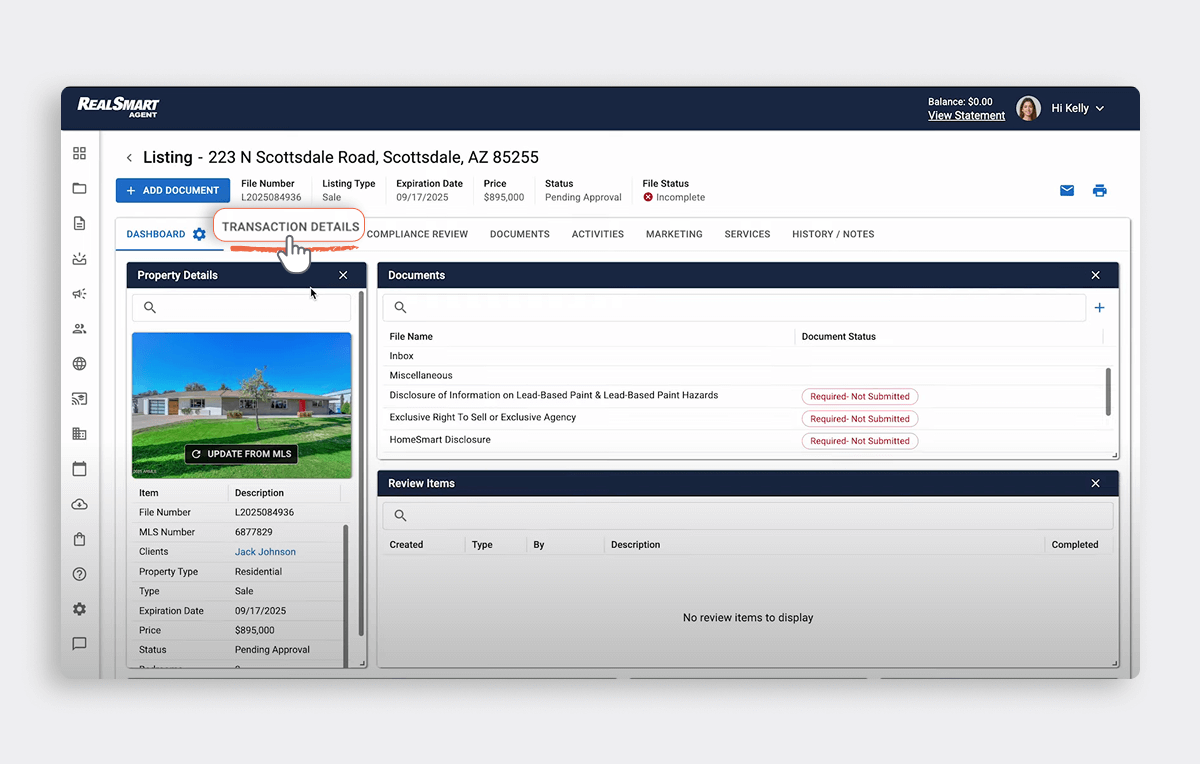
Step 3: Access transactional details
At the top menu of the listing page, click on Transactional Details to open that section.
Step 4: Click on “Photos”
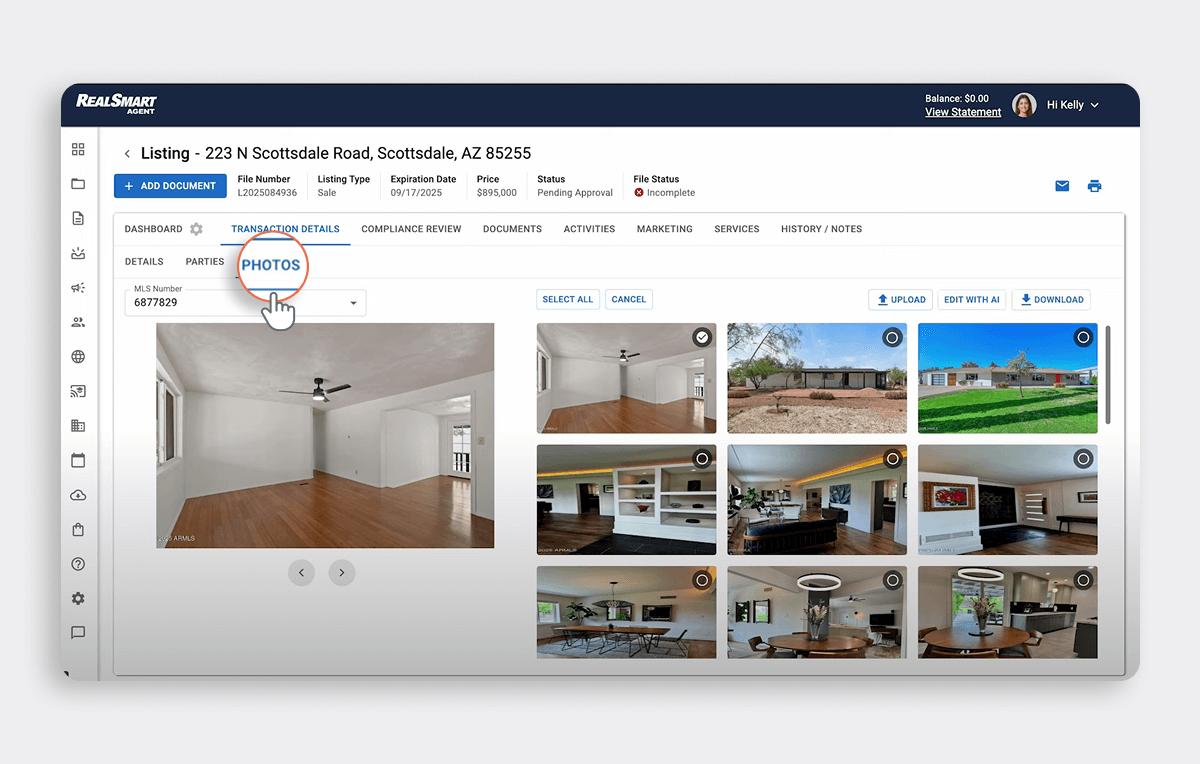
Step 5: Select the photos to edit
Click the Select button, then choose specific photos you want to enhance or stage. Also, you can use “Select All” to pick every single image.

Step 6: Click “Edit with AI!”
Once your photos are selected, click the “Edit with AI!” button.

Start Editing: Every Photo Brings Endless Possibilities
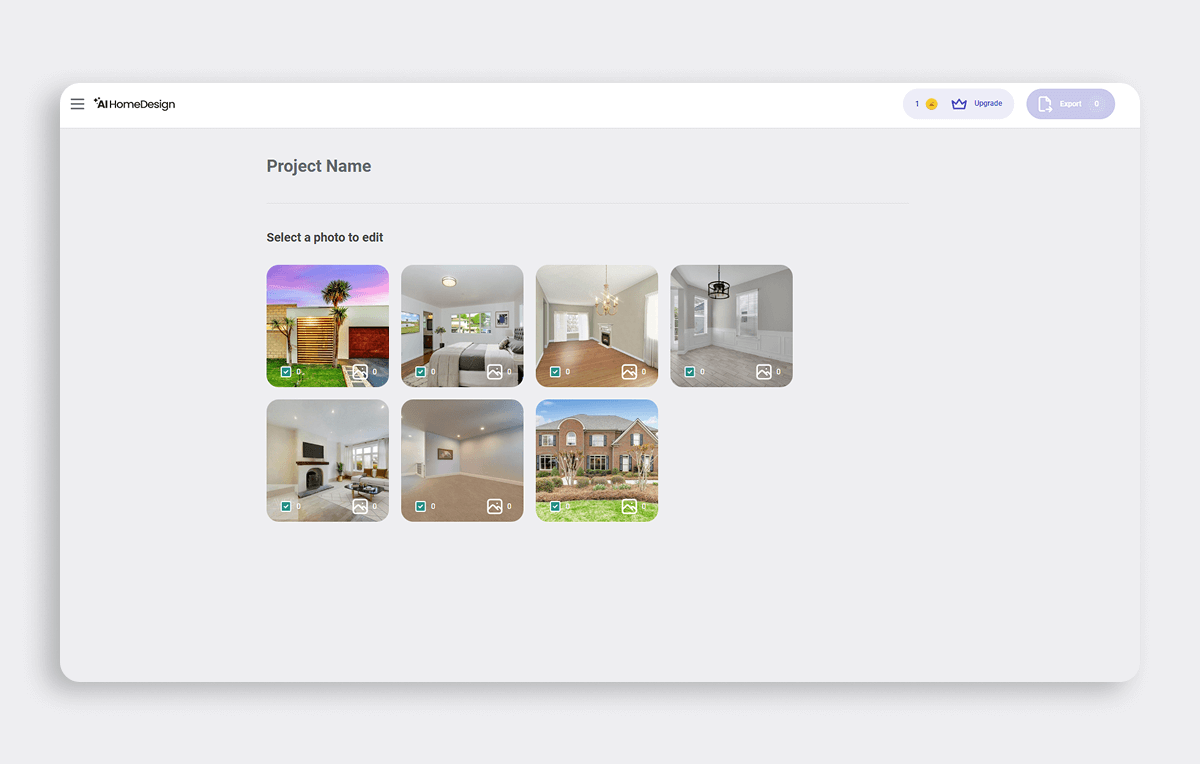
Once you’ve clicked “Edit with AI!”, the AI HomeDesign editing interface opens up, where you can start enhancing or staging your listing photos right away.
Just click on any photo thumbnail to begin.
Select the AI tool you need
Once inside the photo editor, you’ll see a left-hand sidebar listing all available AI tools. From here, you can choose the specific edit you want to apply (e.g., virtual staging, item removal, day-to-dusk conversion, etc.)
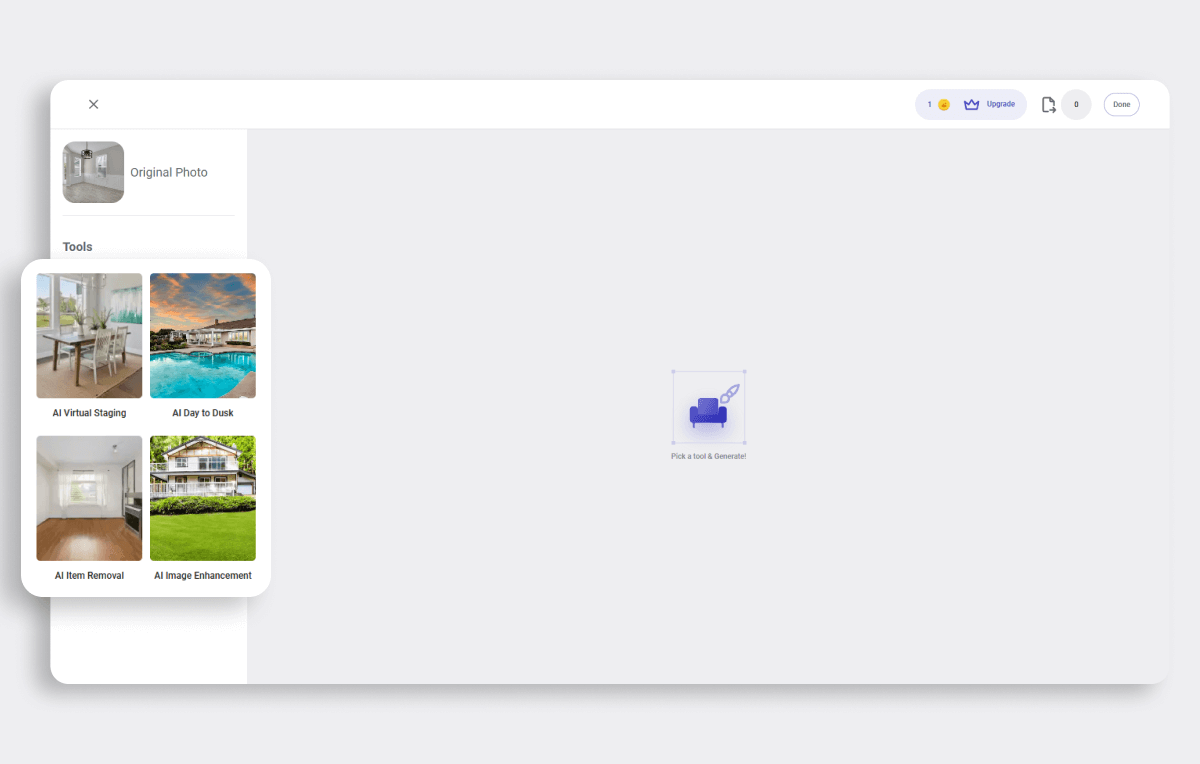
A Glance into Your Photo Editing Toolbox
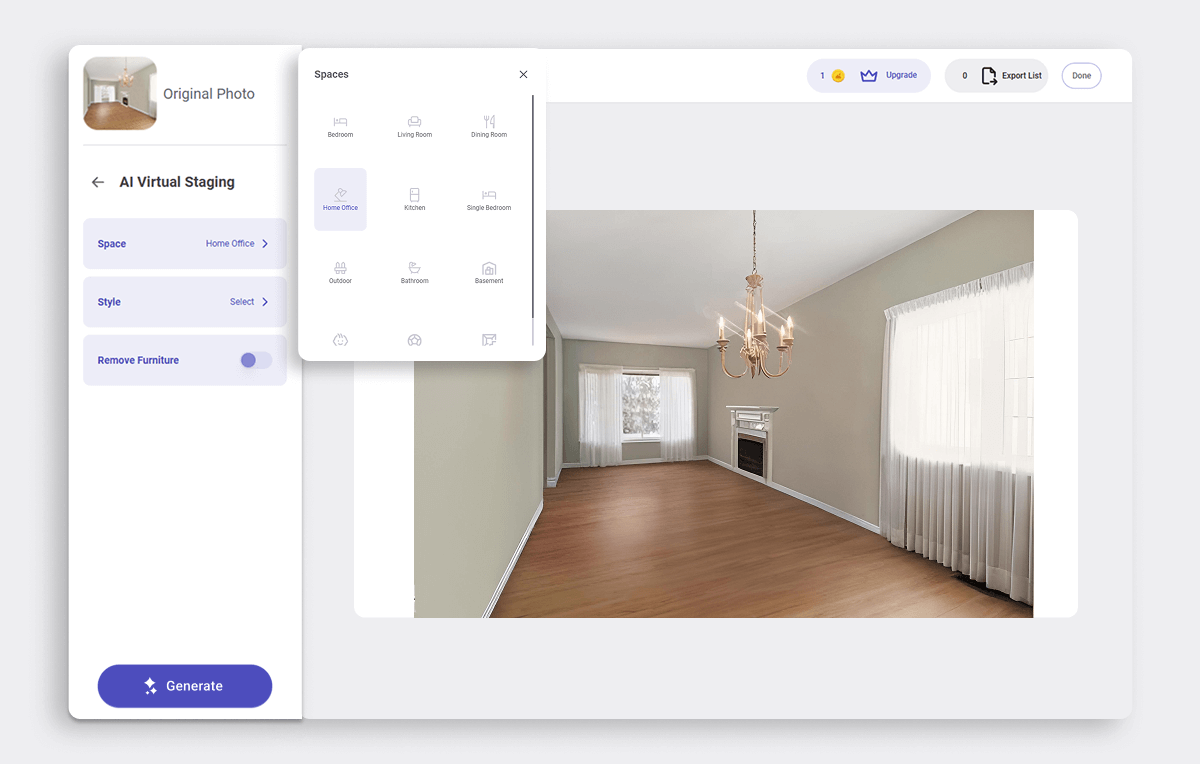
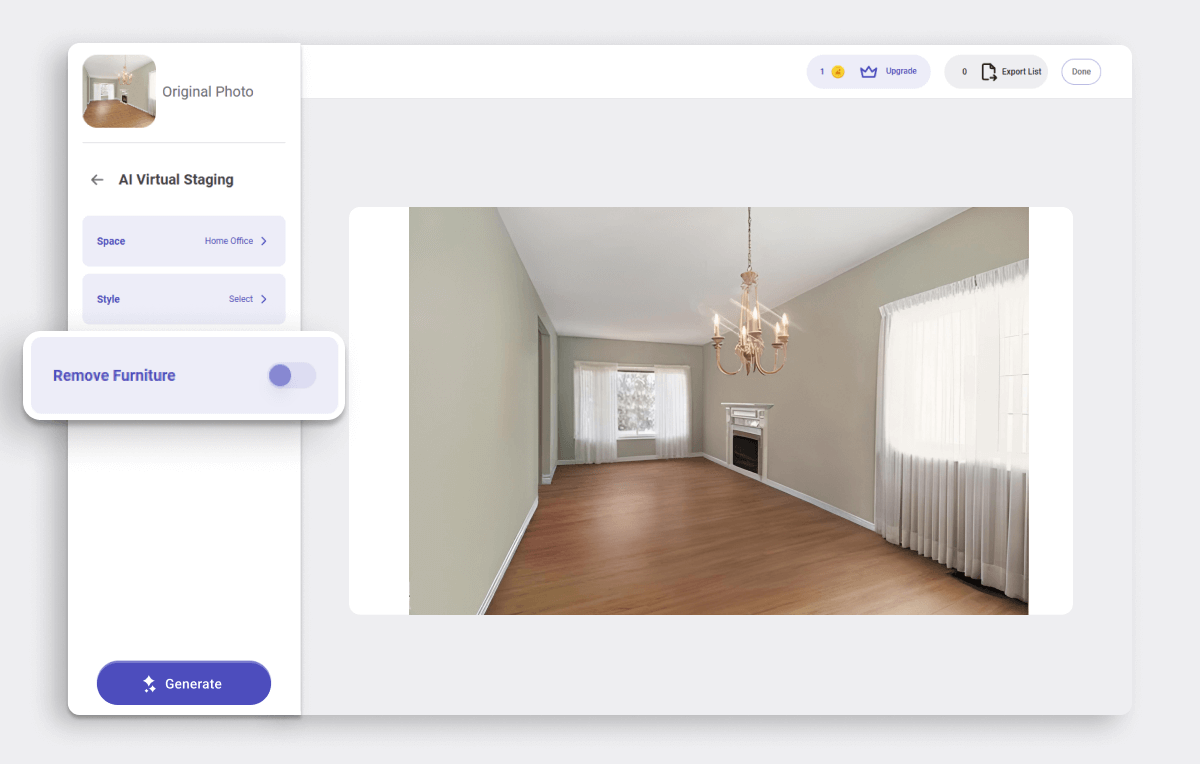
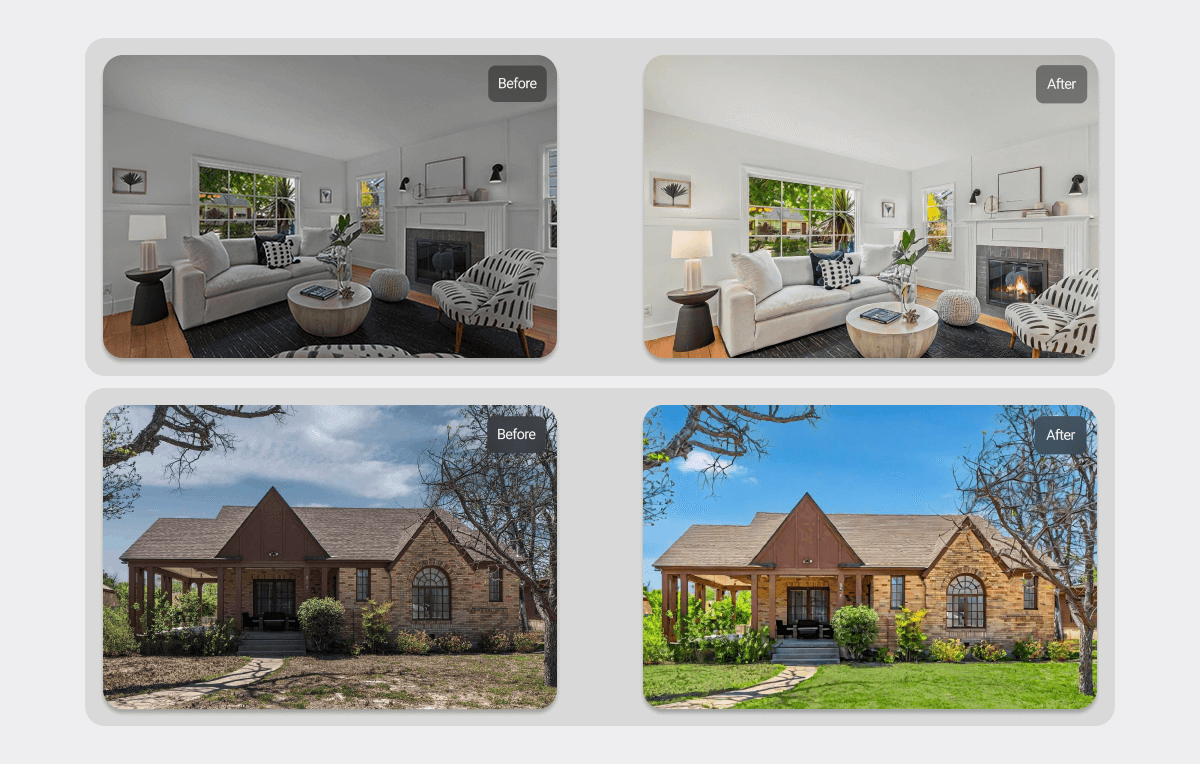
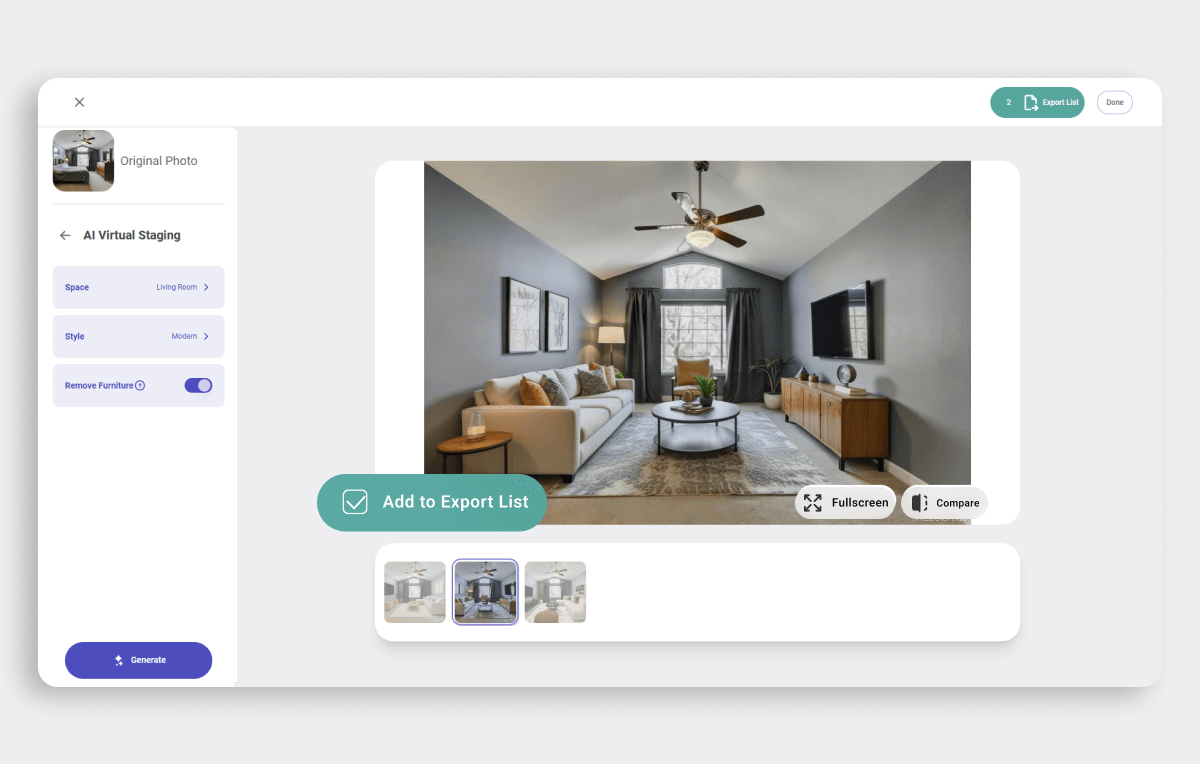
AI Virtual Staging: Personalized Staging Starts Here
With AI Virtual Staging, you can turn any room into a professionally staged space in seconds.
1. Choose the room type
Select the type of room you’re working with (e.g., living room, bedroom, kitchen).
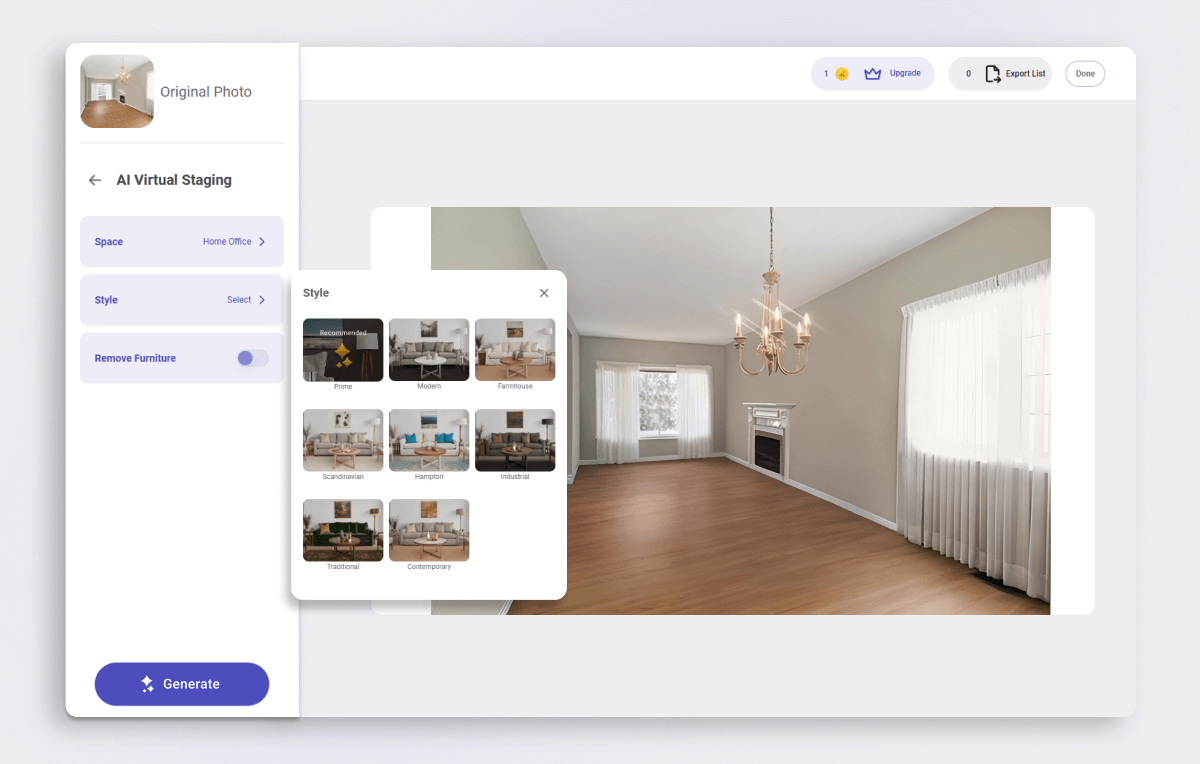
2. Select a staging style
Pick a design style that fits the property, e.g., modern, minimalist, farmhouse, and more.
3. Remove existing furniture (if needed)
If your photo is already furnished, check the “Remove Furniture” box. AI will automatically clear the space.
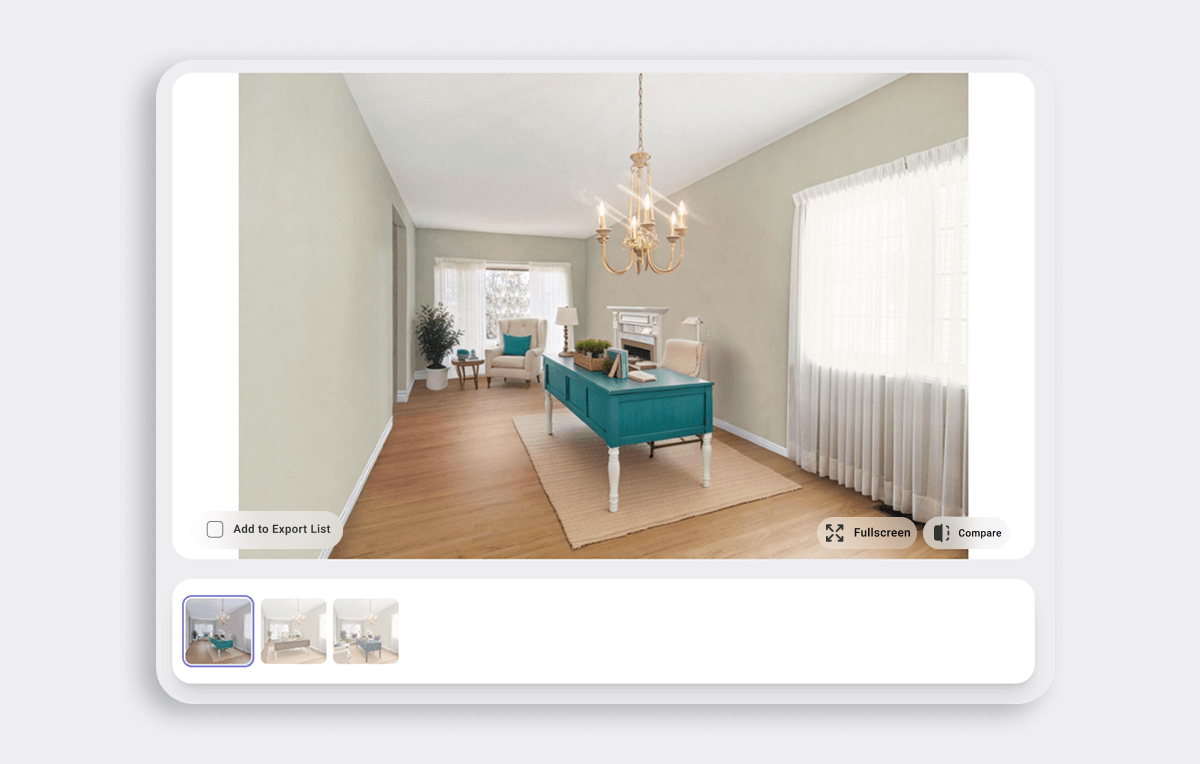
4. Click “Generate”
Each time you click Generate, you’ll receive three different staged versions of the room.
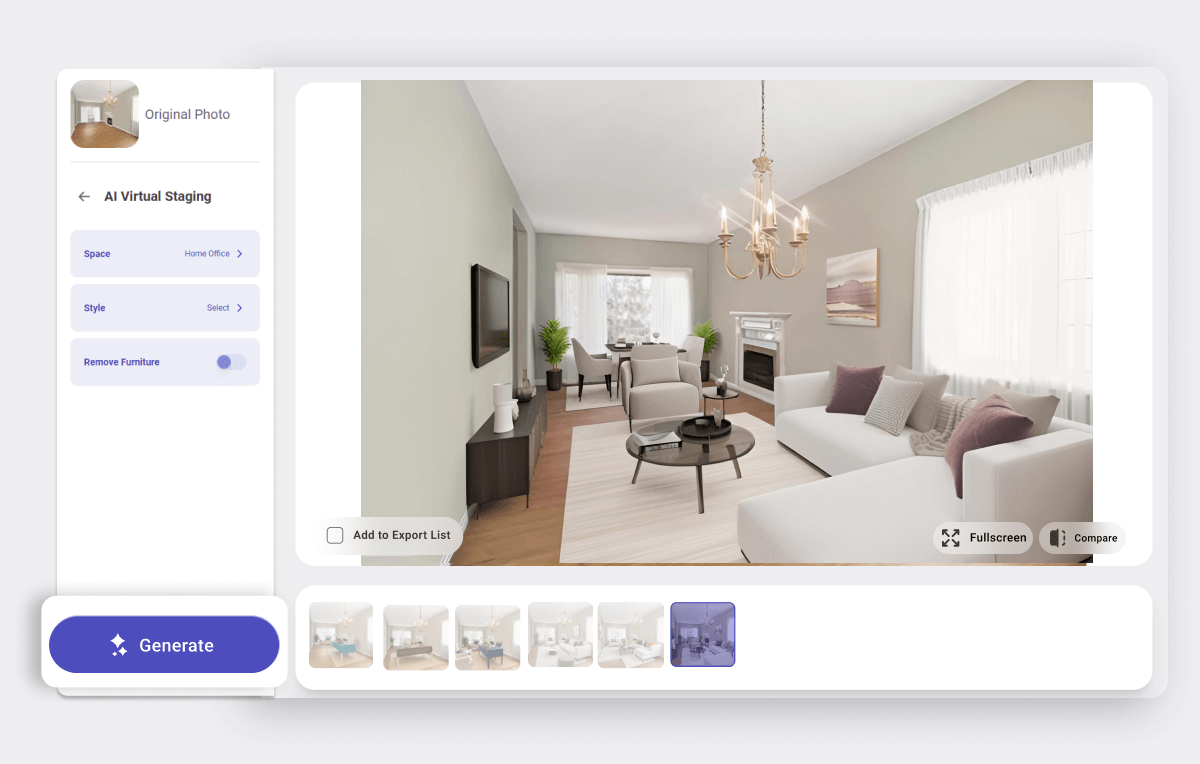
5. “Generate” again for more designs
Click “Generate Again” to receive a new set of three options. You can also change the room type or style settings to see completely different results.
AI Day-to-Dusk: Change Your Sky & Enhance Outdoor Appeal
Use AI Day to Dusk to instantly transform your daytime exterior photos into stunning twilight shots.
Select your sky style
Choose from four different sky options, such as dusk with clouds, dusk without clouds, twilight with clouds, or twilight without clouds.
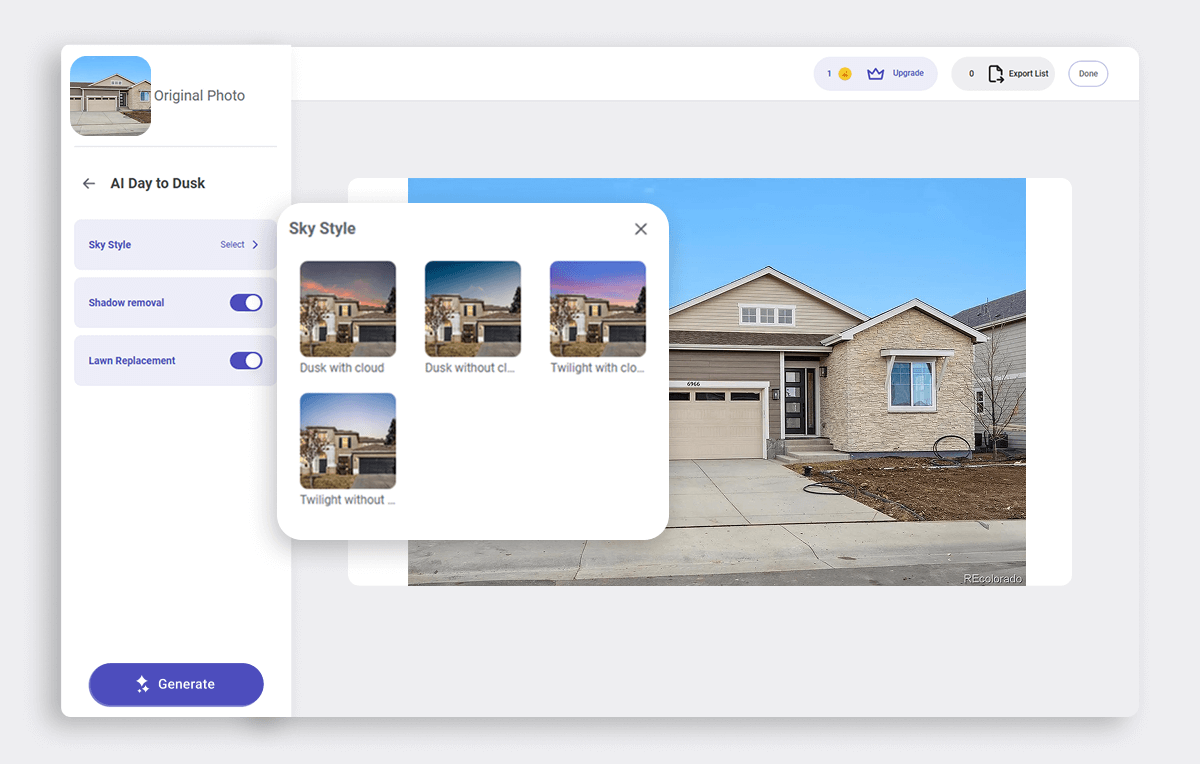
Optional enhancements
You can enable the following settings for improved results:
- Shadow Removal
- Lawn Replacement or Lawn Touch-Up
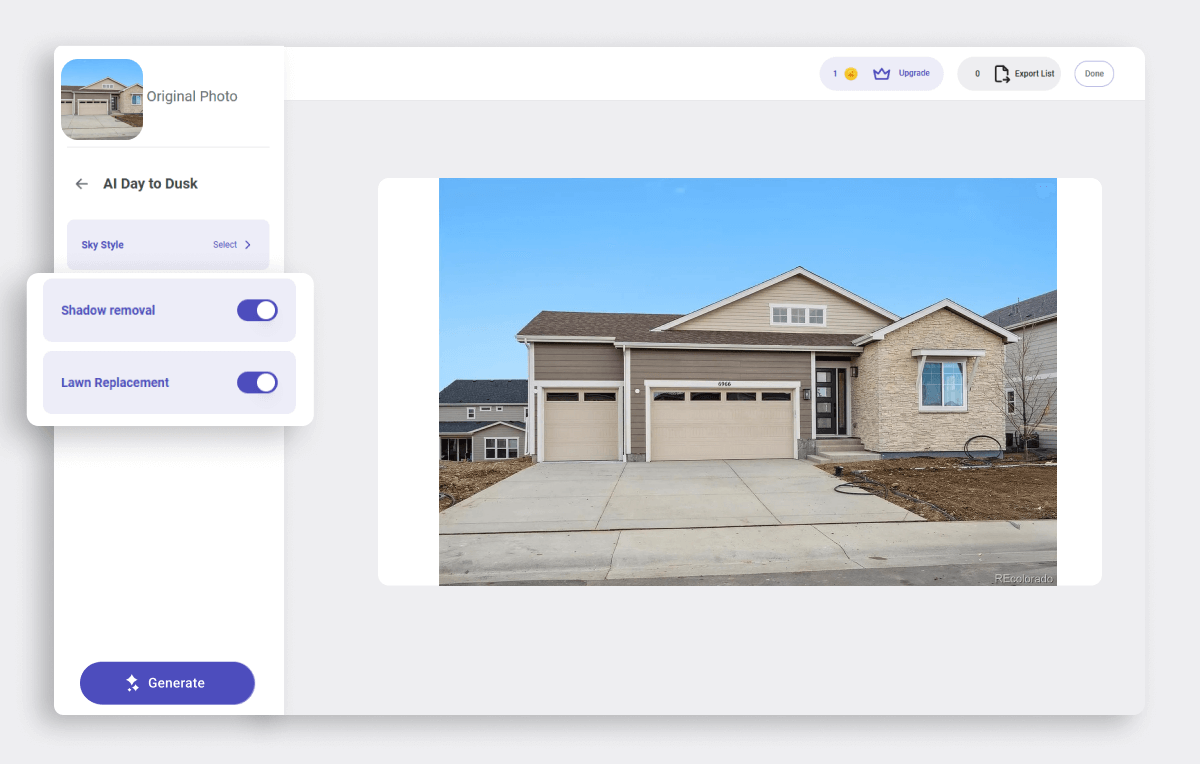
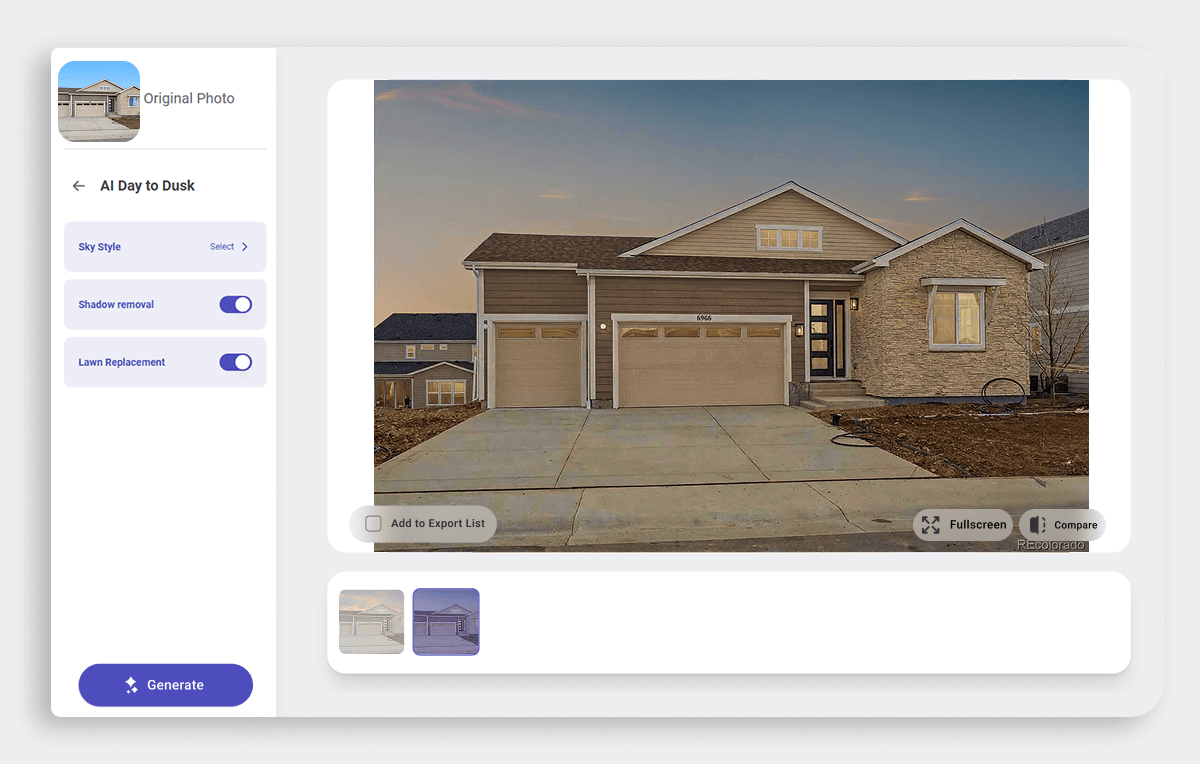
Click “Generate”
Each generation produces a dusk-style version of your selected photo.
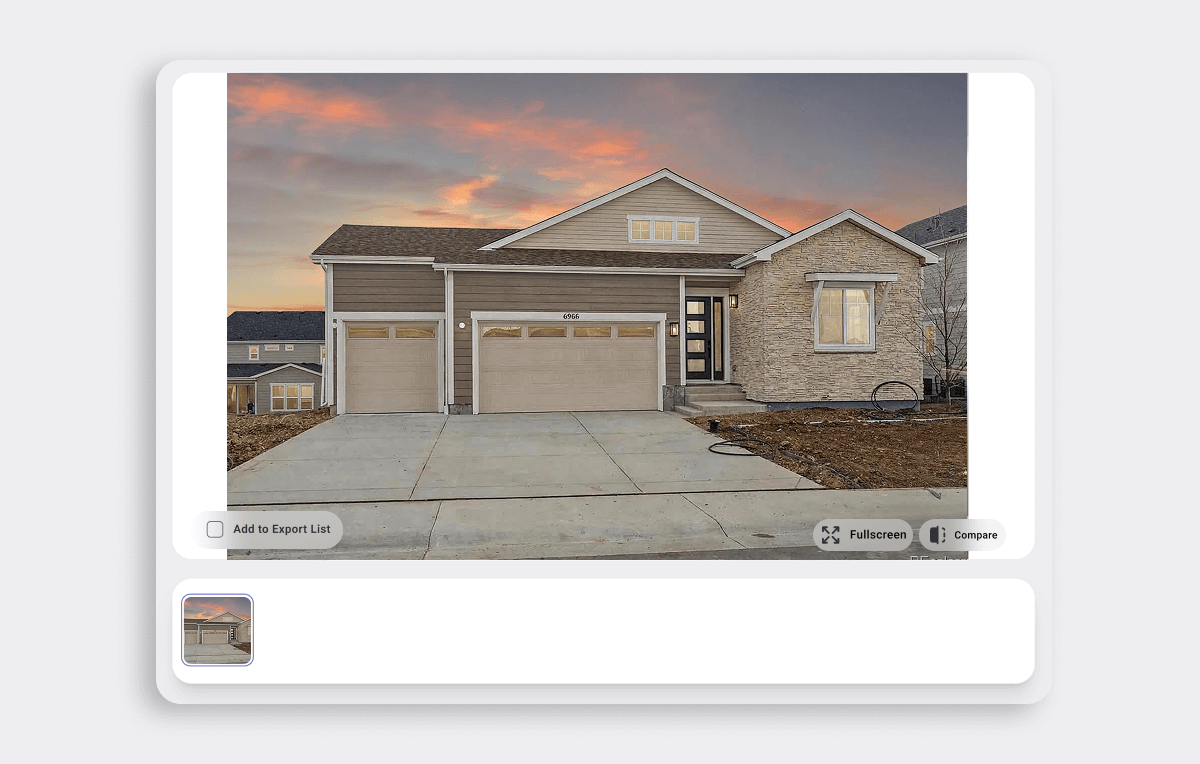
Try again for a new look
Click “Generate” again to get a fresh output. Changing the selected sky style will create a completely different result.
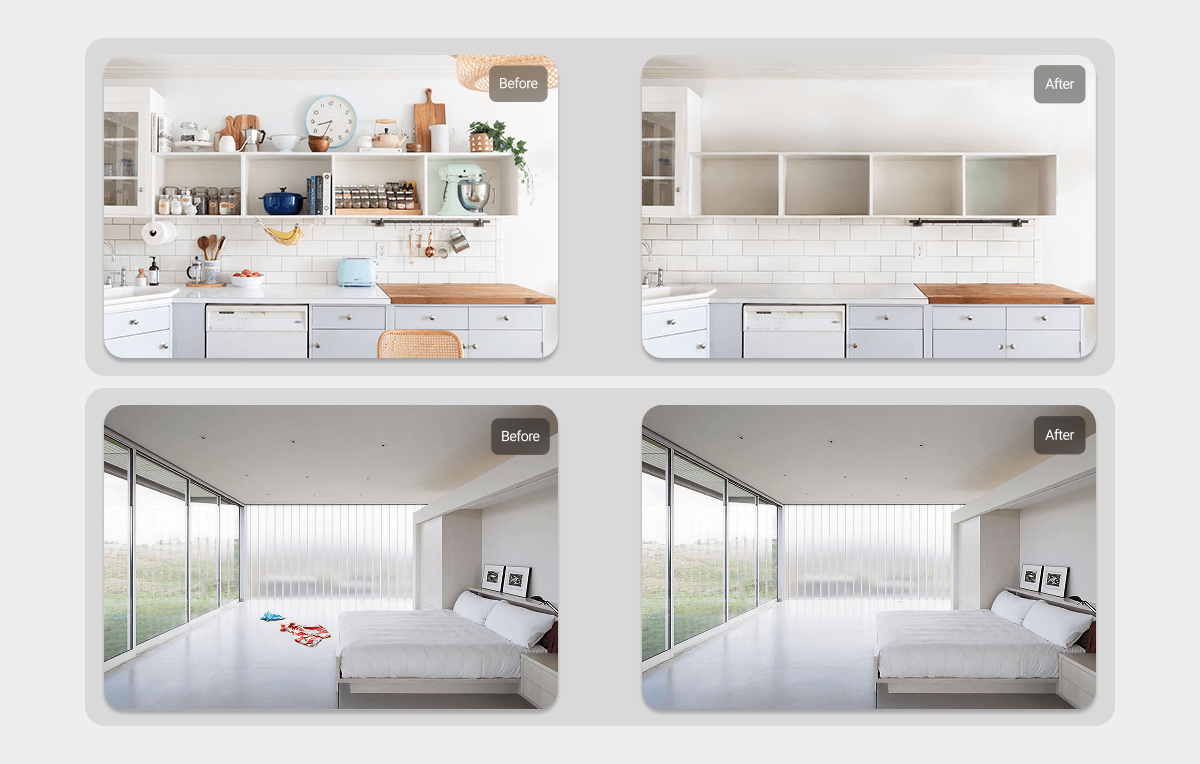
AI Item Removal: Whole Room Decluttering or Precision Removal
Use AI Item Removal to quickly declutter a room or remove specific items one by one with precision.
Whole room removal (Auto Removal)
Choose this option to automatically clear all furniture and clutter from the photo. The AI will not touch the fixtures and will merely clear the clutter and furniture.
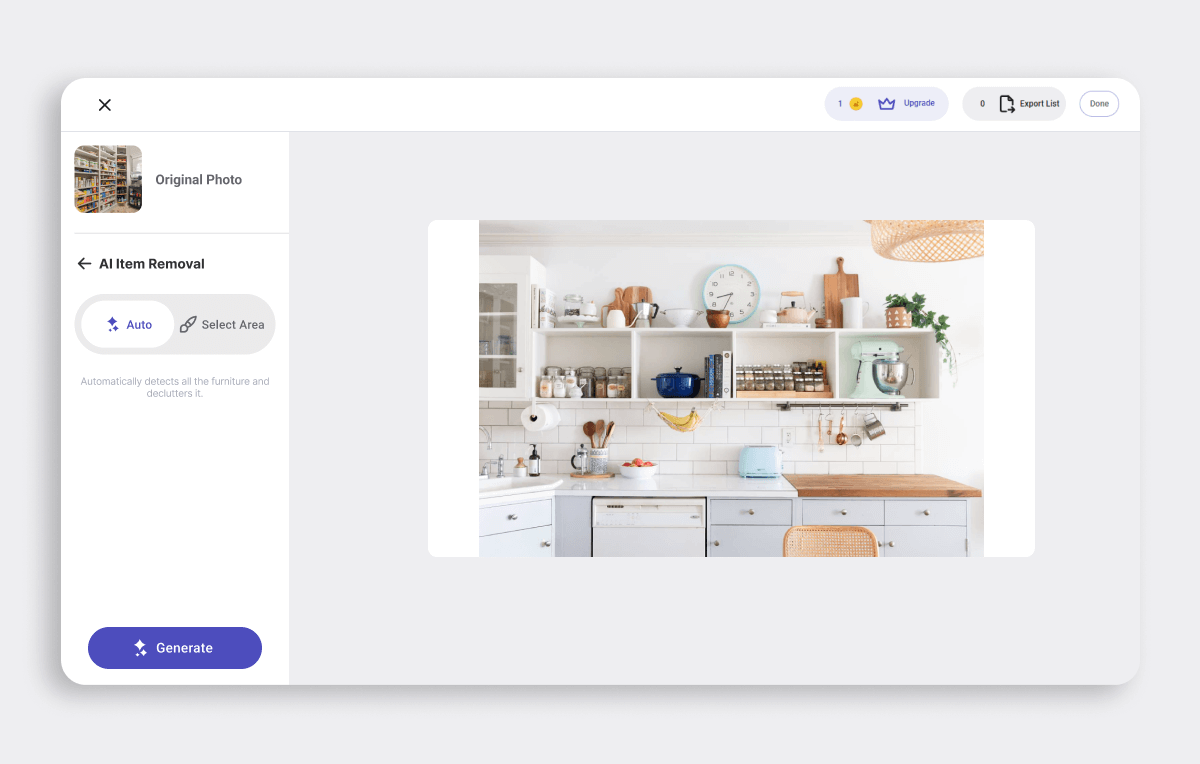
Masking tool for specific items
Use the masking tool for more control. Brush over the exact items you want to remove.
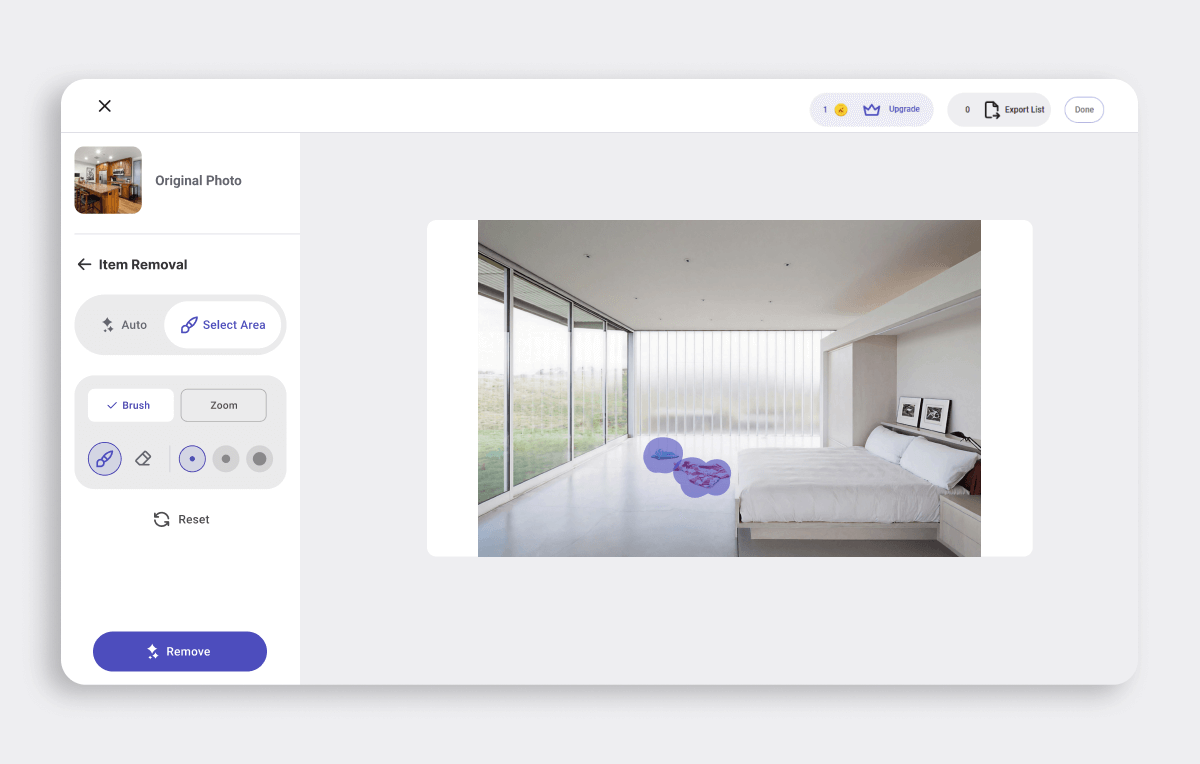
Click “Generate”
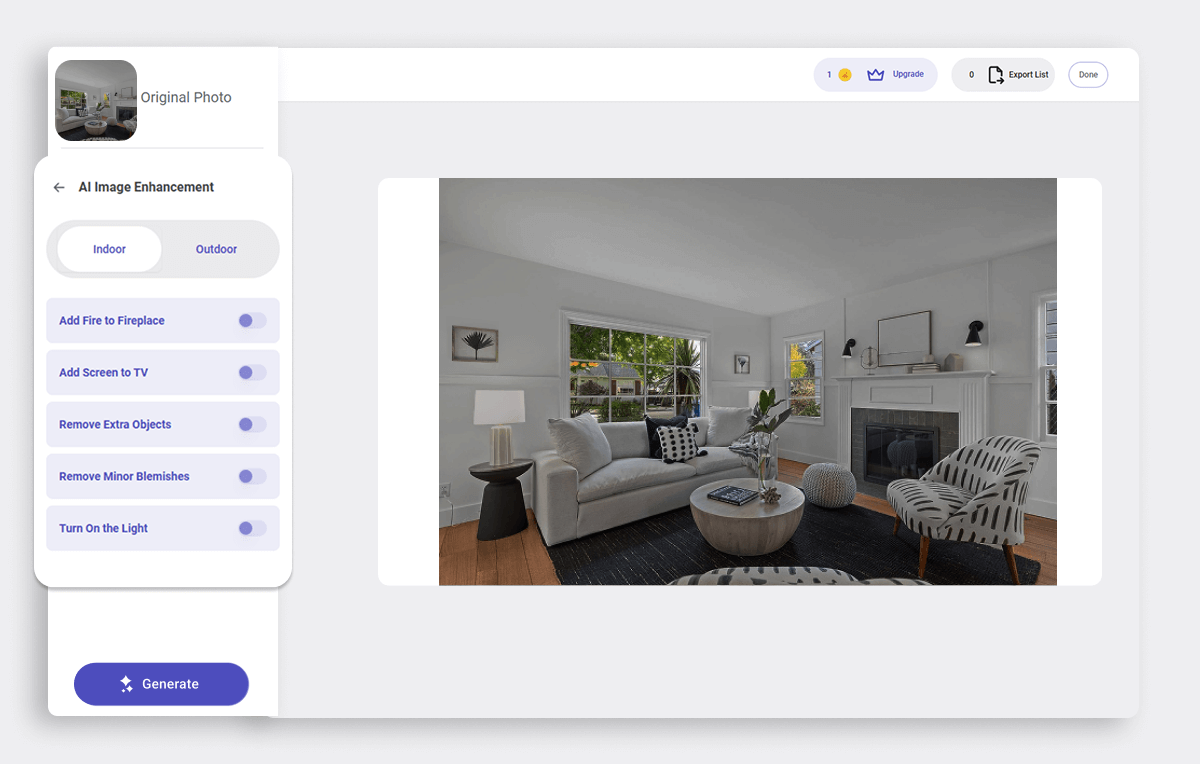
AI Image Enhancement: Indoor or Outdoor, You’re in Control
AI Image Enhancement improves photo quality with targeted edits, whether your image is indoors or outdoors.
Choose indoor or outdoor
Select the appropriate setting based on your photo. Each has its own enhancement options.
Indoor enhancements
- Available features include:
- Lighting adjustments
- Blemish removal
- Adding fire to fireplaces
- Displaying content on turned-off TVs
Outdoor enhancements
- Available features include:
- Sky replacement
- Lawn replacement
- Lighting enhancements
- Blemish and object removal
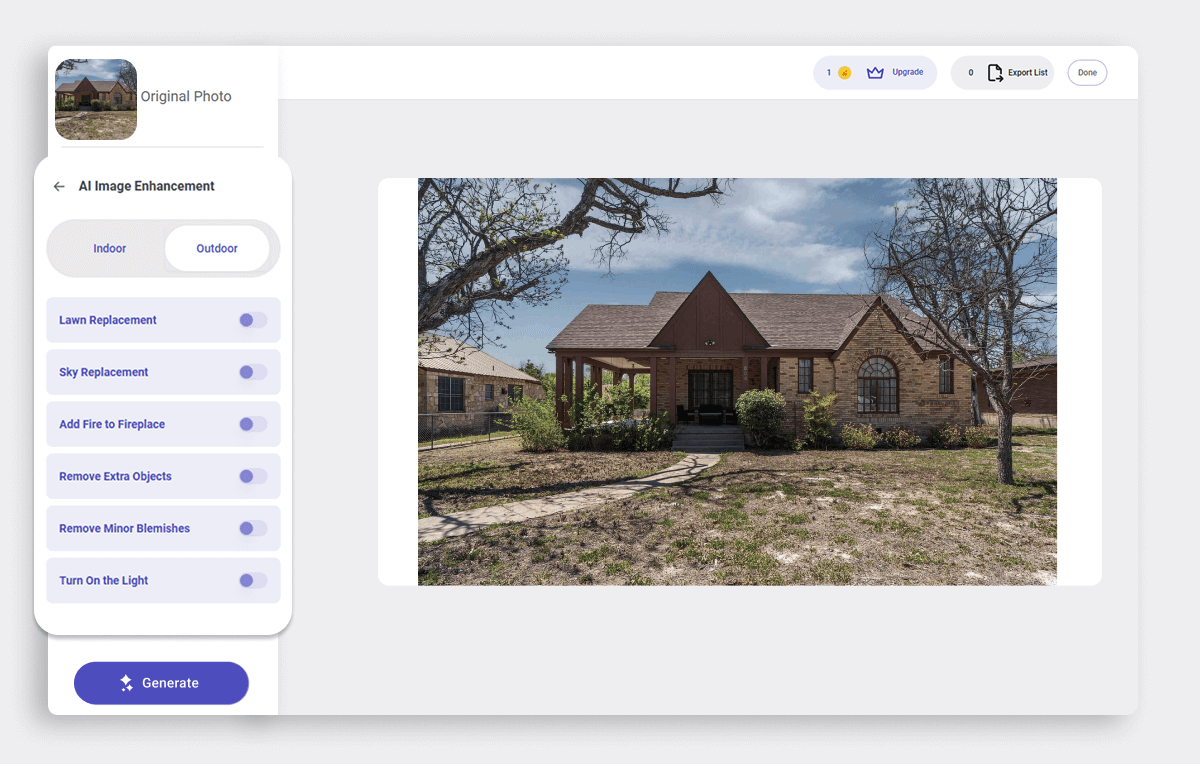
Click “Generate”
Apply your chosen enhancements and generate a polished image.
“Generate” Again for more options
Click “Generate” again to see a new version with slight variations.
Three Key Actions for Reviewing Outputs
After generating images with any AI tool, you’ll have three key options to manage and evaluate your results before exporting them.
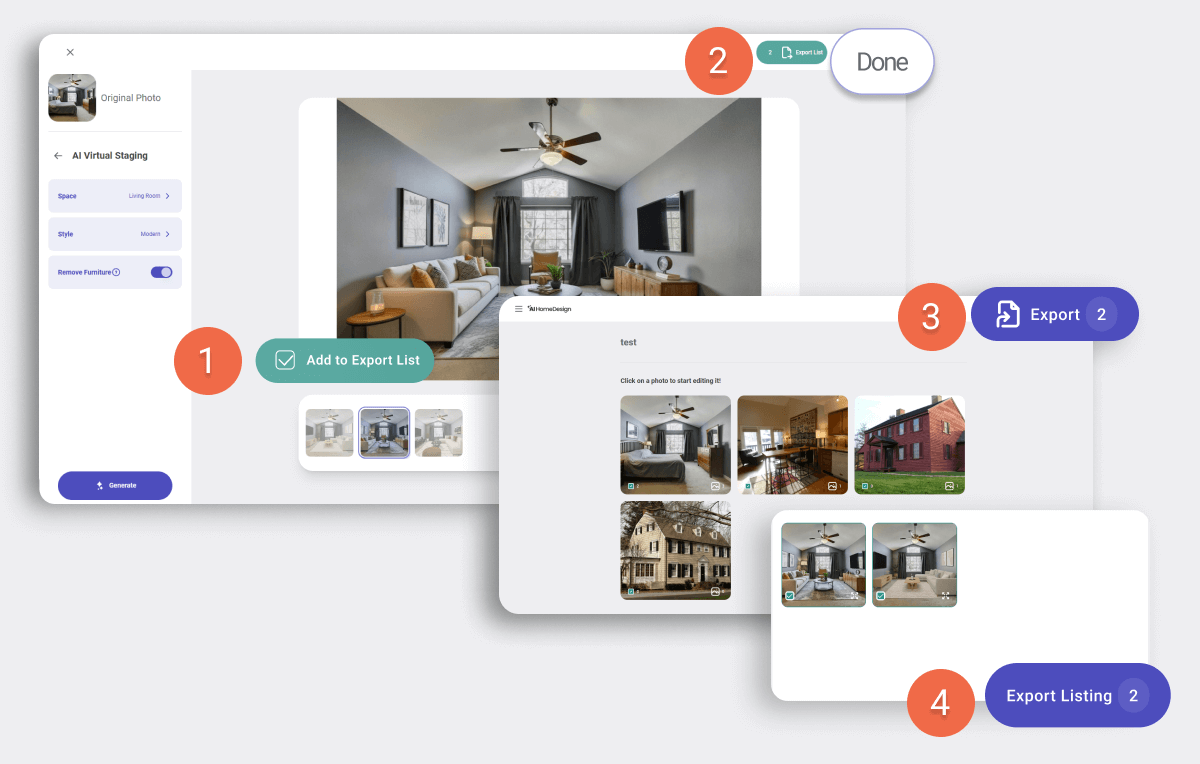
1. Mark as ready for export
When you find a version you’re happy with, mark it as “Add to Export List” to send it back to your RealSmart Agent listing.
You’ll be able to review all the photos you have marked for export once you’re done with all your photos. Therefore, don’t worry about a wrong photo showing up in your listing!
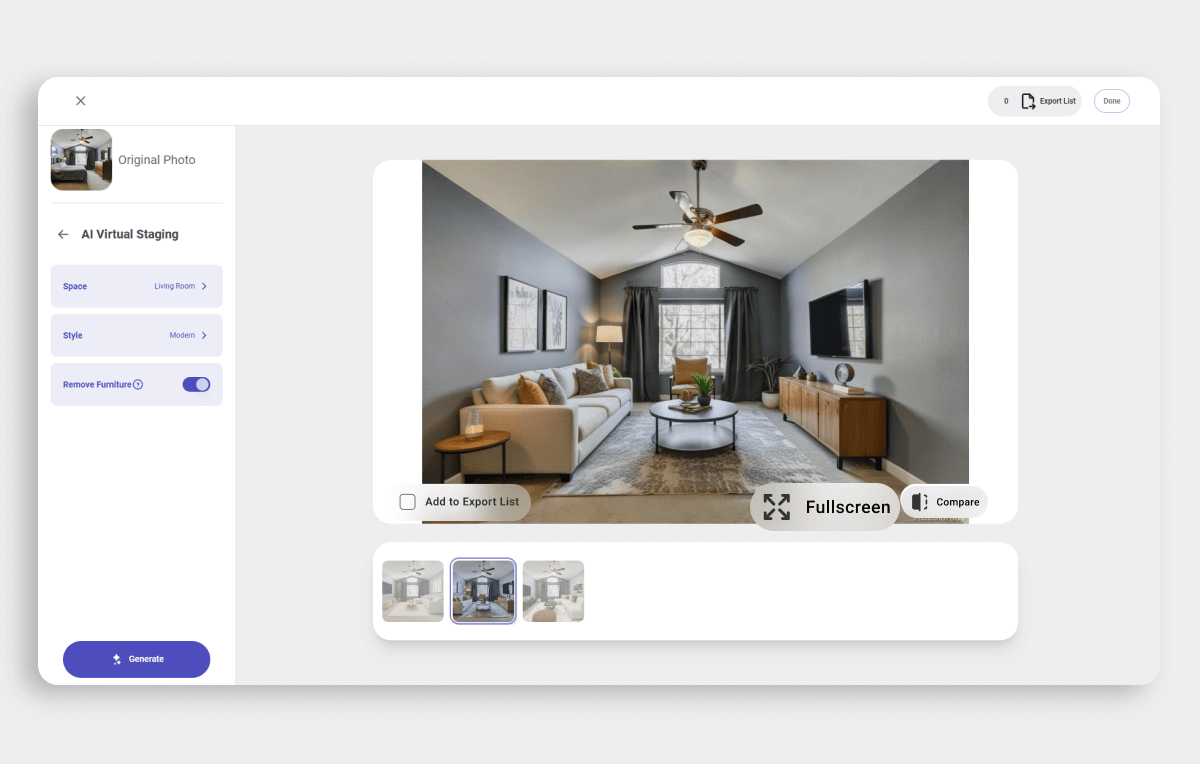
2. Enlarge for a closer look
Click on “Full Screen” on any image to enlarge it for a detailed review before making a decision.
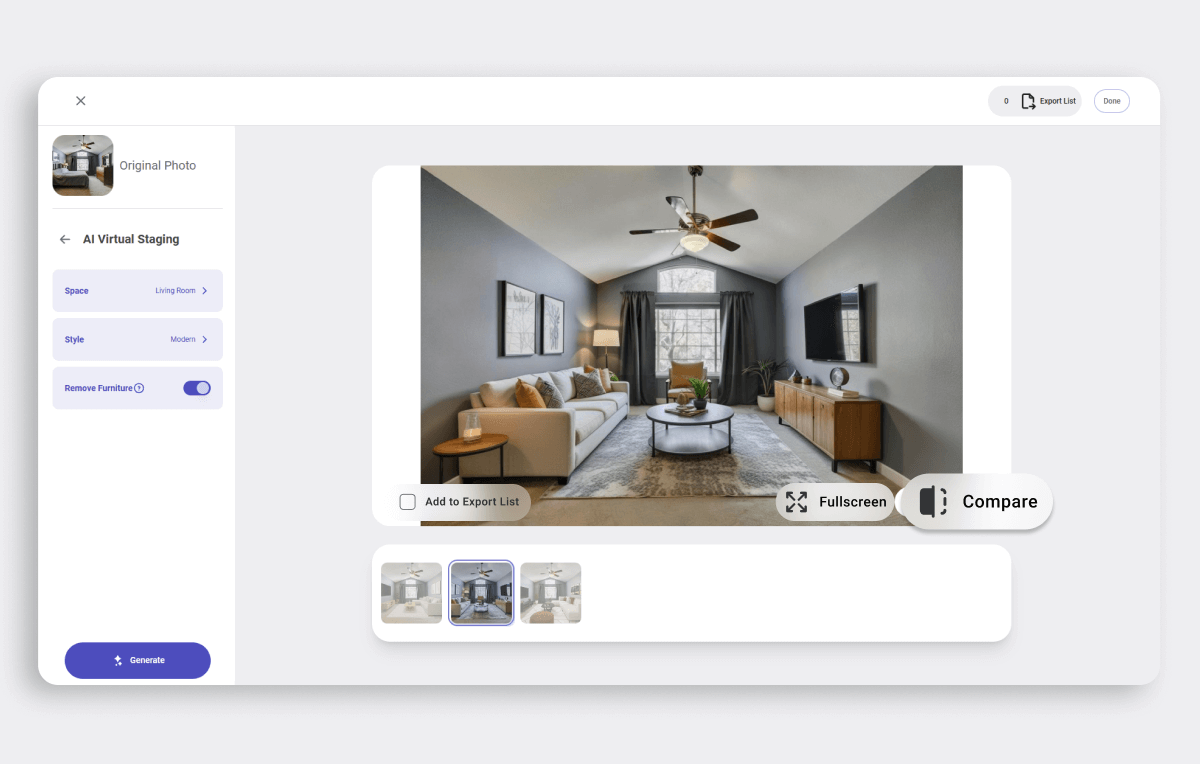
3. View the before & after
Use the Before & After comparison feature to evaluate how the AI has modified the original photo.
Export to Complete the Process
Once you’ve reviewed and finalized your images, don’t forget to export them back to your RealSmart Agent listing.
How to export?
- Toggle “Add to Export List”
Turn on the toggle for each image you want to include in the final export. - Click “Done”
After marking all desired images, click “Done” on the upper right side to proceed. - Confirm and export listing
Review your selected images and click Export Listing to send them back to RealSmart Agent.
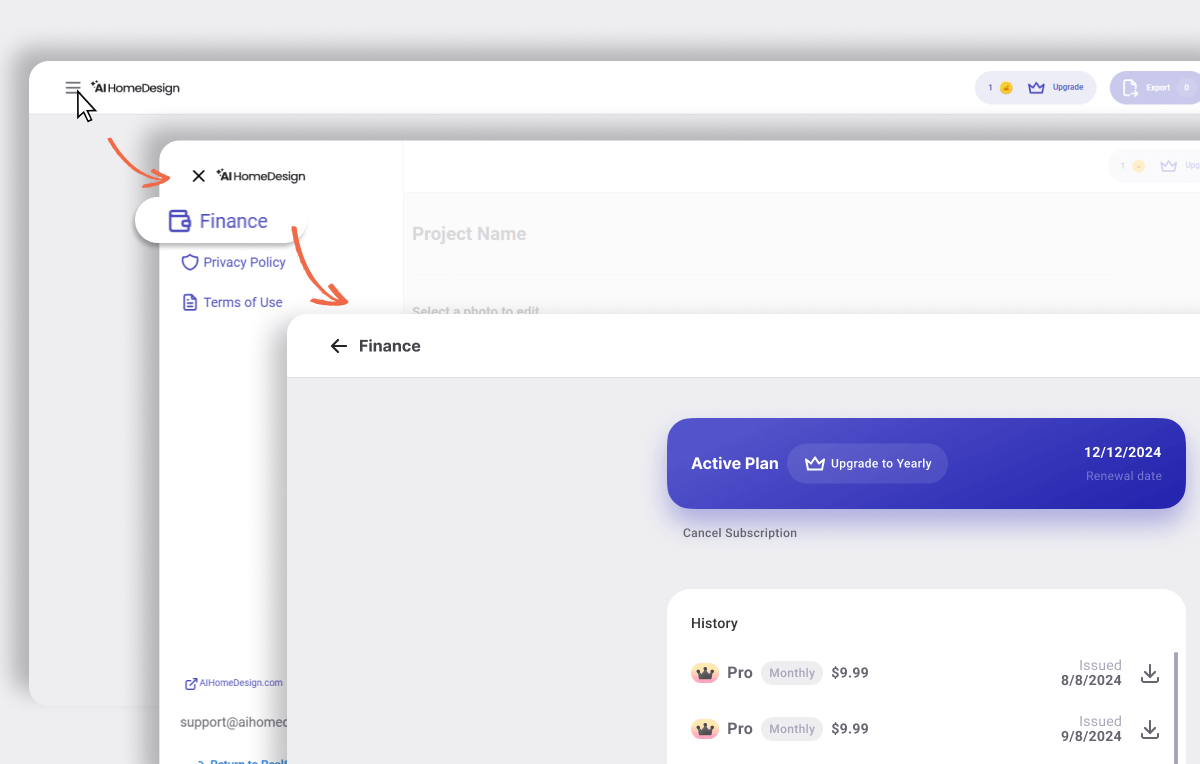
Manage Your Plan with Ease
The Finance menu makes it simple to keep track of your subscription, billing, and purchase history.
In the Finance menu, you can:
- Check your plan’s expiry date
- Cancel your subscription if needed
- View your purchase history
Start Free. Grow Fast.
Explore AI HomeDesign with a free trial before committing to a subscription.
No credit card free trial!
With AI HomeDesign’s free trial, you get:
- 1 free credit to test the platform
- Test all core services (Virtual Staging, Photo Editing, Interior Design, and Renovation)
- Use multiple regenerations on a single photo
When you’re ready to upgrade, click “Upgrade” to unlock full access!
Start Exploring Your AI HomeDesign Dashboard!
That’s it! You’re now ready to use AI HomeDesign directly through RealSmart Agent to enhance your listings with speed and ease.
If you have any questions or run into any issues along the way, our team is here to help. Just reach out to us at support@aihomedesign.com.
We’d be more than happy to assist!