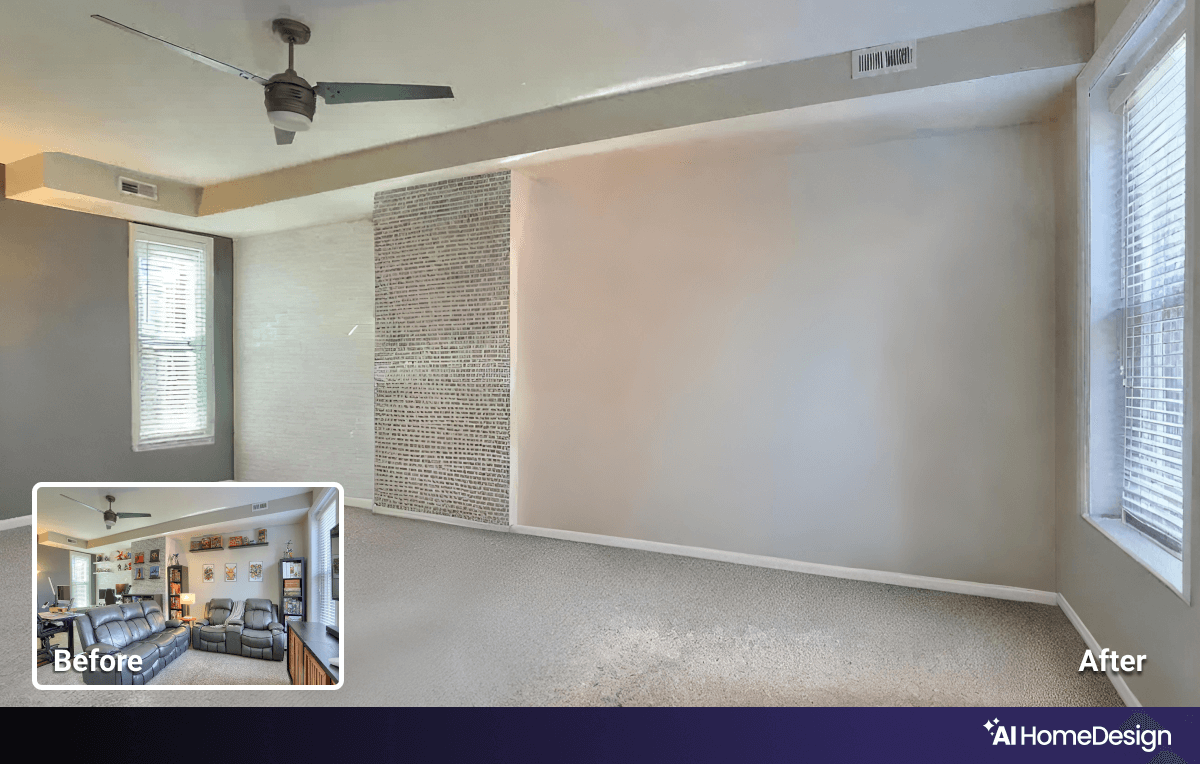
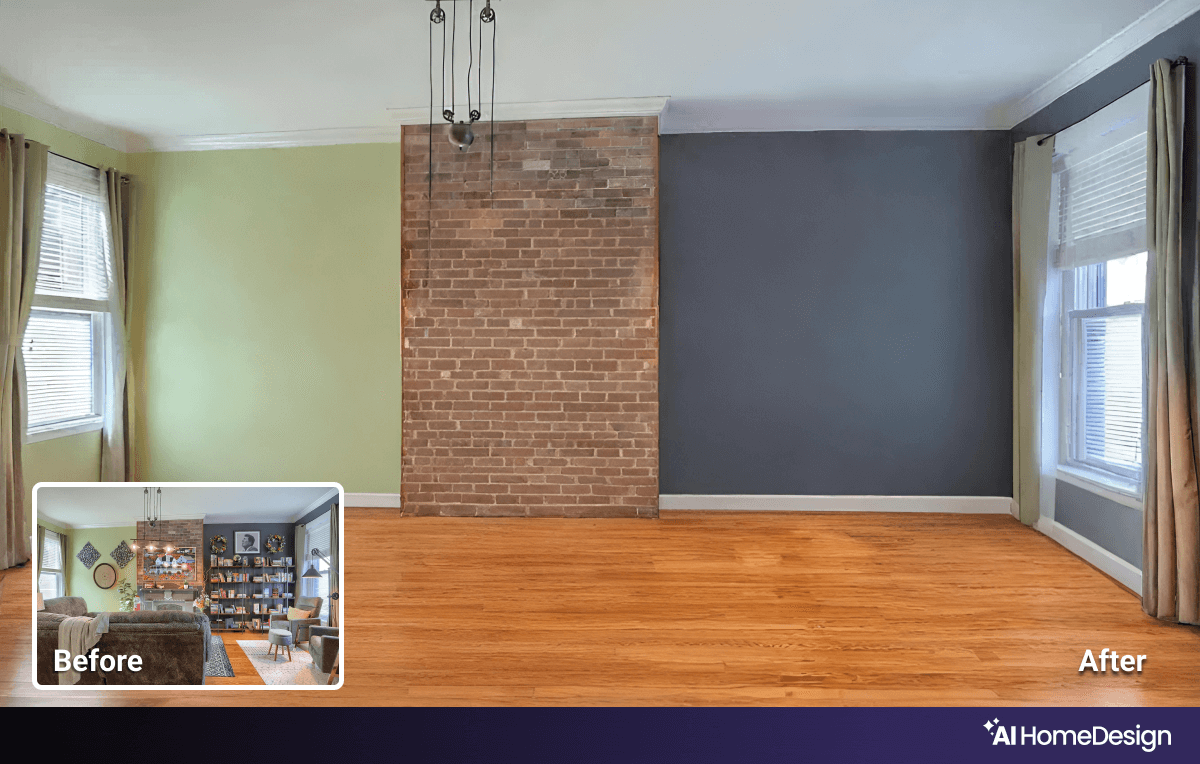
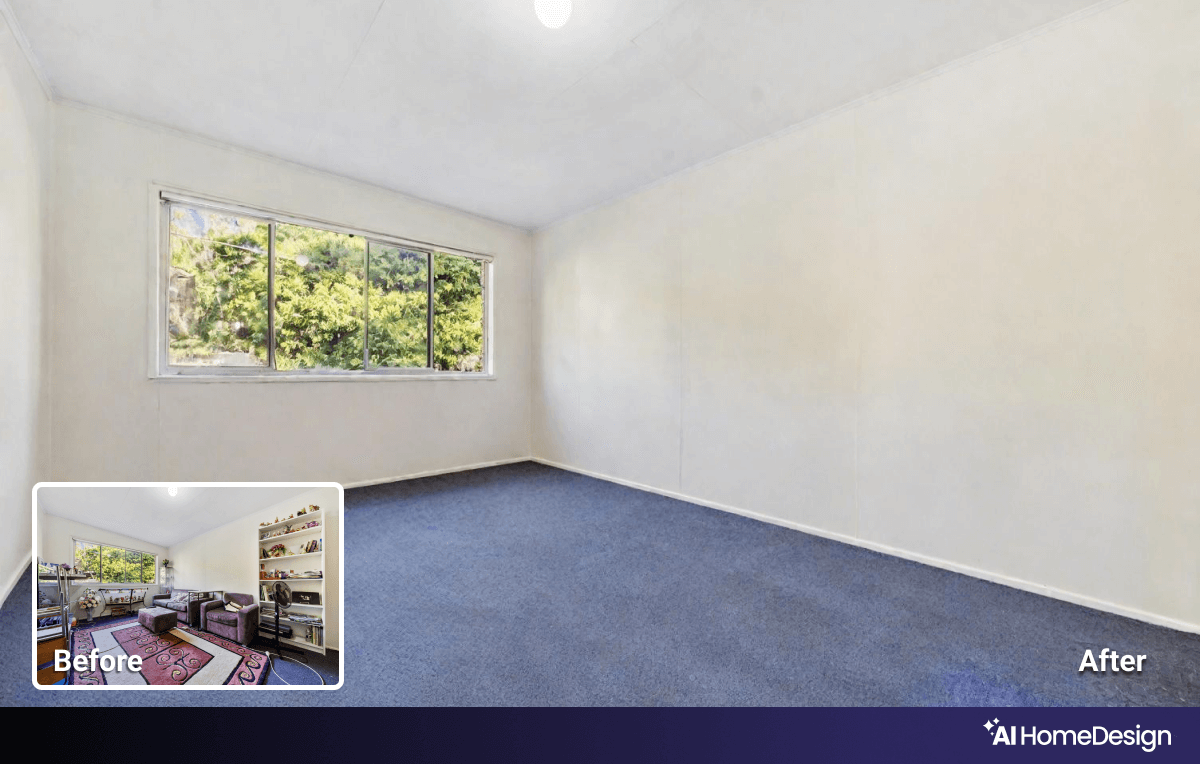
Item removal in real estate photography is a crucial part of the editing process. This step eliminates unnecessary and distracting objects using digital tools. There are two primary reasons for this:
- It helps clients focus on what truly matters; and,
- It influences the emotions clients experience when viewing the photo.
We all know that professional real estate photography can be challenging and expensive. However, if you decide not to hire a pro, you must invest time and effort into editing. Using unedited, raw photos in your listings can drive potential customers away by not meeting their needs.
Two Key Points Overlooked in Item Removal Tutorials
Fortunately, various tools and resources are available for item removal in real estate photography. From computer programs to mobile apps to AI services, you have a wide range of options. Also, numerous online tutorials can help you learn how to use these tools effectively.
However, two key points are often overlooked in item removal in real estate.
First, it’s essential to understand what defects may appear when removing distracting items, and, more importantly, how you can go about fixing them. Secondly, identifying which objects to remove is crucial to help clients see the property as a solution for their needs. Next, we will explore these two and other important points in detail when you wish to go about item removal in real estate.
Overcoming Challenges in Real Estate Photo Editing
As mentioned, many tutorials are available for teaching item removal in real estate photos. At AI HomeDesign, you can find a suitable tutorial that covers simple retouching techniques, such as noise reduction, imperfection fixing, and spot removal.
In this tutorial, we’ve explained various image retouching techniques aimed at optimizing your listings. We’ve also emphasized that the more photos you retouch, the more professional your listings will appear.
But no matter how professional you are, difficulties will come up along the way. It’s crucial to address any challenges you might face, so let’s discuss those in detail.
Let’s explore the main problems you might encounter and their solutions. If you’re in a hurry to edit your images, why not give our AI Item Removal tool a try? Don’t forget to utilize the six free credits we’ve provided in our professional AI tool.
Visible artifacts
If item removal in real estate photos isn’t done correctly, noticeable artifacts may remain, distracting viewers. To overcome this challenge, you need to master a tool often referred to as the healing brush.
To spot artifacts, zoom out or use a different monitor after editing. If you see any extra artifacts, go back and refine your edits using the healing brush or clone tool.
Maintaining consistency while removing items
Ensuring that edited areas match the surrounding texture and color can be tricky, as inconsistent edits often create noticeable spots that subtly discourage viewers. Clients inevitably judge the quality of your work based on the integrity of your property photos. When manually removing items from real estate images, it’s important to use the clone stamp tool with care to sample nearby textures.
Take your time to adjust colors and lighting, ensuring that the edited areas blend seamlessly with their surroundings. Poorly executed item removal can result in an unnatural look, distracting viewers from the property instead of enhancing the image.
To overcome this, focus on making subtle edits. If an area appears unnatural, undo the edit and adjust only a specific portion, blending it with the surrounding areas for a more organic appearance.
Precision during item removal in real estate
Achieving precision in item removal can be challenging. It’s easy to accidentally remove parts of the intended image or create unwanted artifacts around the edited area.
To enhance your precision, zoom in while editing to get a closer look. In editing tools like Adobe Photoshop, you can use feathering or soft edges to blend the removed areas seamlessly with the surrounding pixels.
Layer management
Managing layers effectively can indeed feel overwhelming, especially for those new to photo editing. If you don’t fully understand how layers work, you risk making unintentional edits that can compromise your entire project.
To streamline your layer management and enhance your workflow, it’s crucial to label each layer clearly and descriptively, indicating its purpose. Whether it’s for background elements, adjustments, or specific edits, consider color-coding layers or grouping similar layers together for even better organization.
This way, you can easily navigate through your edits, allowing you to make changes without inadvertently affecting the entire image. A well-organized layer structure not only saves time but also empowers you to experiment freely, knowing that you can revert to previous states without hassle.

Over-editing
Beware of the temptation to over-edit, as it can lead to an unnatural look. Removing too much may make your image feel flat or unrealistic. Always question whether your edit enhances the image. Step back frequently to assess the photo as a whole, and avoid the dangerous pitfalls of over-correction.
Removing too much or the wrong part of an image can cause you to lose essential visual elements that tell the property’s story. To combat this risk, always keep a backup of the original photo when you’re practicing item removal in real estate. If you accidentally remove something important, you can easily revert to the original file.
Wasted time and effort
If your initial edit doesn’t meet your standards, you’ll have to redo the work. This leads to wasted time and potential frustration. To prevent this, develop a systematic editing approach. Create a checklist of steps to follow so you know exactly what to do, helping you avoid unnecessary re-edits.
Don’t stress about the time you’ll invest in creating a checklist. Tools like checklists that enhance your self-learning process are anything but a waste of time; they actually save you time during your projects. Over time, you’ll find that your ability to create checklists improves, your skills will develop, and eventually, you might not even need to rely on them anymore.
Strategies for Item Removal in Real Estate Images
By following the tips above, you can easily tackle challenges in removing unwanted items from real estate photos. Another key challenge is figuring out which objects to remove. This is important for helping clients see the property as the perfect living space.
Start by identifying and understanding which listing you’re showing to each customer. You may want to create different edited versions of each image, removing different items in each version. Use other real estate photo editing techniques to highlight other important features of the property as well.
To do this effectively, understand the common items found in real estate photos and what each item communicates to your audience.
In the end, deciding what to keep and what to remove depends on your audience’s needs. Observe how different items impact viewers and take note of your clients’ preferences.

The importance of providing a white canvas
In capturing professional images of properties, the absence of objects can be just as important as their presence. While you can influence the audience’s emotions by strategically placing objects in an image, remember that potential buyers want to envision themselves living in a given house. Therefore, understanding your client’s aspirations is crucial before undertaking item removal in real estate photography.
One effective way to create a white canvas is to highlight the home’s flooring. Buyers are eager to see the type, condition, and quality of your hardwood floors or tiles. By keeping the space clear, clients can freely envision themselves living in their dream homes.
Do personal items play a role in real estate images?
It’s essential to remove personal belongings and clutter from communal areas of the home. Personal items only contribute to real estate images if they’re highly iconic. Items such as toothbrushes, combs, and clothes have no place in property photos. However, keeping some personal items in a box can be beneficial.
For example, displaying a table with photo frames can create a warm and inviting atmosphere for clients.


Showing pet-friendliness or risk concerning clients?
Whether to track pets during item removal in real estate photos depends on local culture and your target audience. Many people prefer to remove any signs of pets from the images. Pet footprints can raise concerns about tidiness or potential damage.
However, sometimes showcasing a pet’s presence can highlight that a property is pet-friendly.


Decide in the moment
Based on our discussion about items in property photos, it’s sometimes essential to decide on the spot whether to keep or remove each item.
For example, if you know your images will be shown during special occasions like Christmas, adding seasonal items can enhance the mood. A festive touch can indeed complement a white canvas.
However, avoid keeping these decorations in photos outside of relevant seasons. If a listing remains on the market for an extended period, your images may become outdated as seasons change.
Final Thoughts
In this article, we’ve shared everything you need to know about item removal in real estate photos and how to implement it effortlessly.
With the guidance provided, you’ll find that no technical challenge is beyond your reach. With a bit of practice, you can easily master the art of object removal using editing software like Photoshop and confidently tackle larger items.
Moreover, when you understand your customers’ needs clearly, deciding which items to keep or remove will feel like a breeze!
If you still feel you’re not quite ready yet, you can also transform your photos by easily removing unwanted objects and distractions with our amazing AI Item Removal tool. Our advanced AI technology swiftly identifies and eliminates clutter, leaving you with clean, focused, and visually stunning images!


