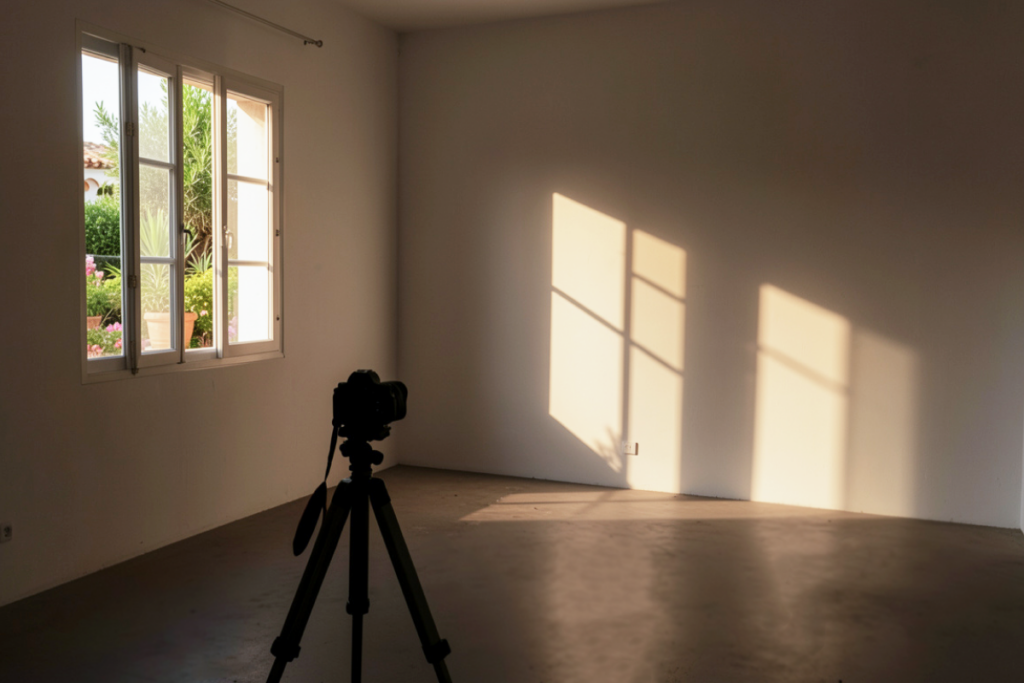
Dark rooms can weaken a real estate listing before buyers read a single word. The best staging ideas for dark rooms begin with image quality and lighting, not furniture alone. Once the base photo is strong enough, virtual staging can help the space look brighter, clearer, and easier to interpret in listing photos. The aim is to improve presentation without misrepresenting the property.
What Virtual Staging Does in Dark Rooms
Virtual staging helps buyers understand empty rooms more easily by adding digital furniture and decor to listing photos. In dark spaces, the process needs more care because low-light images can reduce detail, flatten color, and increase the risk of visible editing artifacts.
In dark rooms, staging only works well when the base image is already under control. The best results usually begin with a clean room, better lighting, and the strongest base photo possible.
Editors can then clean up distractions, correct exposure, perspective, and color balance, and apply staging that fits the room’s actual scale and lighting. Virtual staging is one example of how AI in real estate can improve listing presentation and marketing workflows.
In rooms with bright windows, HDR bracketing with three to five exposures can help balance the image. In much darker rooms, flambient methods often produce cleaner results. Once the base image is stable, virtual staging can improve the presentation without making the room look artificial or misleading.
Even then, disclosure still matters, and permanent features should never be hidden or changed.
What to Prepare Before Virtual Staging a Dark Room
Dark rooms need more preparation before virtual staging begins. Strong results start with better planning, both in the room itself and in the way the shoot and edit are handled.
Start by preparing the space itself. Clear surfaces, remove visual clutter, and straighten anything permanent that should stay visible in the final image. It also helps to decide in advance how the room should function once staged, since that affects furniture choice, layout, and style direction later in the process.
It also helps to plan the image workflow before editing begins. In rooms with bright windows and darker interiors, HDR bracketing can help preserve both highlight and shadow detail.
In very dark or windowless spaces, flambient capture is often the better option because it tends to produce cleaner, more balanced color. For capture planning, a guide to real estate photography cameras and lenses can also help inform equipment choices.
How to Photograph a Dark Room Before Virtual Staging
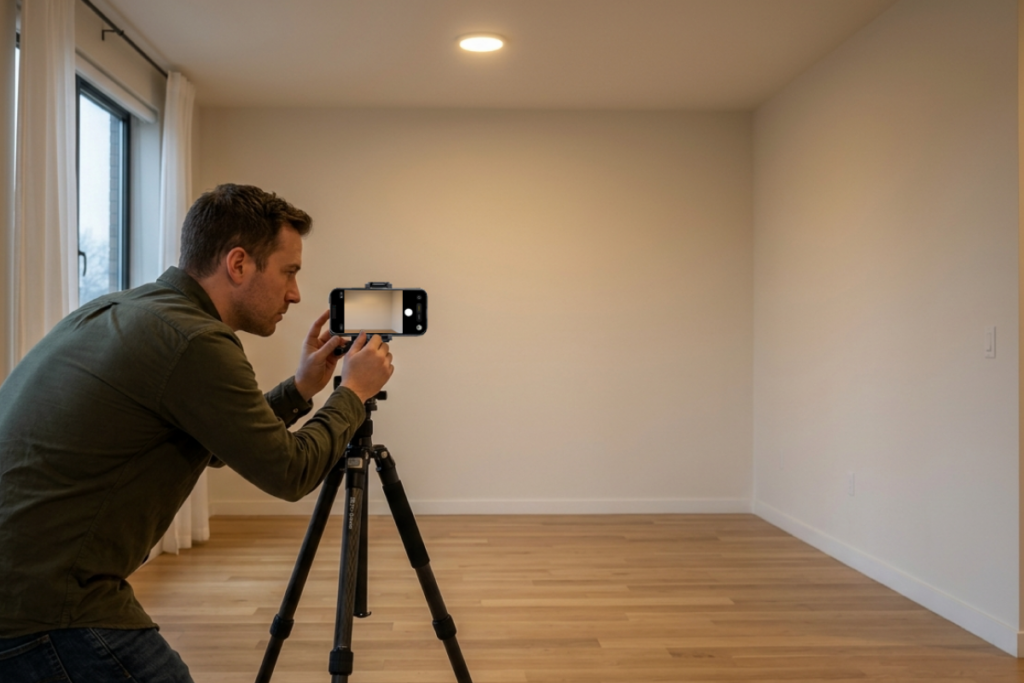
Clear surfaces, remove visual clutter, and straighten anything permanent before shooting. A clean base photo reduces distractions and improves later real estate photo editing.
Before taking the photo, focus on a few basics:
- Turn on the most consistent light sources available.
- Reduce mixed lighting when possible to avoid uneven color.
- Open window coverings if daylight helps the room read more clearly.
- Mount the camera or smartphone on a tripod for stability.
- Frame from a corner at chest height.
- Show two walls and some floor to create depth.
- Keep vertical lines as straight as possible.
When the space still has usable ambient light, HDR brackets of three to five exposures can help preserve both highlights and shadows. In very dark rooms, flambient capture often produces cleaner and more balanced results.
When HDR Is Enough and When Flambient Is Better
Use HDR when three to five bracketed exposures are enough to balance window light and interior detail. In rooms that still have usable ambient light, this is often the simpler option.
Choose flambient when the room is very dark or windowless, or when HDR alone leaves muddy color, weak contrast, or visible noise. In those cases, flambient often produces cleaner and more balanced results.
Apply AI Decluttering, Relighting, and Virtual Staging in the Right Order
Start by cleaning the image before adding any furniture or decor. AI decluttering should come first because a cleaner room gives the editing process a clearer base and reduces the chance of staging objects being placed over distractions.
Before staging begins, correct the photo itself. In dark interiors, that usually means fixing exposure, perspective, and color balance first, then relighting the image so the room looks more natural.
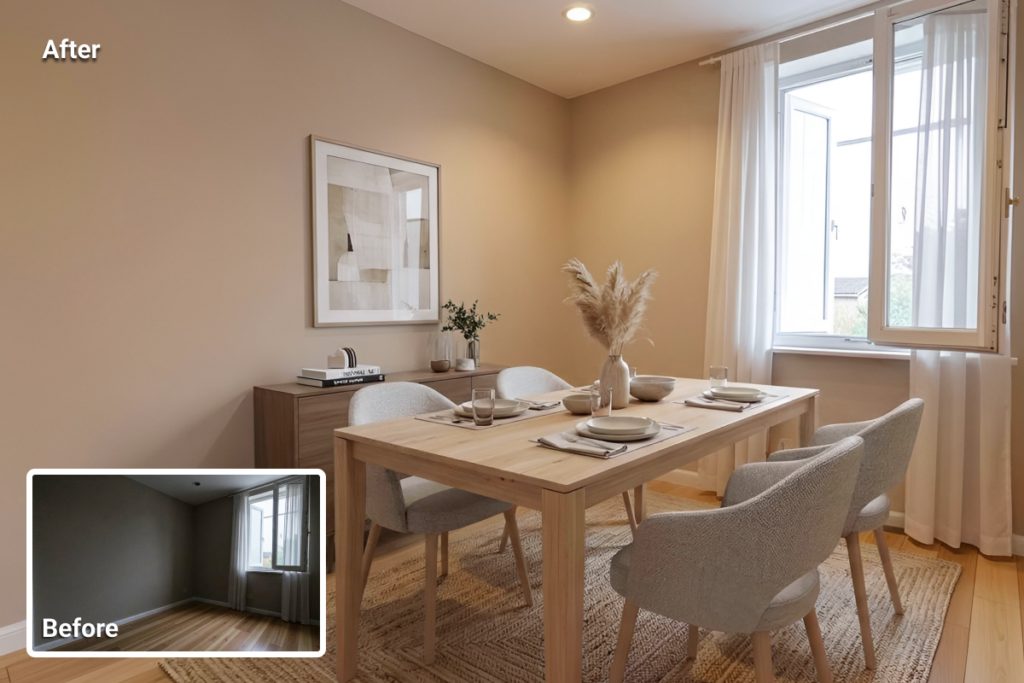
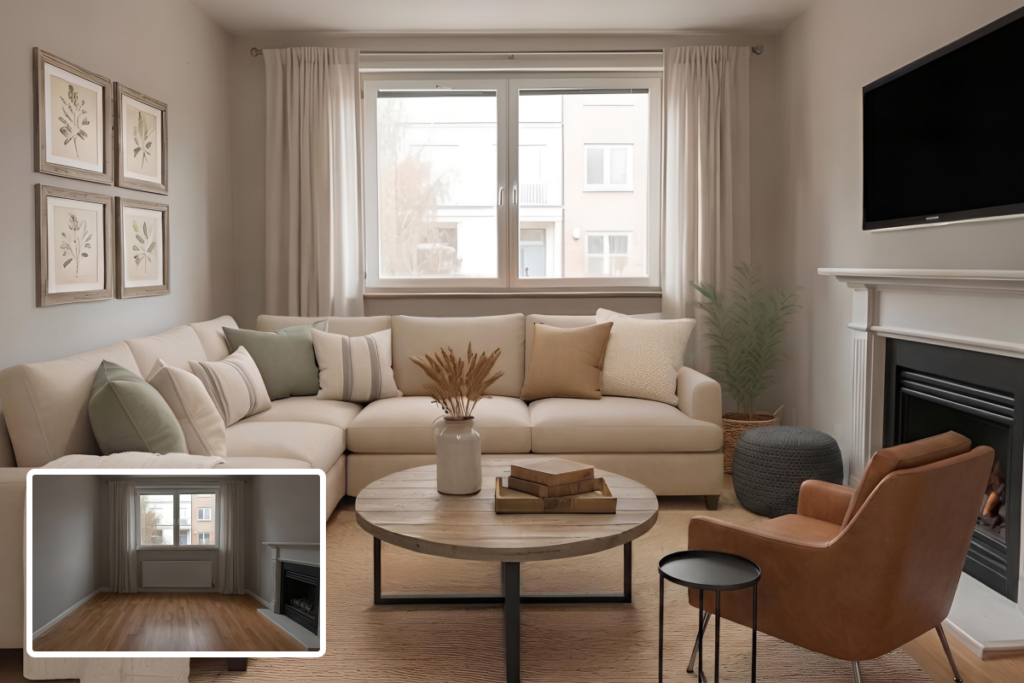
Virtual staging should come after those corrections, not before. That order helps reduce artifacts, improves scale, and makes it easier for furniture to match the room’s real light direction, softness, and color temperature. It also helps the final image look more believable rather than overly processed.
When applied at the right stage, AI virtual staging can improve presentation much faster and at a lower cost than physical staging.
How to Prompt AI So Staged Rooms Look Believable
Do not try to force every instruction into a single prompt. Better results often come from building the scene in steps, especially after exposure, perspective, and color balance have already been corrected.
A practical prompt sequence usually looks like this:
- Start with the room type, such as a living room, bedroom, office, or dining room.
- Define the design style, such as modern, transitional, coastal, or Scandinavian.
- Add key furniture pieces and layout priorities, including sofa size, bed placement, clear walkways, and the room’s focal point.
- Refine the lighting so the staged elements match the tone of the original photo.
Furniture scale matters. Oversized sectionals, tall lamps, or too many accent pieces can make the room feel misleading and weaken the listing’s credibility.
The staged furniture should also match the room’s real lighting, including direction, intensity, softness, and color temperature. If window light falls from the left, the shadows and highlights on staged objects should follow the same pattern. That helps the final image look integrated rather than pasted in.
Review for Realism Before Publishing the Listing
Before export, compare the staged image with the original base photo. This makes it easier to catch issues that might look acceptable in the render alone, especially in dark rooms where lighting and staging need to work together.
Check the following before publishing:
- Match shadows and highlights to real window and lamp positions.
- Make sure furniture looks grounded rather than floating or pasted in.
- Compare furniture scale with doors, windows, and wall lengths.
- Watch for mixed lighting or mismatched color temperatures.
- Remove extra decor if the styling makes the room feel tighter.
A final human review still matters. It helps catch scale problems, low-light artifacts, and styling choices that automated tools may miss. If the image will appear on MLS, confirm that disclosure requirements are met before export.
MLS Disclosure and Ethical Guardrails for Virtual Staging
Human review and MLS disclosure should be the final step before publishing. Even when an edit looks realistic, it still needs to reflect the property accurately and align with local MLS rules for property listings and current expectations around virtual staging legality.
What must remain truthful:
- Do not hide visible defects.
- Do not alter structural elements.
- Do not remove permanent fixtures.
- Do not change room dimensions unless the image is clearly disclosed as a virtual renovation.
Before publishing the listing:
- Add a visible “Virtually Staged” watermark.
- Disclose the edit in the listing remarks.
- Place the original, unedited photo near the staged version when possible.
- Verify local MLS rules for property listings, since requirements can vary.
Clear labeling matters for both compliance and buyer trust. State what was digitally added and make it clear that the furnishings are shown for visualization only.
Common Mistakes to Avoid When Staging Dark Rooms
One of the most common mistakes is starting with a weak low-light photo. When the base image lacks clarity, later edits become less reliable. A tripod, chest-height corner framing, and, when possible, a wide-angle lens usually help produce a more usable source image. In difficult interiors, three to five HDR exposures or flambient photography often create a stronger starting point.
Another problem is leaving mixed lighting uncorrected. When warm and cool light sources stay in the same image, the room can take on unrealistic color shifts that become even more obvious after staging.
It is also a mistake to add furniture before correcting exposure, perspective, and color balance. Virtual staging usually works better once the room already looks photographically stable and easier to interpret.
Over-styling can also weaken the result. Layouts should stay believable and match the room’s actual function. Scale matters just as much. Oversized sofas, tiny rugs, or too many decorative elements can make dimensions feel inaccurate.
Lighting consistency is another area where staged images often break down. Furniture should match the room’s real light direction, shadow softness, and color temperature. Otherwise, the final image can look pasted in rather than naturally integrated.
Disclosure should not be treated as optional. Staged images need to follow local MLS expectations and present the property honestly, without hiding or altering permanent features.
What to Expect From a Well-Executed Dark-Room Staging Workflow
A well-executed dark-room staging workflow should produce listing photos that look brighter, cleaner, and more realistic without feeling overprocessed. Light should appear balanced, furniture should feel grounded in the space, and the room should still reflect the property honestly rather than looking artificially redesigned.
Handled well, the final gallery looks cleaner, feels easier to read, and comes across as more trustworthy in a listing.
Expected Benefits of a Strong Dark-Room Staging Workflow
Done well, the final images are usually easier to publish and easier for buyers to interpret. The room looks clearer, the layout reads faster, and the staged furniture supports the space without overpowering it. Compared with physical staging, the process is also faster and more affordable, especially when the source image is strong enough from the start.
Before publishing, the final image should still be reviewed for realism, labeled clearly, and checked against disclosure requirements. Before publishing, it can also help to review how to prepare real estate photos for MLS. If the capture and editing process is already solid and the next question is platform choice, the next step is to compare the best virtual staging software for real estate.
Quick Checklist
- Declutter and prepare the room before shooting.
- Use a tripod and shoot from a corner at chest height.
- Choose a wide-angle lens or a high-quality smartphone.
- Capture bracketed exposures when HDR is needed.
- Use flambient capture for very dark or windowless rooms.
- Correct exposure, perspective, and color balance before staging.
- Apply AI decluttering first, then relighting, then virtual staging.
- Build the staged scene in steps, starting with room type, style, and key furniture.
- Check furniture scale, shadow direction, light softness, and color temperature.
- Add a visible “Virtually Staged” watermark, disclose the edit in listing remarks, and keep the original photo nearby.
Final Thought
Dark rooms need more care than brighter interiors because editing mistakes tend to show faster. When the process is handled well, the final image looks clearer, more believable, and more useful in a listing without pushing the space beyond what the property actually offers.
Just as importantly, staging should support the listing without distorting the property. That means keeping scale believable, matching light direction and color temperature, and reviewing the final image for realism before publishing. Clear disclosure still matters, especially when the image will appear on MLS or in client-facing marketing.
Used carefully, virtual staging can make dark rooms easier to understand and easier to market without the cost and delay of physical staging.
FAQs
Can you virtually stage a very dark room?
Yes, but only if the base photo is usable. Very dark rooms usually need tripod capture plus HDR or flambient correction before staging.
Is HDR enough for dark real estate interiors?
Sometimes. For very dark or windowless rooms, flambient usually produces cleaner color and fewer muddy shadows than HDR alone.
What is the correct order for editing dark-room listing photos?
Prepare the room, capture the photo, declutter, relight, then stage. Review realism and add disclosure before exporting.
How do you make virtual furniture look realistic in a dark room?
Match the room’s actual light direction, intensity, softness, and color temperature. Also check scale so furniture does not look pasted in.
Do MLS rules require disclosure for virtually staged photos?
In many cases, yes. Requirements vary by MLS, so disclosure should always be checked before publishing. A visible “Virtually Staged” label, a note in the listing remarks, and access to the original image are common safeguards.
What are the biggest mistakes to avoid?
Poor low-light photos, mixed lighting, over-styling, bad scale, and missing disclosure are the main issues. Those mistakes reduce trust and can create compliance risk.