Picking a new paint color from a swatch still feels risky. The same goes for siding, roofing, and landscaping, since the eye never sees those choices in context until the job is finished. That is why curb appeal decisions often stall, or swing too far, right before a listing or renovation starts.
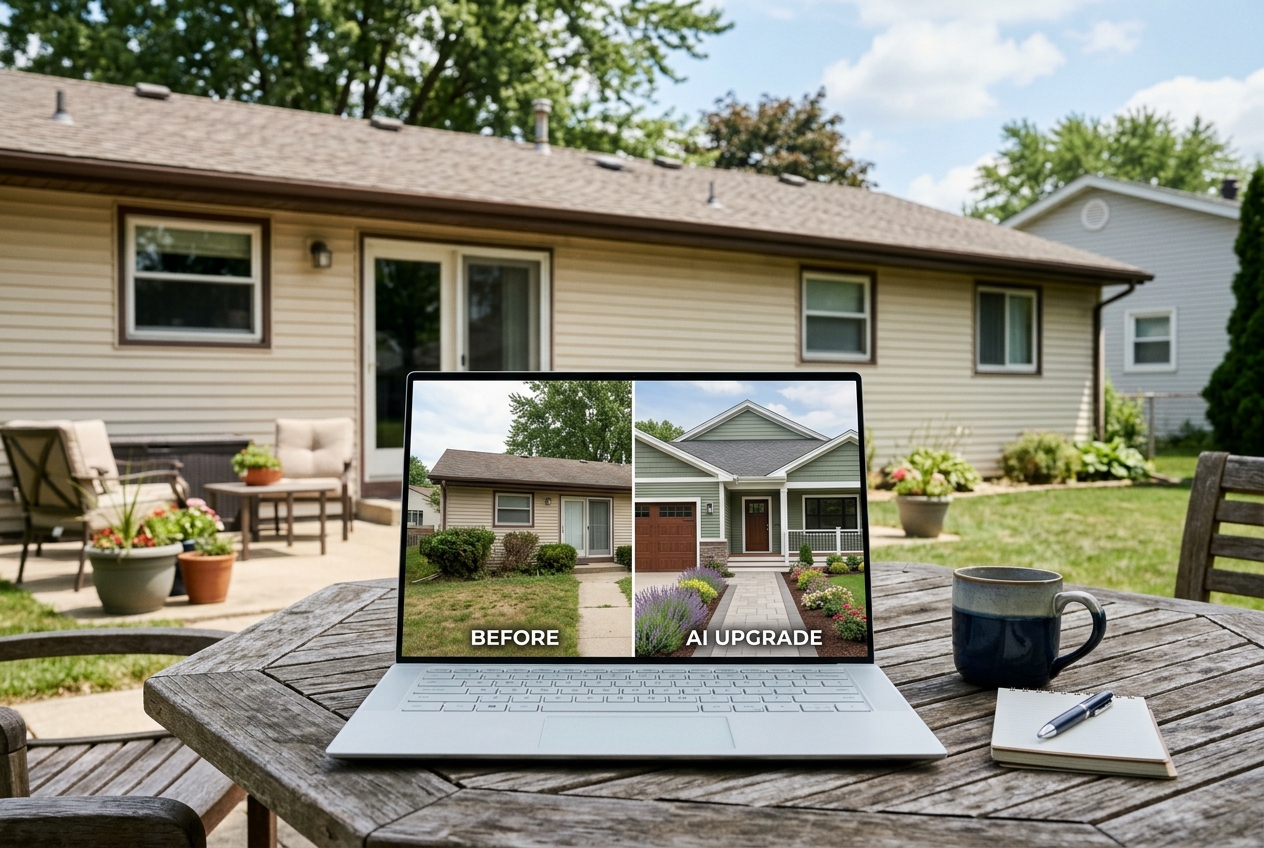
AI exterior design tools change the order of operations. A homeowner can upload one exterior photo, generate multiple AI exterior render variations, and compare options before calling contractors. That “preview first” approach also fits modern real estate workflows, where visuals move faster than sketches and long email threads.
For a wider view of how this fits into the category, start with AI is transforming real estate, then use the workflow below to keep exterior decisions grounded and low risk.
Why Curb Appeal Still Moves Real Estate Value

Buyers form an opinion from the street and the first listing photo. That pressure makes exterior work feel urgent, even when the budget stays limited. The smartest move is not “do more.” The smart move is to spend on changes that look clear from the curb and read well in photos.
Industry research on outdoor projects supports that focus. The National Association of REALTORS tracks how homeowners and agents view remodeling outcomes, including which outdoor upgrades feel worth doing before a sale and which ones create visible impact for daily use. Agents can use the Remodeling Impact Report on outdoor features as a reality check when debates turn into guesswork.
AI curb appeal previews do not change resale math on their own. They help teams choose the right project and avoid the wrong one. A clear visual also prevents last-minute pivots, like repainting a front door twice because the “bold” choice fought with existing brick.
A practical rule helps: prioritize changes that sit in the buyer’s first frame. Front doors, trim contrast, clutter near the entry, and “dead” landscaping zones show up immediately. AI previews let homeowners test those ideas in minutes, before any vendor quote arrives.
What AI Exterior Design Tools Actually Produce
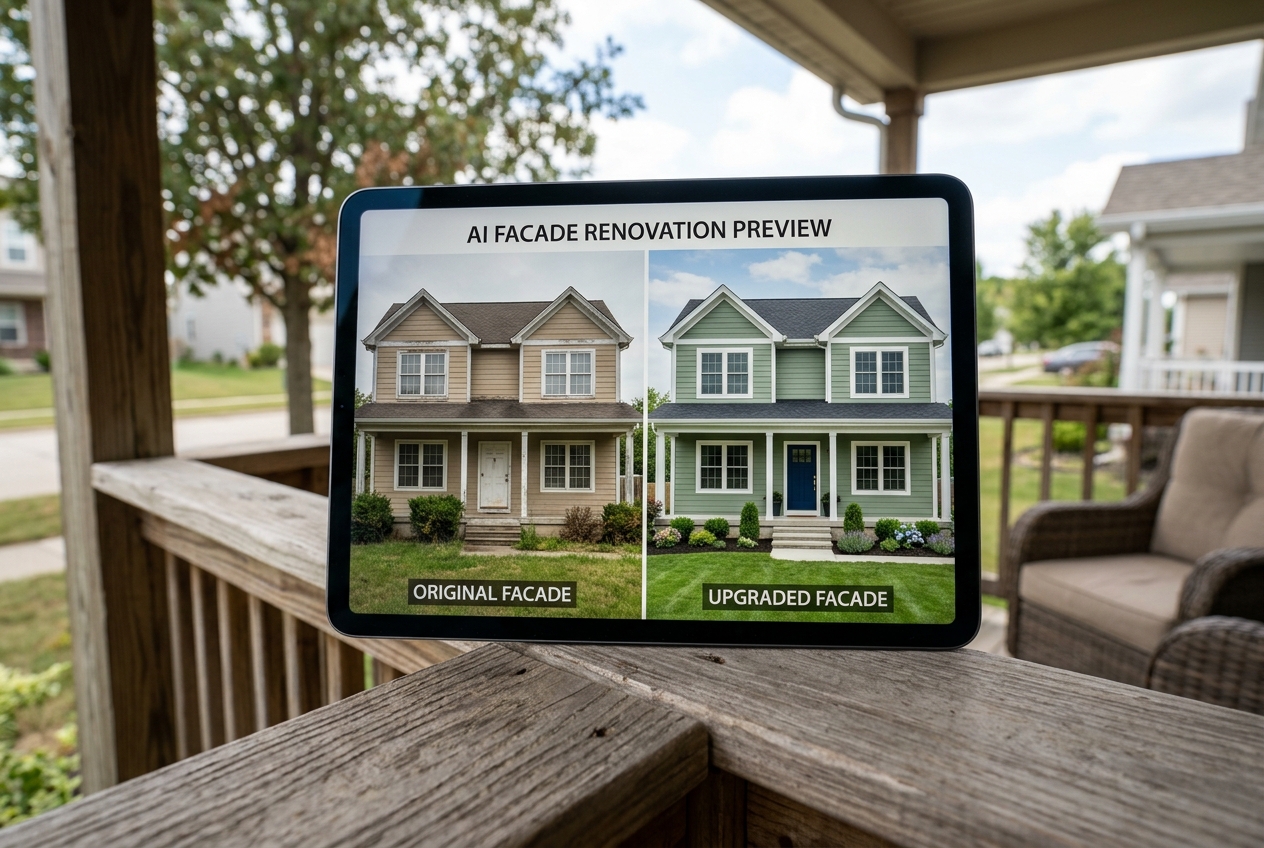
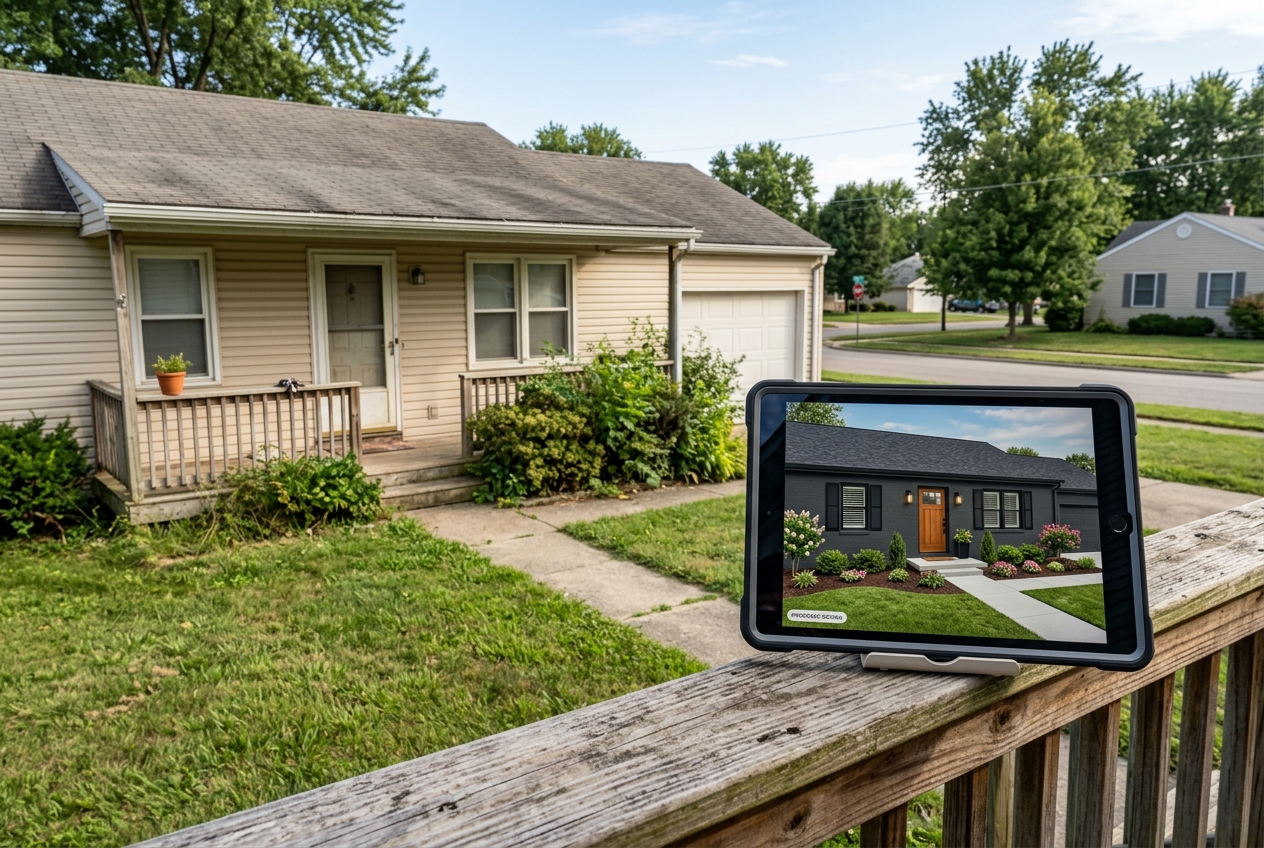
A good exterior visualizer does more than recolor a house. It generates variations that stay anchored to the photo’s geometry. Roof pitch, window spacing, shadow direction, and existing materials should remain consistent while finishes change.
Most tools follow the same pattern. The homeowner uploads a front elevation photo, picks an intent such as “new siding,” “new roof,” or “landscaping refresh,” then selects a style direction. The model produces a set of variations that show the same home with different combinations.
These outputs work best as decision documents. A render can answer, “Does charcoal siding make the roof feel lighter or heavier?” or “Do shutters crowd narrow windows?” It can also show whether a new pathway layout makes the entry feel more direct.
AI exterior previews overlap with photo editing, but the goal differs. Photo editing improves the current condition. Exterior design AI tools visualize a future condition. For related context on AI-driven visuals, AI in real estate photography breaks down where automation helps and where teams still need strong source images.
The Step-by-Step Workflow: From Photo to Preview
Fast tools still depend on one slow input: a usable photo. A simple workflow avoids rework and makes the output easier to share with agents, contractors, and HOA reviewers.
For deeper capture fundamentals that also apply to listing photos, use these real estate photography tips, then follow the steps below.
Step one: Capture a clean facade photo
Shoot from the street, not from the porch. A straight-on angle keeps vertical lines closer to true and helps the model understand the home’s symmetry.
Pick soft light. Overcast skies often beat harsh sun because deep shadows can confuse siding lines, roof edges, and landscaping borders.
Step two: Prep the frame before uploading
Move cars, trash cans, and yard tools out of view. Clear visual noise helps the tool “read” the entry path, planting beds, and trim boundaries.
Save the image as a standard JPG or PNG. Many tools accept both, and that avoids the surprises that sometimes come with HEIC phone files.
Step three: Choose one change theme per batch
Start with a single variable, like front door color, then run siding, then run landscaping. Stacking too many changes at once creates renders that look exciting but feel hard to build.
A homeowner can still reach a full “after” look. The difference is control, since each decision stays visible.
Step four: Generate several variations and compare side by side
Most tools output multiple options per run. Save each version and view them at the same size, on the same screen, under the same lighting.
A quick check catches common issues. Look for warped rooflines, windows that shift, or railings that lose straight edges. Those artifacts signal that the source photo needs a cleaner angle.
Step five: Build a shareable decision packet
Export a small set that includes the original, the top two renders, and brief notes. Notes should focus on visible choices, like “white trim, warm door, stone path,” not a full construction scope.
Send the packet two days before a contractor walk-through or a listing consult. That window gives stakeholders time to react without slowing the project.
Step six: Lock the concept, then request real bids
Use the selected render as a visual brief. Contractors still need measurements, product specs, and site conditions, since an AI render is not a construction document.
A homeowner can now ask for quotes on a clear target instead of a vague mood description.
Which Upgrades to Preview First and How to Compare Impact
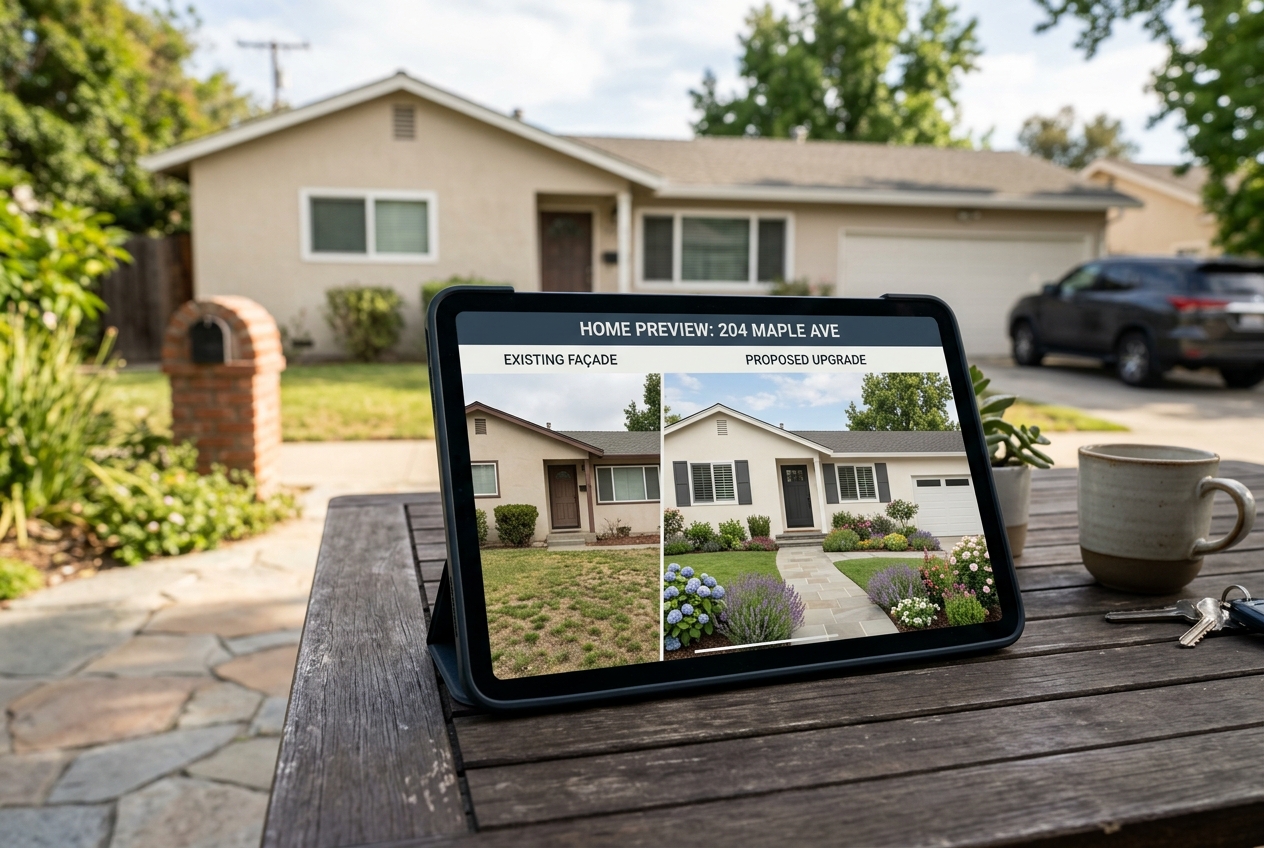
Exterior upgrades compete for the same dollars. AI previews help teams choose changes that read well from the street and in a listing photo, then avoid spending on details no one sees.
Start with the “entry story.” The front door, lighting, house numbers, and path shape tell the buyer where to look. A quick front door color AI preview can also solve common problems, like a door that disappears against dark siding.
Next, test the largest surfaces. Siding and trim color shifts change the home’s perceived size and cleanliness. Roofing color changes can also correct the “top heavy” look that happens when a dark roof meets mid-tone siding.
Landscaping and hardscape changes work best when they simplify. AI landscaping preview tools can show whether a new bed line frames the entry or just adds visual clutter.
| Upgrade area | What AI can preview well | What to decide before hiring a pro |
|---|---|---|
| Front door and trim | Color contrast, hardware style cues, entry emphasis | Neighborhood fit, HOA constraints, durability needs |
| Siding and paint | Whole-facade harmony, light vs. dark balance | Material choice, moisture management, install method |
| Roof and gutters | Color harmony, edge definition, visual weight | Venting, flashing details, local code requirements |
| Pathways and planting beds | Flow to the front door, bed shape, clutter reduction | Drainage, irrigation, plant hardiness |
A simple comparison method keeps decisions grounded. Pick one “hero change” and one “supporting change.” For example, new siding can be the hero, while simplified landscaping supports it. That approach reduces the odds that a pergola, shutters, and bold door color fight each other.
AI Preview vs. Hiring a Designer or Contractor Drawings
AI previews win on speed and iteration. A homeowner can test many looks in a single sitting. That speed matters when a listing timeline compresses or when a contractor needs direction before writing a quote.
Traditional designers still win on buildability. They account for grading, drainage, code, structural load, and product availability. AI images cannot confirm any of those constraints. A contractor also needs measurements, material specs, and clear scope language.
A practical workflow blends both. Use AI to narrow options, then pay for professional planning only after the look feels right. That sequence often reduces the number of paid revision cycles, since the homeowner starts with a clearer concept.
This mirrors the value logic behind digital presentation in other parts of real estate. The benefits of virtual staging frame why fast visual iteration helps decisions, even though staging and exterior renovation are different activities.
AI renders also help avoid the “two different conversations” problem. Without a shared picture, an agent talks about market appeal while a contractor talks about scope. A render keeps both groups oriented around the same target.
Where AI Exterior Previews Fit for Agents and Sellers
Agents often need a way to show potential without overpromising. AI exterior previews can support that, as long as the visuals stay clearly labeled and the listing copy stays accurate.
For listing prep, a render can answer, “What would this look like with a lighter facade and cleaner landscaping?” That helps teams decide whether to do a small real-world refresh or market the home with an “option” story. For broader campaign ideas that use visuals responsibly, AI real estate marketing covers how agents can pair AI content with compliant messaging.
For sellers, AI previews reduce disagreement about taste. A homeowner can see three options, pick one, and stop cycling through opinions. That also makes it easier to approve simple projects like paint, lighting, and bed cleanup.
For agents who already use digital visuals indoors, exterior previews pair naturally with virtual staging for realtors. The key difference is the promise. Staging shows a furnished space. Exterior renders show a proposed change that still requires real work.
Use clear Disclosure language whenever an image shows a future condition. A practical line that fits many contexts is: “Disclosure: AI-generated visualization. Not a photograph of the current condition.” MLS Rules vary by market and portal, so teams should also check local requirements, including whether a Virtually Staged Watermark is expected.
Common Mistakes and Edge Cases That Break the Preview
Bad source photos create bad renders. Wide-angle distortion, extreme shadows, and blocked facades cause warped lines and strange material boundaries. A quick fix is distance. Stepping back and using a less aggressive lens view often improves straight edges.
Many homeowners also change too much at once. A render that swaps siding, roof, windows, landscaping, and lighting in one run can look impressive but offers no clear decision. Separate the work into batches, then build a final “after” look from the best pieces.
Teams should also treat every render as a concept image. Contractors still need site checks. Exterior work involves grading, drainage, and local code, and AI cannot validate those constraints.
Several situations need extra care because the “preview before build” model has limits. Historic districts may restrict colors and materials. Townhomes and condos can block changes to shared exteriors. Rural properties may need decisions that account for long driveways, fencing, and outbuildings. Distressed sales can also require safety work before cosmetic work.
Finally, keep the deliverable clean. A shareable packet should include the original photo, the chosen render, and short notes that explain visible choices. Save commission details, contractor fee talk, and negotiation strategy for the in-person conversation, since those topics distract from design decisions and can raise trust issues early.
Frequently Asked Questions
Can AI really show siding, roofing, and landscaping changes on the same photo?
Yes, many tools can preview multiple exterior elements from one source image. The most reliable results come from running changes in batches, like siding first and landscaping second. That keeps geometry stable and makes it easier to spot artifacts. The final render should guide decisions, not replace drawings or site measurements.
What makes a photo “good enough” for an AI exterior render?
A usable photo shows the full facade, straight vertical lines, and minimal obstructions. Soft light helps, because harsh shadows can hide trim and siding edges. A street-level angle usually works better than a porch-level shot. If the tool warps rooflines or windows, the photo often needs a cleaner angle.
Can an AI render be used for an HOA change request submission?
Many homeowners include renders as visual support, since boards often respond faster to a clear image than to a written description. The packet still needs any required forms, product samples, and paint codes. HOA Rules vary widely, so teams should confirm accepted formats and labeling before submission.
What disclosure should appear on AI exterior images used in marketing?
A short, plain Disclosure helps prevent confusion: “Disclosure: AI-generated visualization. Not a photograph of the current condition.” Some MLS Rules and portals also require a Virtually Staged Watermark or similar labeling. Teams should follow local policy and keep the disclosure visible anywhere the image appears, including social posts.
Are AI exterior previews the same as virtual staging?
They solve similar problems but target different areas. Virtual staging focuses on interior rooms, adding furniture and decor to existing photos. AI exterior preview tools focus on facade and landscape changes, like paint, siding, roofing color, and pathways. Some platforms offer both, but the disclosure and use case often differ.
How should agents share exterior render options with sellers without overwhelming them?
A small set works better than a large gallery. Many teams share the original plus two options, each with one sentence on the visible choice, like “light siding with dark trim.” That keeps feedback focused. Budget talk, contractor selection, and negotiation strategy usually land better in a live meeting.