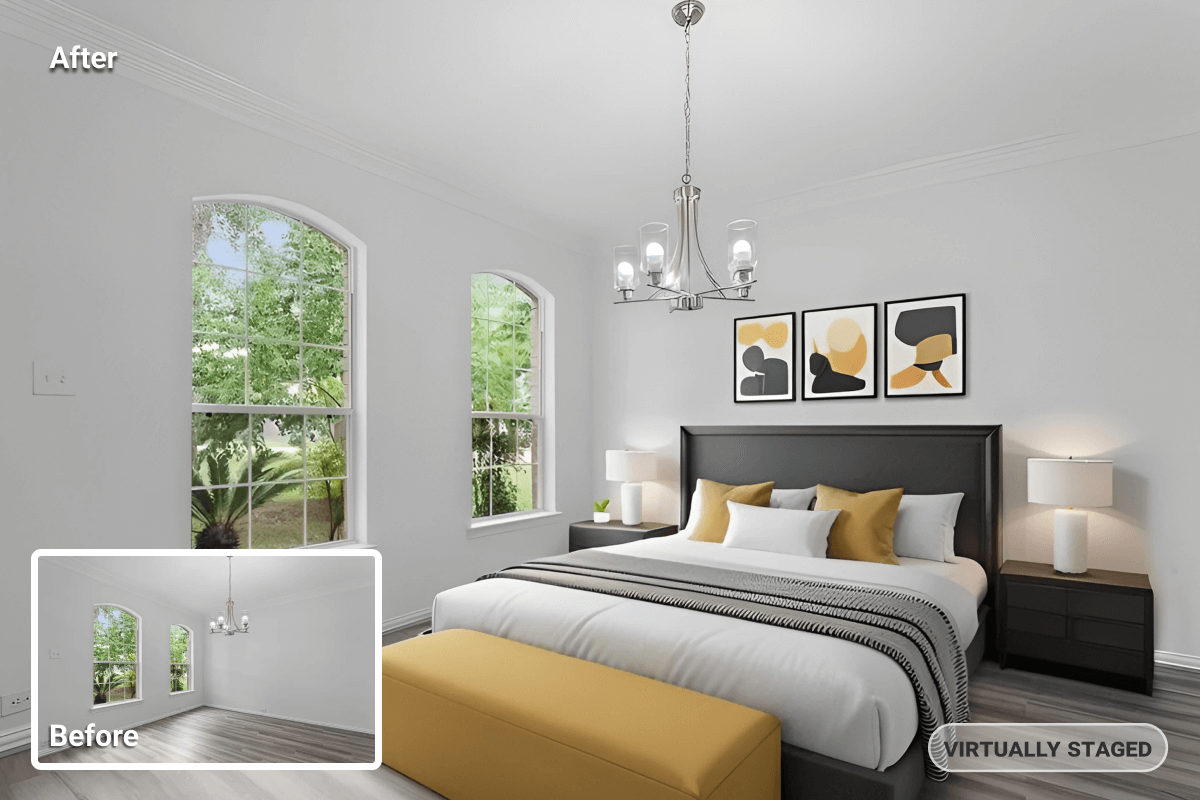
What Is DIY Virtual Staging With AI?

DIY virtual staging with AI means you upload a room photo to an AI staging tool, label the room type (e.g., living room), choose a design style, and let the model place furniture with proper scale and lighting.
You can also remove clutter, replace furniture, and enhance image quality in terms of exposure, sharpness, and noise.
")
")
When Is DIY Virtual Staging a Good Fit?
Use DIY virtual staging when you need listing-ready images in minutes, want to test styles and layouts without back-and-forth, or need tighter cost control across your properties. It works best on standard rooms with clear base photos.
For luxury listings, unusual architecture, or heavy relighting needs, it’s better to have a professional stage your images. Always add a short MLS remark noting that images include virtual furnishings. Here’s how you can perform your first DIY virtual staging with AI.
Before You Start
Before you begin staging your photos, make sure your images are ready for the best AI results. Clean, well-lit, and properly framed photos make a big difference in how realistic your final output looks.
- Declutter each room before shooting.
Remove personal items, cables, and decor that distract from the space. - Shoot in natural daylight whenever possible.
Even AI tools work better with balanced lighting. - Use a tripod.
Keep your phone steady to maintain consistent framing between shots. - Capture multiple angles of each room.
In case you plan to stage more than one view. - Avoid using filters or heavy HDR before upload.
Raw images help AI understand depth and texture more accurately.
Tip: Keep filenames consistent across rooms to make MLS uploads and client reviews easier.
Also, if your property is still occupied, take one clear shot per room with minimal furniture. AI tools can remove existing items automatically before staging.
DIY Virtual Staging: Step-by-Step Guide
Virtually staging a space with AI doesn’t require any special knowledge or skill. Everything you need to know about AI virtual staging can be summarized into a few steps listed below:
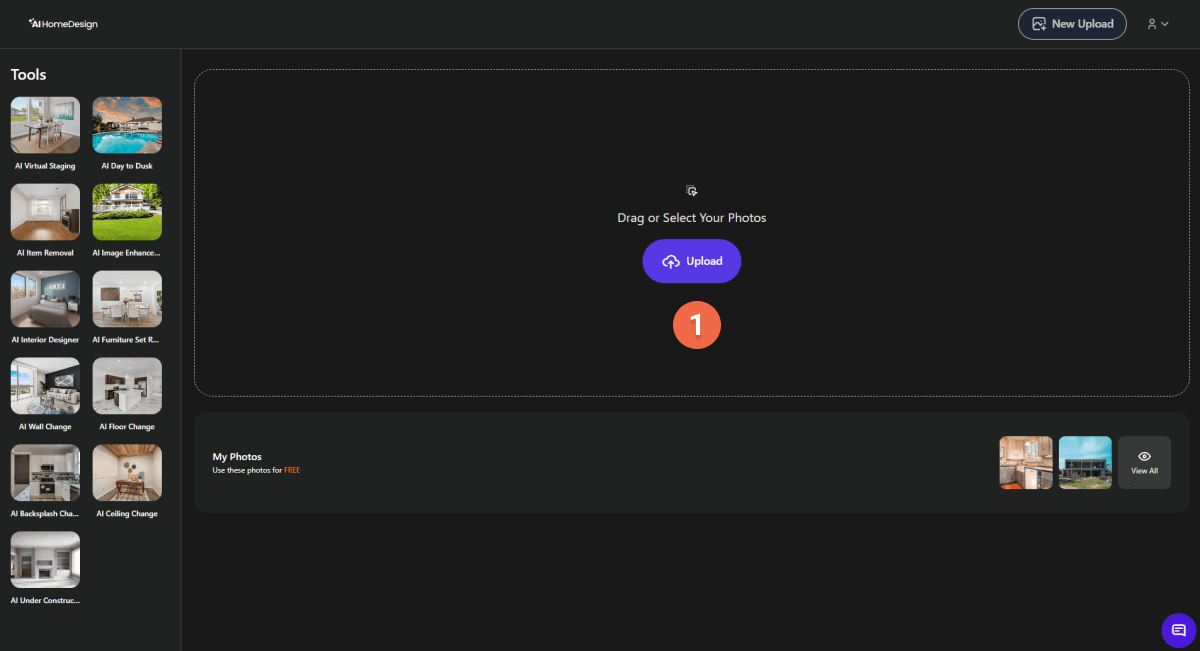
1. Open AI HomeDesign and sign in
2. Upload your Photo and click on Virtual Staging.
3. Select the room type.
With AI HomeDesign, you can stage the following spaces:
- Living room
- Bedroom (single & double)
- Dining room
- Home office
- Kids room
- Nursery
- Foyer
- Basement
- Bathroom
- Kitchen
- Outdoor
4. Choose a style and click on Generate
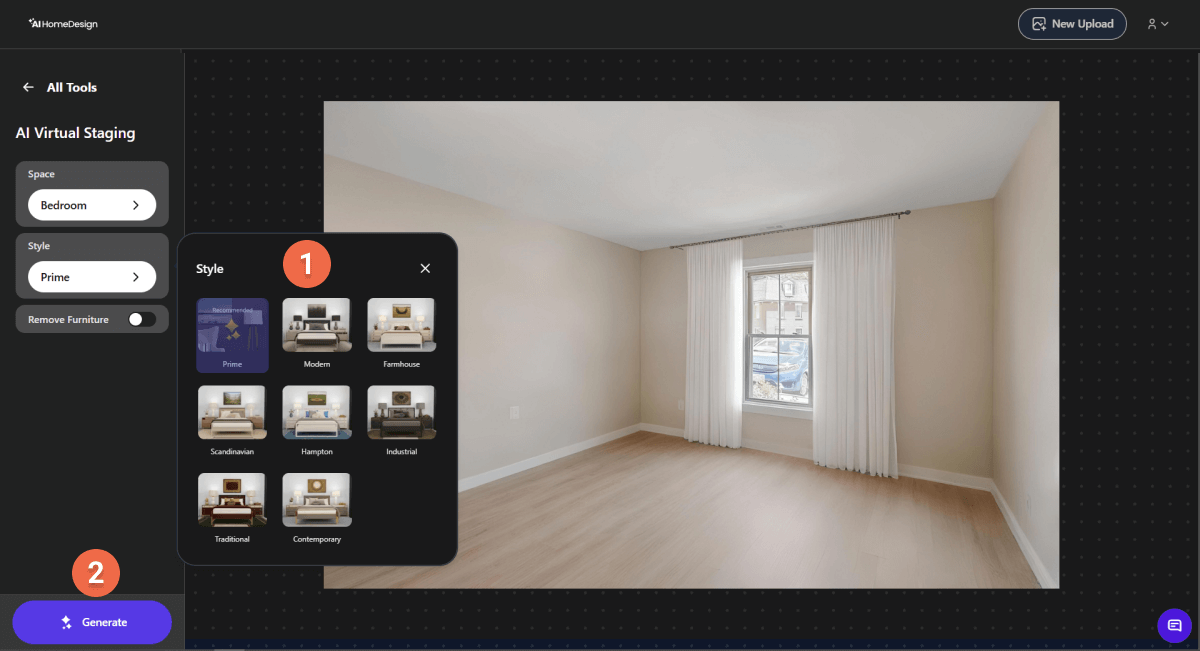
AI HomeDesign can design your spaces in the following styles:
- Prime
- Modern
- Farmhouse
- Scandinavian
- Hampton
- Industrial
- Traditional
- Contemporary
Before selecting your preferred design, if there are items in your room, turn on the “Remove Furniture” option. After choosing the style, click “Generate”.
5. Review the realism of the space.
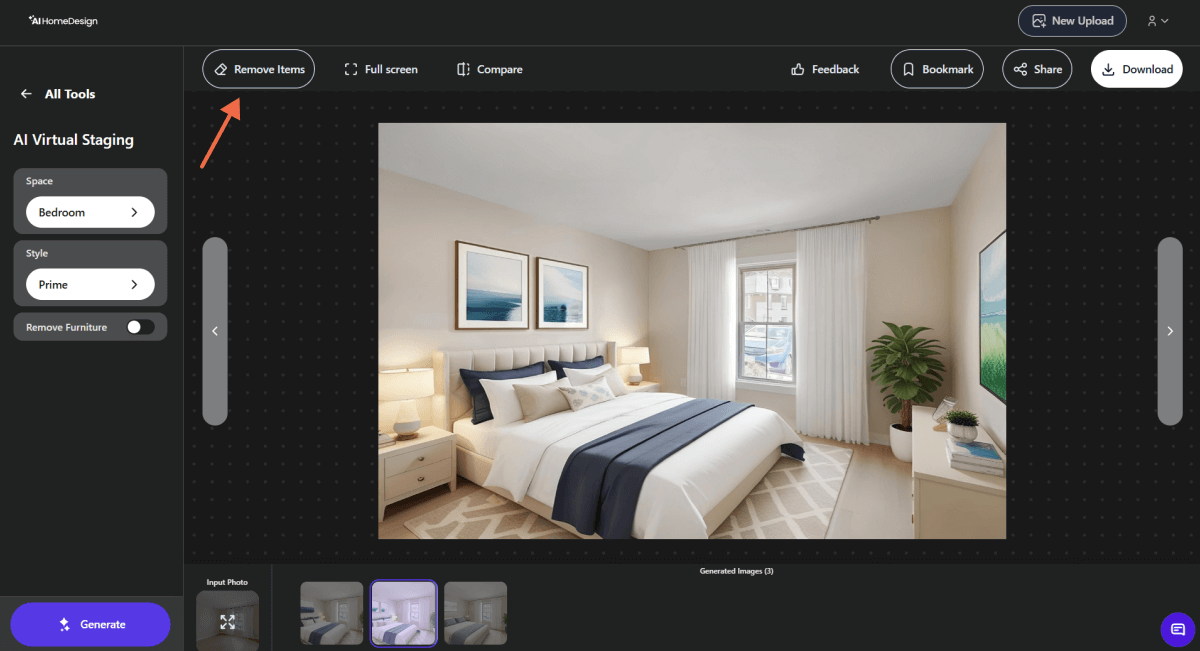
Check lighting, perspective, and proportions. With each generation, AI HomeDesign gives you three results. You can try other room types and styles and generate new results for free.
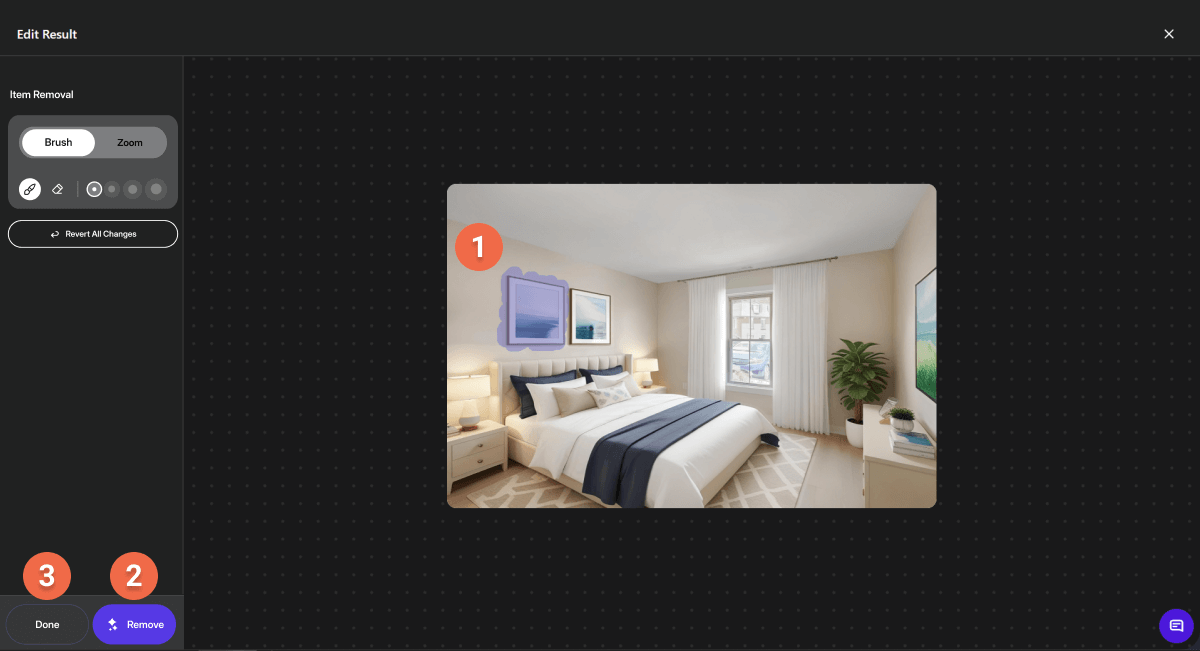
Also, you can remove unwanted items in the photo to make it more appealing. To use this option, click “Remove Items”. You’ll be navigated to a new page where you can choose a brush type and mask over the item you want to remove. After doing so, click “Done” to proceed.
6. Add your disclosure and download.

If you’re preparing those photos for a property listing, you should openly disclose that your images are “Virtually Staged” before listing to stay compliant with MLS rules.
To do so, click “download”, turn on “Virtually staged” label, choose where in the photo you want it to appear, and hit the download button again.
DIY Virtual Staging With AI: Common Mistakes and Quick Fixes
Here are several common mistakes first-timers might make when staging their photos using photo editing tools. Using a reliable AI staging tool would prevent you from running into such issues.
- Over-furnishing small rooms
Choose lighter pieces and simpler layouts. - Mixed color temperatures
Match render lighting to the base photo. - Clutter left in the scene
Run item removal before staging. - Ambiguous room purpose
Choose different room types for the same space to find out what purpose it best serves. - Skewed lines or distortion
Correct verticals before upload. - Incorrect furniture scale
Compare pieces against doors or windows; choose smaller items or regenerate with corrected scale.
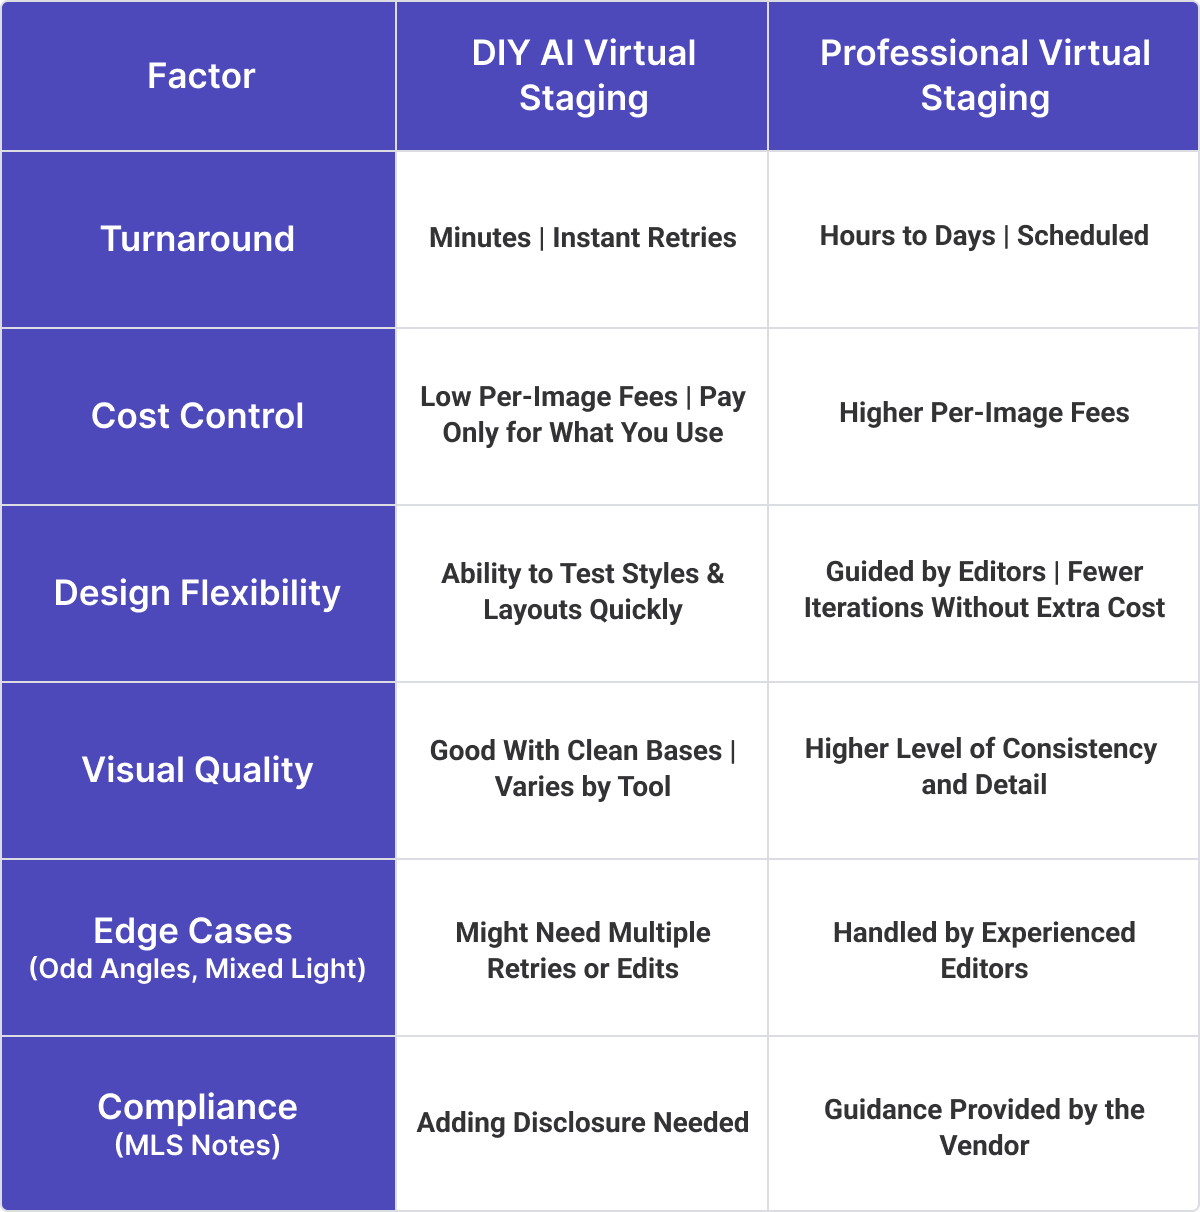
DIY vs. Professional Virtual Staging
Although DIY virtual staging with AI has benefits, some situations call for a professional stager. The table below helps you choose the right approach.
Conclusion
DIY virtual staging with AI gives agents and photographers full creative control at a fraction of the time and cost. Test different styles, enhance your photos, and go live faster. It is a fast, controllable way to get listing-ready images, especially for standard rooms with clean base photos.
However, for luxury or complex spaces, have a professional finalize your hero images and include a brief MLS note about virtual furnishings.