How Does Virtual Staging Work? In simple terms, it adds realistic furniture and decor to photos of empty rooms. Agents upload a photo, pick a style, and get a furnished image back in under a minute. No crew, no rented furniture, no multi-day wait. Difficulty: beginner. Time: about half an hour for a full listing.
What Is Virtual Staging?
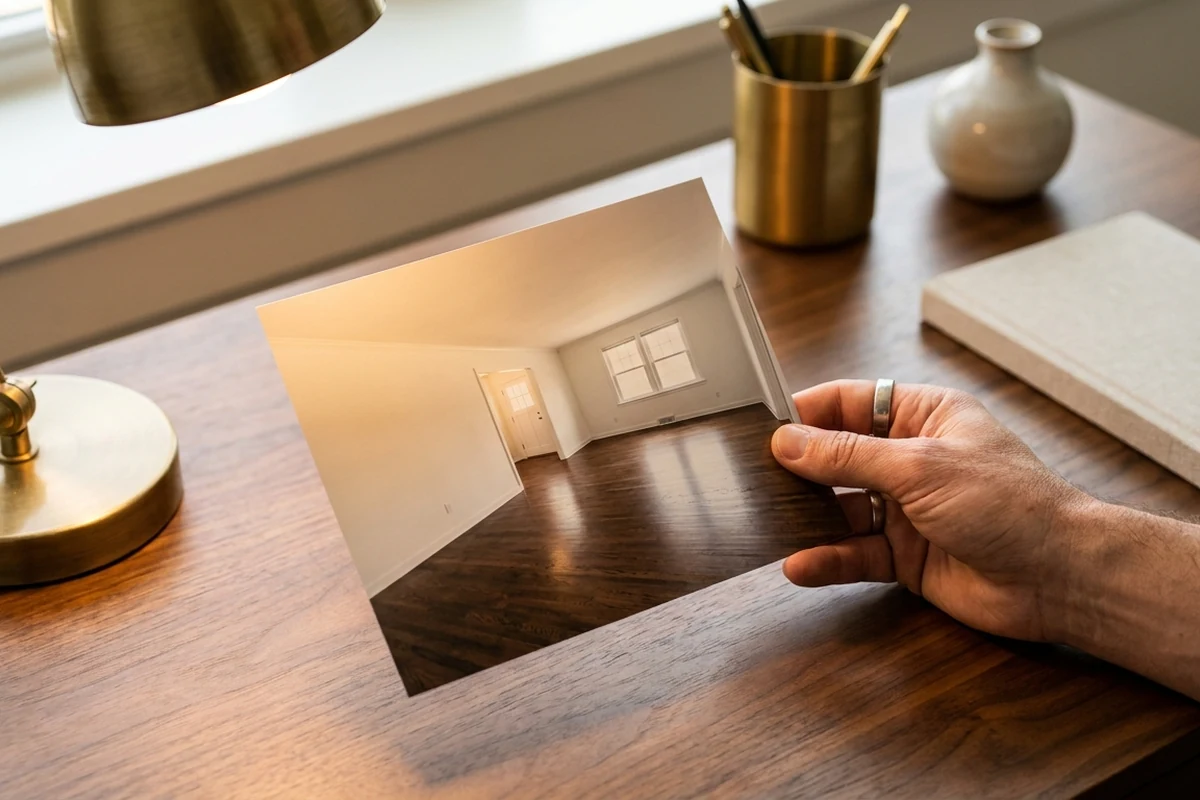
Empty rooms photograph badly. Bare walls and hollow floors make it hard for buyers to judge scale, picture daily life, or feel any pull toward a property. Virtual staging fixes this by placing furniture, rugs, lighting, and decor into listing photos digitally.
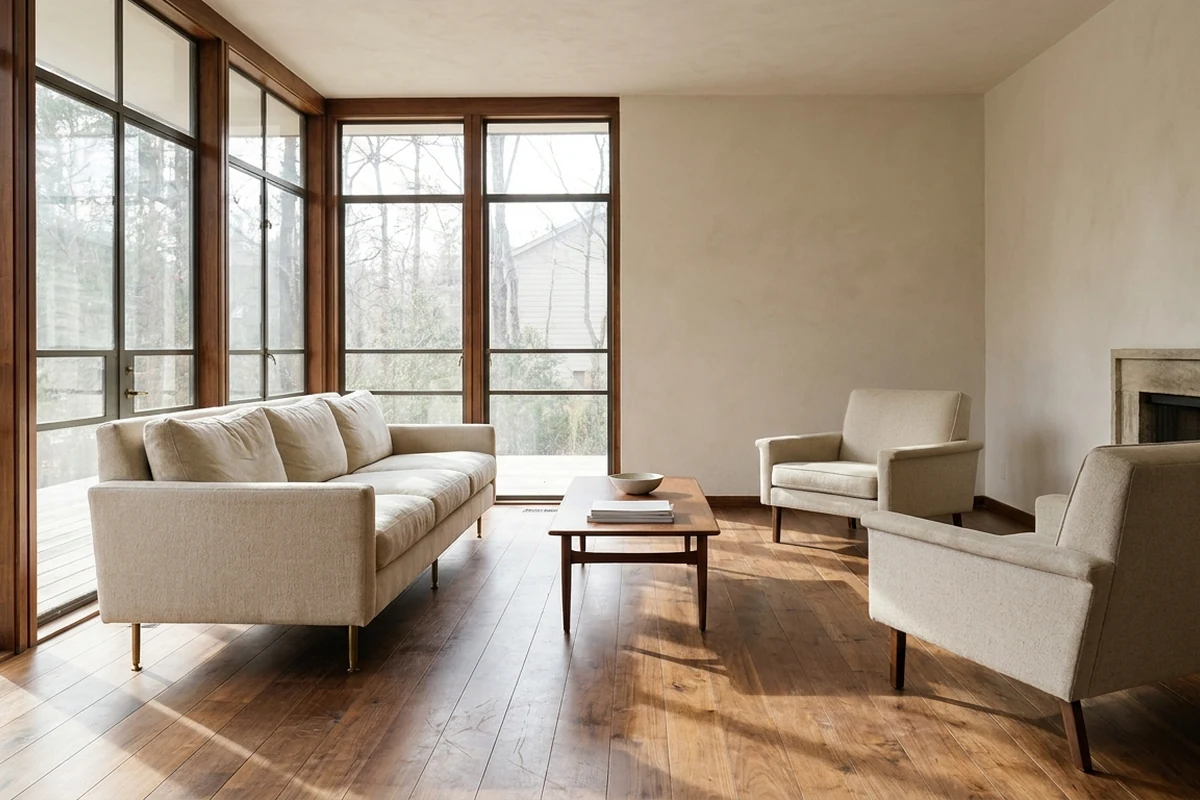
AI staging tools read a room’s geometry, architectural lines, lighting, and perspective. They then drop scaled furniture models into the photo so the result looks proportional and grounded. The output is a furnished image ready for MLS upload.

AI vs. Manual Methods
AI-automated staging delivers finished images in roughly a minute per photo. Manual staging, handled by professional 3D artists, takes a day or two per image. Both produce realistic results. The AI path suits agents juggling tight timelines and multiple listings.
Cost separates the two approaches even more sharply. Traditional physical staging runs thousands of dollars per property. Virtual staging costs a small fraction of that per image, making it accessible at nearly any price point. It changes how a space looks in photographs, not how it looks in person.
Active work on the AI side is minimal. Most agents finish a full set of rooms in under half an hour. No design background is needed. By the end of this guide, agents will have MLS-ready staged listing photos. AI in real estate has made this workflow genuinely beginner-friendly.
What Agents Need Before Starting: Prerequisites and Tools
Poor results almost always trace back to poor inputs. The most common failure in AI home staging is uploading a dark, cluttered, or low-resolution photo and expecting polished output. A blurry or underexposed image produces distorted, unconvincing results every time.
Photo Quality Standards
High-resolution, well-lit, wide-angle photographs are the mandatory starting point for virtual staging for real estate. A professional real estate photographer is the safest route. Most shoot with a wide-angle lens and use flash or natural light to capture clean, bright interiors. Agents handling real estate photo editing themselves should shoot in RAW format and correct exposure before uploading.
Room Preparation
Rooms should be empty or nearly empty before the shoot. Personal items, trash, and leftover furniture create problems. The AI stages around them awkwardly or produces unrealistic overlaps. A clean, bare room gives the algorithm the clearest canvas. Removing clutter before the shoot is faster than correcting it afterward.
Platform Access and Account Setup
Several virtual staging platforms serve this workflow: BoxBrownie, Roomstage AI, InstantDeco.ai, AI Stager, DeHome AI, Staged by AI, Xpress Rendering, and AI HomeDesign, among others. Most require a simple account registration. Pricing structures vary. Some platforms sell individual image credits; others offer monthly subscriptions. Reviewing the credit model before committing avoids surprise costs mid-project.
Style Knowledge and Skill Level
A basic sense of the target buyer’s design taste helps when picking a staging style. Most platforms offer eight or more options: Modern, Scandinavian, Coastal, Mid-Century, and others. No design or technical skills are needed beyond uploading a photo and clicking through the style menu.
Step 1: Capture the Right Listing Photos
Bad source photos are the single biggest reason staged outputs look fake. When room geometry is unclear or lighting is uneven, AI tools struggle to place furniture at the correct scale. The result looks pasted-in rather than real.
Shoot each empty room from a corner using a wide-angle lens. This gives the AI a full view of floor lines, wall angles, and ceiling height. Aim for sharp images with straight vertical lines and no harsh shadows. Daylight is the best light source. Supplement it by turning interior lights on to balance the exposure.
Common mistake: shooting in portrait mode on a phone. Portrait orientation crops the room and introduces lens distortion, which causes misaligned furniture in the staged output. Landscape mode with a dedicated camera or a wide-angle attachment produces far more usable results.
Order of operations matters too: enhancement, item removal, or AI virtual staging first? Photo enhancement and clutter removal should happen before any staging is applied. Sending a raw, unedited image to a staging tool produces weaker results than sending a clean, corrected one.
Step 2: Upload Photos to a Virtual Staging Platform
First-time users often hit a wall here, not because the platform is hard, but because they upload the wrong file. A compressed, watermarked, or low-resolution image almost guarantees a flat, unconvincing result. The AI engine needs clean data.
Create an account on the chosen platform, then upload room photos to the dashboard. The AI analyzes each image for geometry, perspective, and lighting before rendering begins. That analysis is what lets furniture land at the correct scale and cast realistic shadows.
File Format and Size Requirements
Most platforms accept JPEG and PNG files. Upload limits vary by platform, so agents should check documentation before batch-uploading a full listing. Uploading at the highest available resolution is always the safer choice.
Once uploaded, the photo appears in the dashboard and becomes ready for room type selection and style configuration. Platforms offering DIY virtual staging with AI are designed so no design experience is needed. The interface guides the agent through each decision in sequence.
Common mistake: uploading photos that carry a photographer’s watermark or have been compressed for email. The AI reads those artifacts as part of the room’s texture, which distorts the final render. Always upload the original, uncompressed file from the camera or photographer.
Step 3: Select Room Type, Design Style, and Furniture Preferences
A living room rendered in ultra-modern style can feel jarring inside a Victorian-era home. That mismatch is one of the most common configuration errors, and it happens at this exact step.
Most platforms prompt the agent to select a room type first: living room, bedroom, dining room, kitchen, and so on. That choice matters because the AI uses it to load appropriate furniture categories and scale. A bedroom preset loads bed frames, nightstands, and soft lighting. A dining room preset loads tables, chairs, and accent pieces sized to the space.
Matching Style to the Buyer
Style selection controls the aesthetic output. Platforms typically offer eight or more design styles: Modern, Scandinavian, Coastal, Industrial, Mid-Century, Bohemian, and others. The best virtual staging software for real estate gives agents a style library deep enough to match a range of buyer demographics and price points.
A coastal cottage near the water suits a relaxed, light-palette Coastal or Scandinavian look. A downtown loft conversion reads better in Industrial or Modern. Agents should consider the neighborhood’s dominant architecture and the likely buyer profile at that price point. Ornate crown molding paired with stark minimalist furniture, for example, tends to reduce buyer interest rather than build it. Once selections are confirmed, the platform begins rendering with furniture matched to the room’s dimensions and chosen style.
Step 4: Review, Refine, and Download the Staged Images
Publishing the first AI output without review is a common and costly mistake. Small artifacts, like a floating side table, a shadow pointing the wrong direction, or a sofa that looks pasted rather than placed, quietly undermine buyer trust. A quick, structured review takes only a few minutes.
What to Check Before Downloading
Start by examining furniture scale relative to the room’s actual dimensions. A bed that fills an entire wall or a rug that barely covers the floor signals a scale error. Next, trace the shadow direction across all objects. Shadows should originate from a single consistent light source. Scan for floating objects or clipping artifacts, where furniture edges bleed into walls or floors.
Revision Options When Something Looks Off
Most AI staging platforms offer several correction paths. Regenerating the image with a different design style often resolves lighting mismatches. Swapping individual furniture pieces can fix scale problems without restarting the whole composition. For complex rooms with unusual angles or multiple light sources, escalating to a manual 3D artist service produces more reliable results, though turnaround extends to a day or two.
Downloading for MLS Use
Once the image passes review, download it at the highest available resolution. MLS platforms require sharp, detailed photos to display correctly. A good final image shows furniture that appears grounded, shadows that match the light source, and a room that feels lived-in rather than assembled in software.
AI Virtual Staging vs. Manual Virtual Staging: Speed, Cost, and Quality
Choosing the wrong method for a listing’s timeline can stall a campaign before it starts. AI virtual staging delivers finished images in under a minute. Manual 3D rendering by professional artists takes a full day or two per image. Traditional physical staging stretches further still, requiring roughly a week and a half from consultation to setup. Each method serves a different need.
For standard vacant properties and budget-conscious sellers, AI tools make practical sense. Turnaround is near-instant, and per-image costs stay low. Manual staging costs more and takes longer, but it offers greater control for unusual layouts or luxury rooms where precision matters most. For a deeper breakdown, virtual staging cost and roi covers pricing tiers in detail.
Traditional physical staging remains reserved for high-end properties where the in-person experience is non-negotiable. The comparison is explored further in virtual staging vs traditional staging. Some estimates suggest strong returns given virtual staging’s low upfront cost relative to potential sale price lift, though that data is anecdotal and should be treated as directional, not definitive.
Disclosure Requirements: MLS Rules and FTC Guidelines
Skipping disclosure is the fastest way to turn a promising listing into a legal problem. Buyers who arrive at a showing expecting furnished rooms and find empty ones feel misled. That disappointment can escalate to formal complaints or investigations.
MLS rules require that every staged image carry a clear label, typically a “Virtually Staged” watermark, and that the listing description disclose the practice. The FTC’s truth-in-advertising mandate reinforces this. Staged images must not alter structural features or hide material flaws. Adding furniture to an empty room is acceptable. Erasing water stains, cracks, or foundation issues is not.
A reliable best practice: pair every staged photo with its original, unaltered vacant counterpart. This gives buyers an honest view of the space before they schedule a showing. It also demonstrates good faith if a disclosure dispute ever arises. For a thorough breakdown of what the rules permit and prohibit, agents should review virtual staging legality before publishing staged images to an MLS.
Is Virtual Staging Right for Every Listing?
Vacant properties, investment properties, new construction, and out-of-state seller situations tend to be the strongest fits. Empty room staging removes the biggest barrier buyers face: imagining life in a bare space.
Occupied homes with dated or cluttered furniture sit in moderate territory. Virtual decluttering and restaging can refresh the look, though the process requires careful real estate photo editing to blend new furnishings with existing architectural details.
Ultra-luxury properties are the weakest fit for virtual-only staging. At that price point, buyers often expect a curated in-person experience. Traditional physical staging, while far more expensive, may justify the cost when the tactile impression matters as much as the photography.
The practical outcome is concrete regardless of method: a set of MLS-ready images showing each room furnished, styled, and ready for buyer imagination, delivered in minutes rather than days. Lower cost, faster turnaround, and flexible design styles make virtual staging a practical default for most residential listings.
Final Verdict
For most listings, virtual staging is the practical default. The cost gap between AI tools and traditional physical staging is wide, and the turnaround gap is wider. Agents handling mid-market properties rarely need to justify that trade-off.
AI tools process images in under a minute and cost a small fraction of manual work. Manual 3D artists take longer but handle unusual rooms, complex lighting, or high-end finishes that automated tools sometimes miss. The property type and price point usually determine which path makes sense.
Traditional physical staging still has a place for luxury properties where in-person showings carry real weight. That segment is narrower than many assume.
Disclosure is non-negotiable. Every staged image needs a clear label, and the listing description should reflect that. Skipping this step creates legal exposure and erodes buyer trust at showings.
Agents trying AI virtual staging for the first time should start with a small batch of images on one listing. That test run reveals how well a platform handles the specific room types and lighting conditions common to their market. Several platforms operate in the instant-turnaround, per-image pricing category — including AI HomeDesign, BoxBrownie, and Roomstage AI — and any of them can serve as a starting point for that kind of low-commitment test.
For agents working the upper end of the market, the article luxury virtual staging: how to sell high-end property covers where virtual and physical methods overlap and where they diverge.
The most consistent mistake is treating staging as an afterthought. Starting with well-lit, wide-angle photography gives any staging method the best chance of producing images that hold up on MLS.
Frequently Asked Questions
Can virtual staging be used on photos of rooms that still have old or mismatched furniture?
Most professional virtual staging services offer a furniture removal step before adding new pieces. AI tools handle this with varying accuracy. Simple, uncluttered rooms produce cleaner results than heavily furnished ones. For rooms with bulky or oddly shaped furniture, manual staging by a 3D artist usually produces a more reliable outcome.
Will MLS platforms reject unlabeled virtually staged photos?
MLS platforms do not run automated detection for virtual staging. Rejection is not the primary risk. Compliance enforcement and buyer complaints are. Agents are responsible for labeling images before upload. Some MLSs conduct manual audits, and unlabeled staged photos can trigger compliance reviews after a listing goes live.
Does virtual staging work for exterior shots?
It can be applied to exteriors, though the use cases differ. Common exterior applications include adding landscaping, replacing a dull sky, or staging an outdoor patio with furniture. Not all platforms support exterior staging equally well. Checking a provider’s sample gallery for exterior examples before ordering is a practical step.
Can the same staged images be used for both Zillow listings and printed brochures?
Usage rights vary by platform and pricing tier. Many services grant a license for digital marketing use, but print rights sometimes require a separate license or a higher-tier plan. Reviewing the platform’s terms of service before sending images to a print vendor avoids licensing issues later.