Reducing noise in real estate photos starts before editing. Most grainy listing images come from high ISO, weak lighting, or underexposed shots that are pushed too far in post-production. A tripod, low ISO, proper exposure, and RAW capture can prevent many of these issues at the camera stage.
Grainy images can make a listing feel less polished, especially when buyers are scrolling quickly through MLS pages, property websites, or social media previews. Clean, sharp photos help rooms look brighter, details look clearer, and the overall presentation feel more professional.
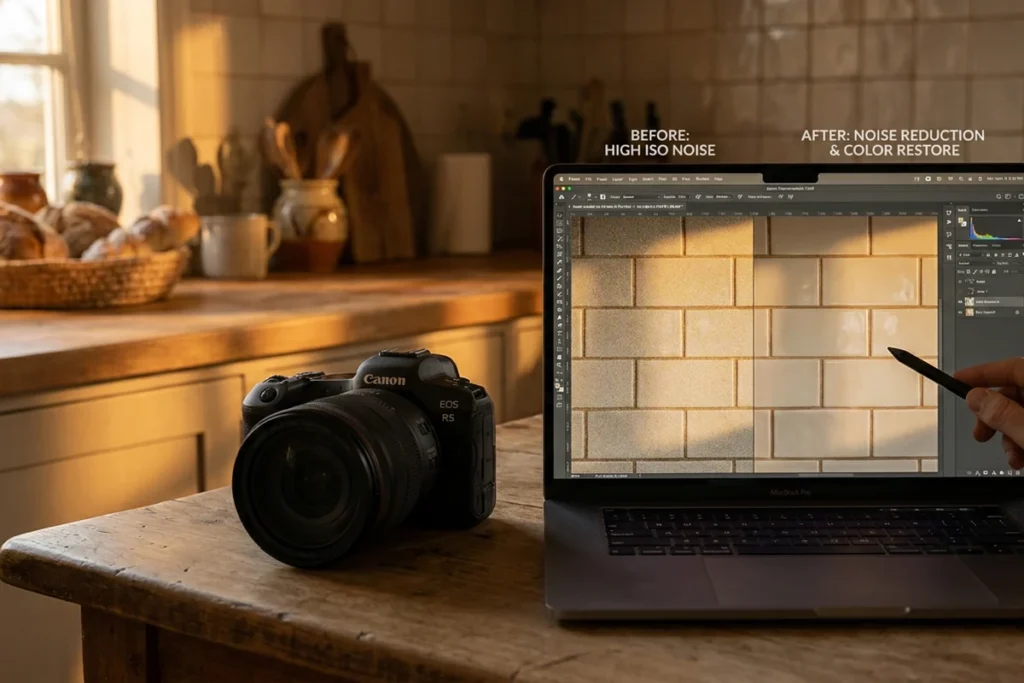
This guide explains how to prevent grain during the shoot, how to reduce noise in real estate photos during editing, and when to use tools such as Lightroom AI Denoise or dedicated noise-reduction software for difficult images.
What You Need Before Reducing Noise in Real Estate Photos

Noise reduction works best when the original photo still has enough detail to recover. A badly underexposed JPEG shot handheld at a high ISO gives editing software very little room to work. Before opening Lightroom or another editing tool, make sure the photo was captured in a way that supports clean post-processing. For broader camera, lighting, and composition basics, start with these real estate photography tips.
Camera and Capture Setup
A DSLR or mirrorless camera is ideal for real estate photography, especially when paired with a tripod. A tripod lets you use a lower ISO and slower shutter speed without introducing camera shake. That matters because high ISO is one of the most common causes of visible grain in interior listing photos.
A full-frame camera can help in low-light situations because larger sensors usually handle noise better. But it is not the only workable option. Crop-sensor cameras can still produce clean real estate photos when exposure, lighting, and camera stability are handled well.
File Format: Use RAW Whenever Possible
RAW files retain more image data than JPEGs, which gives noise reduction tools more information to work with. This is especially useful for darker rooms, window-facing interiors, or images that need exposure adjustments during editing.
JPEG files can still be improved, but they offer less flexibility. Since compression has already removed some image data, heavy noise reduction may soften details or create an unnatural look. For the cleanest results, shoot RAW whenever the camera and workflow allow it.
Editing Software Options
Adobe Lightroom Classic and Lightroom include AI Denoise and manual noise reduction controls in the Detail panel. Dedicated tools such as Topaz Photo AI and DxO PhotoLab can also help with difficult low-light images, especially when preserving detail is important.
For most real estate photo workflows, Lightroom is enough. Dedicated denoise tools are more useful when you regularly edit darker interiors, large photo batches, or images that need stronger recovery.
Skill Level and Workflow Time
AI noise reduction tools are beginner-friendly and can process an image quickly. Manual adjustments take more time because they require balancing luminance noise, color noise, sharpening, and detail preservation.
For a typical listing workflow, the best approach is simple: prevent as much noise as possible during the shoot, then use light editing to clean up what remains. Heavy denoising should be a backup step, not the foundation of the whole image workflow.
What Causes Grain and Noise in Real Estate Photos?
A listing photo can look sharp on the camera screen but appear rough, speckled, or muddy once it is opened on a larger display. In most cases, grain comes from low light, high ISO, underexposure, or too much correction during editing.
High ISO in Low-Light Interiors
High ISO is one of the most common causes of grainy real estate photos. When a room is dark, the camera raises ISO to make the image brighter. That helps the camera capture the scene, but it also amplifies noise.
This usually appears in two ways:
- Luminance noise: a rough, grainy texture across walls, ceilings, floors, and shadows.
- Color noise: random red, green, blue, or purple speckles in darker areas.
Interior rooms are especially vulnerable because they often have uneven light. A bright window, a dark corner, and mixed artificial lighting can all appear in the same frame.
Underexposure and Heavy Shadow Recovery
Noise often becomes worse when a dark image is brightened too much in editing. The camera may capture hidden noise in the shadow areas, but it becomes more visible once exposure, shadows, or blacks are pushed too far.
This is why fixing a dark photo later is not the same as capturing it correctly in the first place. A slightly longer exposure on a tripod usually gives better results than trying to rescue a severely underexposed image in post-production.
Sensor Size and Camera Limits
Full-frame cameras usually handle low light better because they can collect more light than smaller sensors. That can help reduce visible noise in difficult interiors.
But sensor size is not the only factor. A crop-sensor camera can still produce clean listing photos when the image is exposed well, shot at a low ISO, and stabilized with a tripod.
JPEG Compression and Limited Editing Flexibility
JPEG files are harder to clean because some image data is already compressed or discarded at capture. Noise, sharpening, and compression artifacts can become baked into the file, especially in darker areas.
RAW files give editing tools more data to work with. They are not magic, but they make noise reduction cleaner and less destructive.
High-Risk Real Estate Photo Scenarios
Noise is most likely to appear in:
- dark interior rooms
- window-facing shots
- evening or low-light exteriors
- rooms with mixed lighting
- handheld photos
- images brightened heavily in editing
These are the photos that need the most care at capture. Once the file is too dark, too compressed, or too heavily corrected, even strong denoise tools can only do so much.
How to Reduce Noise in Real Estate Photos: Step-by-Step Workflow
Once you understand where noise comes from, the workflow becomes easier. Start by preventing as much grain as possible during capture, then use editing tools only to clean up what remains. The steps below move from camera setup to manual editing, AI denoise, and batch processing.
Step 1: Shoot in RAW and Keep ISO as Low as Possible
Noise problems often start before editing begins. File format and ISO both affect how much clean image data you have to work with later. For real estate photos, the goal is simple: capture the brightest clean file you can without pushing the ISO too high.
Switch to RAW Format
RAW files keep more image data than JPEGs. That gives Lightroom or other editing software more room to reduce noise, recover shadows, and adjust exposure without damaging the image too quickly.
JPEG files are more limited. Compression removes some image data, and noise or sharpening artifacts can become harder to fix later. A JPEG can still be improved, but a RAW file gives you a cleaner starting point.
Shooting RAW+JPEG is useful if you need quick previews or client reference files. For noise reduction, though, the RAW file is the one that matters most.
Use the Lowest Practical ISO
Keep ISO low whenever the room has enough light. For many real estate interiors, ISO 100–400 is a strong starting range when the camera is on a tripod. Darker spaces may need a higher ISO, but it is better to slow the shutter speed on a tripod before raising ISO unnecessarily.
Higher ISO makes the camera more sensitive to light, but it also increases visible grain. This can show up on plain walls, ceilings, floors, cabinets, and shadow areas. Once noise becomes heavy, editing tools may reduce the grain but soften important details such as wood texture, tile lines, fabric, or architectural edges.
Full-frame cameras can help in low light because they usually produce cleaner files at higher ISO settings. But camera settings still matter more than camera type. A well-exposed RAW image from a crop-sensor camera will often edit better than an underexposed full-frame image pushed too far in post-production.
Step 2: Use a Tripod and Expose the Photo Correctly
Grainy real estate photos often start with camera shake and low light. When the camera is handheld in a dark room, it may need a faster shutter speed to avoid blur. That often pushes the ISO higher, which adds visible noise.
A tripod solves much of this problem. It lets you use a slower shutter speed while keeping the ISO low. The result is a cleaner file with more usable detail in walls, floors, cabinets, and shadow areas.
After setting up the tripod, use a self-timer or remote shutter release. Even pressing the shutter button by hand can create small movement at slower shutter speeds. A short delay helps keep the photo sharp.
Expose Brightly Without Blowing Out Highlights
Once the camera is stable, focus on exposure. The goal is to capture a bright RAW file without losing important highlight detail, especially around windows, lamps, and white surfaces.
Photographers often call this Expose to the Right. It means checking the histogram and placing the exposure slightly toward the brighter side, without letting the graph hit the far-right edge. A brighter file usually gives you cleaner shadow detail than a dark file that has to be heavily brightened later.
For many interior real estate shots, an aperture around f/8 to f/11 keeps the room sharp from front to back. With the camera on a tripod, you can use that aperture and a low ISO without worrying as much about shutter speed.
Avoid underexposing the photo with the plan to fix it later. Raising shadows too much in Lightroom can make noise more visible, especially in dark corners, ceilings, and window-facing rooms. A clean exposure at capture will always edit better than a noisy file rescued in software.
Step 3: Reduce Noise Manually in Adobe Lightroom
Noise often looks minor in a thumbnail but becomes more visible at full size. In real estate photos, this usually shows up on flat walls, dark cabinets, ceilings, floors, and shadowed corners. Lightroom’s Detail panel is where you can reduce that grain while keeping the property’s real textures intact.
Open the RAW file in Lightroom’s Develop module and go to the Detail panel. Zoom in to 100% before making adjustments. If you edit while zoomed out, it is easy to miss softened edges, blurred texture, or over-smoothed surfaces.
Adjust the Luminance Slider First
Start with the Luminance slider. Increase it slowly until the rough grain becomes less visible. Watch areas such as wood floors, tile grout, cabinet edges, countertops, and fabric textures while you adjust.
Use the Detail slider below it to preserve some of the fine texture that luminance smoothing can remove. The Contrast slider can help bring back surface definition if the image starts to look too flat.
The goal is not to remove every trace of texture. The goal is to make the photo look cleaner without making the room look artificial.
Fix Color Noise Separately
Color noise appears as small red, green, blue, or purple speckles, usually in shadows or neutral surfaces. Use the Color slider in the Detail panel to reduce these spots.
A moderate setting is usually enough for most real estate photos. Keep an eye on edges where different materials meet, such as cabinets against walls, flooring against baseboards, or furniture against fabric. Too much color noise reduction can blur subtle transitions.
Avoid Over-Smoothing Real Materials
Pushing noise reduction too far can remove the details that make a room feel real. Wood grain can fade. Tile lines can soften. Fabric can lose its natural texture. Walls and cabinets may start to look flat or overly polished.
Always compare the before and after view at 100% zoom before exporting. Stop reducing noise when the image looks cleaner but still keeps its natural material detail.
Step 4: Use AI Denoise for Difficult Low-Light Photos
Manual noise reduction works well for mild grain, but it has limits. Push the Luminance slider too far, and real materials can start to look soft. Wood floors may lose texture. Stone countertops can look flat. Fabric and wall detail may become too smooth.
For heavier noise, AI denoise tools can give cleaner results because they analyze the image before applying correction. They are especially useful for darker interiors, high-ISO shots, and photos where manual sliders would remove too much detail.
Use Lightroom AI Denoise
In Lightroom, open the Detail panel and look for the Denoise option. Lightroom’s AI Denoise works best with RAW files and creates a new DNG version after processing.
Use it when the photo has visible grain but still contains enough real detail to preserve. It can help clean up shadows, walls, ceilings, cabinets, and darker corners without relying only on manual smoothing.
After the DNG is created, review the image at 100% zoom. Check areas with fine detail, such as flooring, countertops, cabinet edges, rugs, and fabric. If the photo starts to look too polished or artificial, reduce the denoise strength or return to a lighter manual adjustment.
Consider Dedicated Noise Reduction Tools
Dedicated tools such as Topaz Photo AI or DxO PhotoLab can also help with difficult files. These tools are useful when you regularly edit darker interiors, high-ISO images, or large listing photo batches.
Topaz Photo AI is often used for noise reduction and detail recovery. DxO PhotoLab is also known for strong RAW processing and denoise features, especially with high-ISO images. Both can be helpful, but they add cost and may require an extra step outside the main Lightroom workflow.
For many real estate teams, Lightroom is enough. Dedicated tools make more sense when noise reduction is a frequent problem, not an occasional fix.
Start From the Original RAW File When Possible
AI denoise tools usually perform better on original RAW files than on edited JPEGs. JPEG compression can make noise, sharpening artifacts, and blocky texture harder to separate. That can lead to over-smoothed surfaces or unnatural edges.
If you only have a JPEG, use a lighter correction and check the result carefully. The goal is still the same: reduce visible grain without erasing the real texture of the property.
Step 5: Use Batch Enhancement for Larger Listing Photo Sets
Editing one or two photos manually is manageable. Editing a full listing set is different. A typical property gallery may include dozens of images, and small differences in exposure, white balance, sharpness, and noise can become noticeable across the final set.
For agents, photographers, or marketing teams handling several listings, batch enhancement can make the workflow faster and more consistent. An AI real estate photo enhancement platform can clean up noise, balance exposure, correct color, and sharpen the full photo set.
This is especially useful when the goal is not heavy retouching, but cleaner and more consistent listing images.
Keep the Results Realistic
Batch editing should not make the property look artificial. Real estate photos still need to represent the home accurately, especially when they are used on MLS platforms, brokerage websites, or paid listing campaigns.
Watch for signs of over-processing, including:
- overly smooth walls or floors
- glowing windows
- unnatural sky edges
- halos around window frames or light fixtures
- colors that look too saturated
- textures that no longer look real
Older automated HDR workflows sometimes created this kind of effect, especially around windows and bright exterior views. Modern real estate enhancement tools can reduce some of those issues, but the final image still needs human review.
When Batch Processing Makes Sense
Batch enhancement works best when you need a cleaner, more consistent gallery without spending too much time on each image. It is useful for high-volume listing workflows, tight turnaround schedules, and teams that do not have a dedicated photo editor for every property.
Platforms such as AI HomeDesign can support this kind of workflow by improving listing photos at scale, including noise cleanup, lighting correction, and overall image enhancement. Still, every processed photo should be checked before publishing. Make sure rooms look natural, materials keep their real texture, and the final set feels consistent from image to image.
Ethical Boundaries: Noise Correction vs. Misrepresentation
Noise reduction should make a photo cleaner, not change what the property looks like. The goal is to correct technical issues from low light, high ISO, or underexposure while keeping the room accurate.
The line gets risky when editing starts hiding real defects. Over-smoothing can make wood grain disappear, soften wall texture, blur fabric, or make floors and cabinets look less worn than they are. At that point, the edit is no longer just improving image quality. It may create a misleading impression of the property’s condition.
Use a Simple Accuracy Test
Before exporting, ask one question: Would the buyer feel surprised by the room in person after seeing the photo online?
Acceptable noise correction includes reducing grain, removing color speckles, and cleaning up shadow noise that came from the camera. Risky editing includes smoothing over stains, cracks, scratches, wall damage, worn flooring, or other visible issues under the cover of noise reduction.
The final photo should look like a skilled photographer captured the property under better conditions. Clean, accurate, and realistic — not artificially perfect.
DIY Editing vs. Outsourcing: Choose the Right Noise Reduction Workflow
The right workflow depends on how many listing photos you edit, how fast you need them delivered, and how much control each image requires. A single property shoot may be manageable in Lightroom. A full weekly pipeline may need AI-assisted or outsourced editing.
Manual Editing in Lightroom
Manual Lightroom editing gives you the most control. You can adjust noise reduction, exposure, texture, sharpening, and color image by image.
This works well for photographers or agents editing a small number of listings. It is also useful for high-value properties where every room needs careful review. The tradeoff is time. Once the photo volume grows, manual editing can slow down delivery and make the final gallery less consistent.
AI-Assisted Editing Tools
AI-assisted tools are a good middle ground. Lightroom AI Denoise, Topaz Photo AI, and DxO PhotoLab can reduce noise faster than manual sliders while preserving more detail than heavy smoothing.
This workflow suits Teams that prefer to outsource can compare real estate photo editing companies based on turnaround time, pricing, consistency, and the types of edits they support.
Outsourced or Batch AI Enhancement
For high-volume listing workflows, batch enhancement may be more practical. AI-based real estate photo platforms can reduce noise, balance exposure, correct color, and sharpen a full photo set with less manual work.
This is useful for brokerages, photographers, property managers, or marketing teams working with multiple listings each month. The main benefit is consistency. The main risk is over-processing, so every final image still needs review before publishing.
Match the Workflow to the Listing Volume
Use manual editing when quality control matters more than speed. Use AI-assisted tools when you need faster edits but still want hands-on control. Use batch enhancement or outsourcing when volume, turnaround time, and consistency are the main priorities.
The best workflow is not the most advanced one. It is the one that keeps listing photos clean, accurate, and ready for review without slowing down the whole marketing process.
Final Thought
Noise reduction works best when it starts at capture. A low ISO, stable tripod, proper exposure, and RAW file give editing tools a cleaner image to work with. Lightroom AI Denoise, manual Detail panel adjustments, and dedicated tools such as Topaz Photo AI or DxO PhotoLab can improve what remains, but they cannot fully rescue a poorly captured file.
The same rule applies to batch enhancement platforms. They can speed up denoising, exposure correction, and color balancing across a full listing set, but every final image still needs review. Clean photos should look natural, not overly polished.
The goal is not to erase every trace of texture. Wood grain, tile lines, fabric, wall surfaces, and flooring details should still look real. Strong noise reduction becomes a problem when it hides property condition or makes the room look artificial.
For real estate listing photos, the best result is simple: a clean, accurate image that looks like the property on its best day, not a different property altogether.
FAQs
Can noise be reduced in a JPEG real estate photo, or does it only work on RAW files?
Noise can be reduced in JPEG real estate photos, but the results are more limited. JPEG compression removes image data and can make grain, sharpening marks, and compression artifacts harder to fix.
Use a light correction and review the result at full size. Too much noise reduction on a JPEG can make walls, floors, and cabinets look soft or smeared.
A camera only goes down to ISO 200. Can it still produce clean MLS photos?
Yes. ISO 200 can still produce clean real estate photos, especially in well-lit rooms and exterior shots.
Exposure matters more than the number alone. A properly exposed photo at ISO 200 will usually look cleaner than an underexposed photo at ISO 100 that has to be brightened heavily in editing.
Does flambient photography remove the need for noise reduction?
Not completely. Flambient photography can reduce noise because flash adds controlled light and helps keep ISO lower.
Some noise reduction may still be needed, especially in the ambient layer or shadow areas. But the correction is usually lighter than it would be with a dark, high-ISO ambient-only photo.
A listing photo was already exported as JPEG and the client needs it today. What is the fastest option?
Use manual noise reduction controls in Lightroom, Photoshop, or another editor that supports JPEG files. Keep the correction light and focus on the most visible grain.
Avoid heavy smoothing. On an already-compressed JPEG, aggressive denoising can make textures look plastic and less accurate than the original photo.
How should noise be handled around bright windows and dark interiors?
Extreme window contrast is better handled during capture, not only with noise reduction. Use bracketing, HDR blending, or a separate window exposure when needed.
For rooms with bright windows and dark interiors, HDR real estate photography or exposure bracketing is usually more effective than trying to fix heavy shadow noise later.