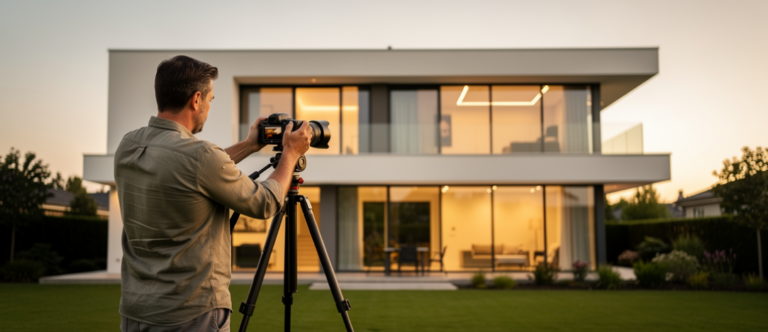
Real estate photo editing techniques are among the most crucial skills in real estate marketing. Whether you’re retouching images or making general edits, the effective use of photos in property listings can profoundly influence a buyer’s subconscious.
By utilizing photos to sway your audience’s perception, you can achieve several key outcomes:
- Increased buyer engagement, encouraging them to take the listings seriously;
- A clearer understanding of both the interior and exterior of the property that allows them to appreciate its features more effectively; and,
- An unforgettable first impression that captures attention; buyers are influenced by their initial perception, even when viewing the property online.
For this reason, we want to explore essential real estate photo editing techniques that are crucial for all real estate agents.
The Difference Between Retouching and Editing
Well, you don’t really need to differentiate between retouching and editing in practice. What’s truly important is the ability to edit photos in a way that captivates the audience. However, this article might also serve as an introduction for some readers who want to embark on their professional photography journey.
When we talk about structural changes, we refer to enhancing the overall quality of the original images through general edits. If our adjustments focus solely on altering individual elements, this is known as retouching.
Retouching involves removing imperfections, adding or modifying aspects, and applying creative effects. On the other hand, image editing includes exposure correction, color adjustment, cropping, smoothing, lens correction, and HDR compositing.
Retouching Techniques for Stunning Real Estate Photos
Even the most stunning shots can benefit from retouching techniques that enhance their appeal. So, let’s explore three essential retouching techniques that are endlessly important in property photo editing:
- Spot removal;
- noise reduction; and,
- imperfection fixing.
In what follows, you’ll discover how these methods can transform your images and ensure they look polished and professional.
Spot removal magic
Spot removal is among the crucial real estate photo editing techniques. Imagine capturing a beautiful living room, only to find a stray item, like a shoe or a child’s toy, on the floor. Spot removal helps you clean up the image by eliminating these distracting elements, making the space look more organized and inviting.
This is especially important when presenting homes for sale, as potential buyers prefer images that showcase the home’s features without distractions.
To perform spot removal, use tools like the Healing Brush or Clone Stamp in your photo editing software. These tools help you eliminate blemishes or distractions in your images. Spot removal can address anything from dust spots on a lens to unwanted objects in the background.
effective spot removal for the win!
- If you’re using manual editing tools like Adobe Photoshop, select the Healing Brush Tool from the left toolbar—it looks like a band-aid—or simply press the shortcut key J. Adjust the brush size using the bracket keys to suit the area you’re working on.
- Then, hold Alt (or Option on Mac) and click on a clean spot nearby to set your sample source.
- Now, click or paint over the unwanted spot, and watch as the tool blends it seamlessly with the surrounding area. Repeat this process for any other spots you want to remove.
- For better accuracy, zoom in on the image. If the Healing Brush isn’t giving the results you want, try using the Spot Healing Brush Tool for faster fixes!
If you’ve never done spot removal in Photoshop, you may face several challenges during the retouching process. Given the significance of these issues, we’ve explored them in a separate article titled “What is Item Removal in Real Estate?“
mastering object removal with AI tools
If you have never worked with Photoshop, it can be challenging at first. In case your initial attempts at removing distractions don’t go well, there’s no need to be discouraged. This photo editing technique takes practice, and you will improve with each try. If you lack the time to enhance your Photoshop skills, try our AI Item Removal tool.
With AI HomeDesign’s Item Removal, you can seamlessly remove unwanted objects and distractions from your photos. Our advanced technology quickly and automatically identifies and eliminates clutter, leaving your images clean, focused, and visually striking.
Reducing noise in your photos
Reducing noise is an important skill to learn in real estate photo editing. If you’ve taken photos of a cozy living space in the evening, you might notice graininess due to low light.
Reducing noise helps create a cleaner, more polished look. Well-lit, sharp images convey warmth and comfort, which are essential in real estate. This creates a positive atmosphere for potential buyers.
steps to reduce noise and enhance clarity
- First, open your image in Adobe Photoshop and make a copy of the layer to keep the original safe. To reduce noise, go to the top menu, click on Filter, then select Noise and Reduce Noise.
- A new window will pop up with sliders to adjust. Start by setting the Strength slider to about 50 to help remove noise. Next, adjust the Preserve Details slider to around 50-70 to keep important details sharp.
- If you notice colorful spots, like green or red dots, use the Reduce Color Noise slider to eliminate them. If your picture is a JPEG, check the Remove JPEG Artifacts box for a cleaner look.
- As you make changes, be sure to check the Preview box to see how your picture looks and changes in real time. After reducing noise, you may want to sharpen the image by going to Filter, then Sharpen, and selecting Unsharp Mask.
For even more help with noise reduction, consider using special programs like Adobe Lightroom. By applying these real estate photo editing techniques, you can make your pictures look clearer and more beautiful, especially for real estate photography!
Polishing photos to perfection
Imagine you’re showcasing a kitchen with beautiful countertops, but there are visible scratches or stains. Such imperfections can ruin a perfectly good photo, and fixing them will enhance the listing quality and buyer experience.
By smoothing out these flaws, you make this given kitchen–or any other space for that matter–look fresh and well-maintained. This attention to detail makes the space more attractive to clients who have an eye for noticing faults and value high-quality finishes.
getting rid of image imperfections
As mentioned above, fixing imperfections in photos is a vital element among real estate photo editing techniques.
Start by opening your photo in Photoshop and create a copy of the layer to protect the original.
- Select the Healing Brush Tool (the band-aid icon) or press J on your keyboard. Adjust the brush size using the square brackets ** and **. Hold the Alt key (or Option on a Mac) and click a clean area of the photo to sample it.
- Then, gently paint over the imperfections to blend them in. For larger flaws, use the Patch Tool. Draw around the mistake and drag it to a better area.
- Zoom in for details by pressing Ctrl + + (or Cmd + + on a Mac). Zoom out to check your overall edits. Once satisfied, save your work by going to File > Save As.
Remember to always work on a copied layer to protect the original. If needed, try the Clone Stamp Tool for more complex fixes.
effortless enhancement with artificial intelligence
As mentioned, in today’s competitive market, improving your real estate photos is essential. If you’d rather not work with Photoshop, we have a simpler solution at hand. At AI HomeDesign, we’ve developed a tool specifically designed to enhance property photo quality.
All you need to do is upload a photo to AI HomeDesign’s Image Enhancement service and wait to see the AI magic happen right in front of your eyes in less than 30 seconds! Our advanced AI algorithms adjust lighting, refine details, and boost clarity. Rest assured that your photos will stand out with stunning vibrancy and precision.
High Time for Next-Level Enhancement!
With the techniques mentioned above, you can retouch your images for a polished result. However, that’s not the end! After standardizing the image through retouching, it’s time to improve the quality further with other photo editing factors, which are rather vast and ever-growing.
Every time a creative editor sits at their desk, they can discover new methods. However, as real estate consultants, your goal isn’t to compete with professional editors. The focus should be on making your listings look professional and boost sales. Let’s take a look at the techniques that can help you achieve these goals!
Understanding the power of light
Lighting as one of these real estate photo editing techniques has a great impact on photo quality. By using light optimally, you can highlight what matters most in your images.
Adjusting lighting helps convey the true spirit of the space and guides the audience’s perception. Without proper lighting, the balance between shadows and colors is lost. In such cases, the best impression you can leave on your audience is often minimal.
adjusting the exposure
Adjusting exposure in Photoshop is about finding the right balance of light in your photos.
- To start, open your image and go to Image > Adjustments > Exposure. Use the “Exposure” slider to brighten or darken the entire image.
- Gently adjust the “Offset” to enhance the shadows and mid-tones.
- Finally, tweak “Gamma Correction” to control the overall brightness. This technique keeps important details visible in both highlights and shadows, making your property photos look inviting.
highlights adjustment
Highlight adjustment is crucial for recovering details in bright areas of your photo.
- Begin by selecting Image > Adjustments > Shadows/Highlights. Increase the “Highlight” slider to reduce overly bright areas, like windows or light fixtures. This change allows you to reveal important details often lost in overexposed spots.
- Adjust the “Shadows” slider to maintain balance in your photo. By doing this, you create a more natural look that highlights the beauty of your property.
shadow adjustment
Shadow adjustment helps reveal hidden details in darker areas of your image. This technique ensures your photo captures all aspects of your property beautifully.
- Stay in the Shadows/Highlights settings to make these changes. Move the “Shadows” slider to brighten dark parts of your photo, uncovering details that were hard to see.
- You can also enhance contrast by using Levels or Curves under Image > Adjustments.
Perfecting the perspective
Perspective issues and distortions are quite commonplace in property images. Even with all the real estate photo editing techniques, your work feels incomplete if it suffers from improper perspective.
As a rule of thumb, images of real estate should feature straight and parallel vertical lines. This alignment gives viewers a better feel for the space.
You can adjust perspective using lens correction and the Straightening filter for crooked lines. Using these lens correction tools is quite simple, and you can check out Adobe’s guide for assistance.
Color adjustment
Colors are key factors that affect the emotions conveyed by an image. You can modify them using the same real estate photo editing techniques mentioned in this blog.
To achieve a good color contrast, check the white balance and temperature settings to create natural colors. Correcting the white balance ensures that white appears neutral in your photos. This adjustment also helps accurately represent other colors in the image.
Ready to Elevate Listings!
In the competitive world of real estate, stunning visuals can truly set you apart. By mastering these real estate photo editing techniques, you can transform ordinary photos into captivating images that highlight a property’s potential.
Each step—from retouching to light adjustment to color correction—plays a crucial role in attracting buyers and leaving a lasting impression. Embrace these techniques and watch your real estate photos reach new heights.